Decadent Fudgy Brownie Pie
I love a dessert that feels like a special occasion but doesn’t require a whole day in the kitchen. This brownie pie is that treat. You get the flaky, buttery crunch of a traditional pie crust paired with a center so fudgy it’s almost like a truffle.
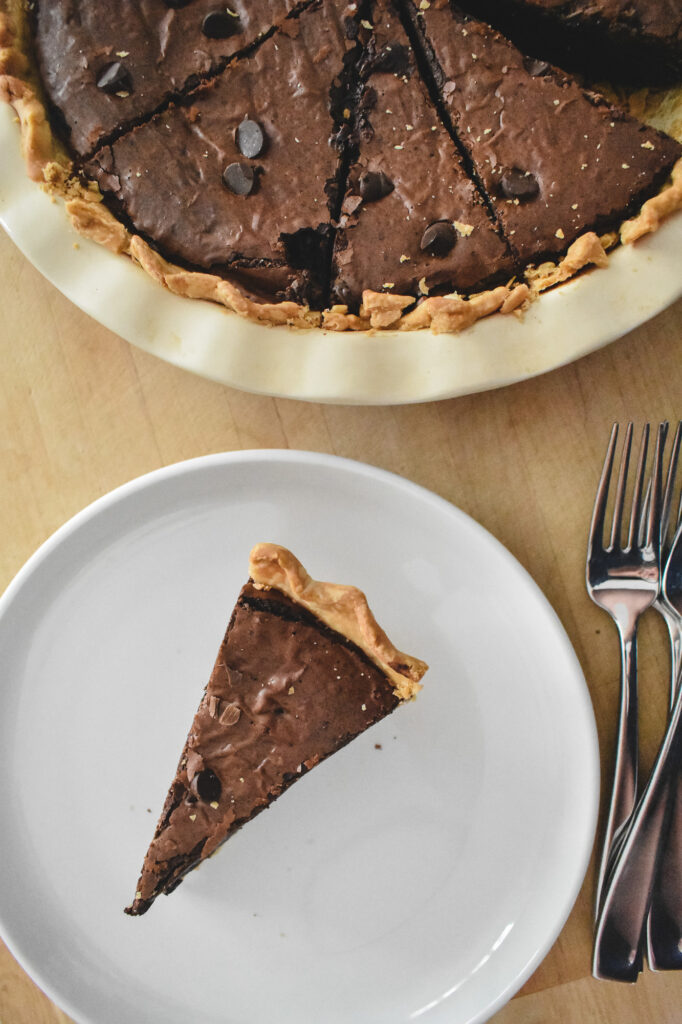
The key to that elusive, crackly top and the dense middle isn’t a box mix. It’s a specific mixing technique that I spend some time getting just right. By using a deep dish approach, we ensure every slice is substantial and satisfying. It is nostalgic, reliable, and exactly what you want to bring to a potluck or serve after a Sunday dinner.
A Few Notes on the Ingredients
The Cocoa I Use
I almost always reach for Dutch process cocoa powder for this pie. It is treated to neutralize its acidity, which gives the filling a much darker look and a smoother chocolate flavor. Since this recipe doesn’t use a leavening agent like baking soda, we don’t need the acid in regular cocoa to make it rise. The Dutch process simply gives the recipe that deep chocolate profile that I love.
Cocoa Choice
If you don’t have Dutch process cocoa, you can use regular unsweetened cocoa powder instead. The color will be a little lighter and the flavor might have a tiny bit more tang, but it will still be delicious.
The Chocolate Duo
I use a mix of a chopped chocolate bar and standard semi-sweet chips. I like to use a bittersweet bar with around 60% cocoa because it melts down so nicely into the butter to create that fudgy base. The chips get folded in at the very end so you still have those little pockets of texture once the pie is baked.
The Pie Crust
I usually grab a refrigerated pie crust from the store to keep things simple, but a homemade one works just as well. The main thing I’ve learned is that you really can’t skip the blind bake. Getting the crust crisp before the filling goes in is important, especially with a filling this dense.
First Things First
Getting the Crust Ready
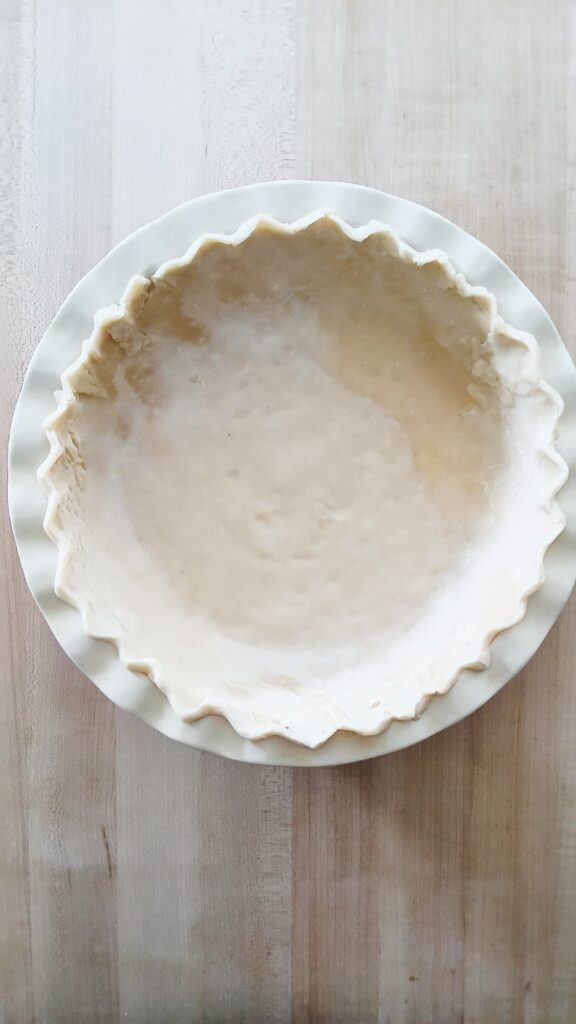
I like to start by getting the pie shell into the pan. I center the dough over my 9-inch pie plate and gently press it into the bottom and up the sides, making sure I don’t leave any air pockets trapped underneath. For the edges, I just use my thumb and forefinger to give it a simple crimp. It looks pretty and it’s the best way I’ve found to keep the crust from slipping down the sides.
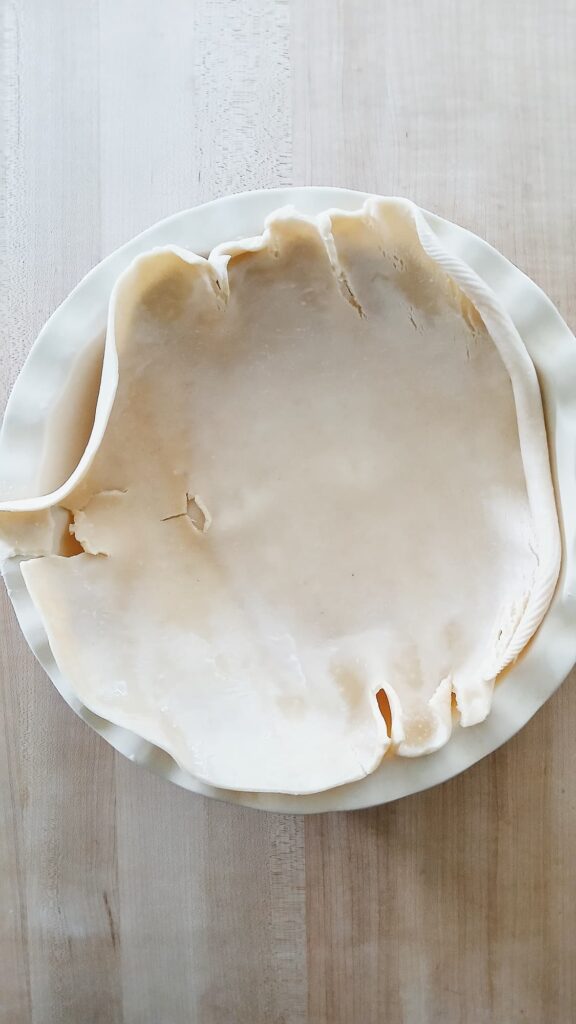
I make sure to follow the instructions on whatever dough I’m using, but the big thing is making sure the dough isn’t too cold when I start unrolling it. If it’s cold and straight from the fridge, I always end up with holes or cracks. I just pinch the dough back together the best I can and keep moving.
Docking and Blind Baking
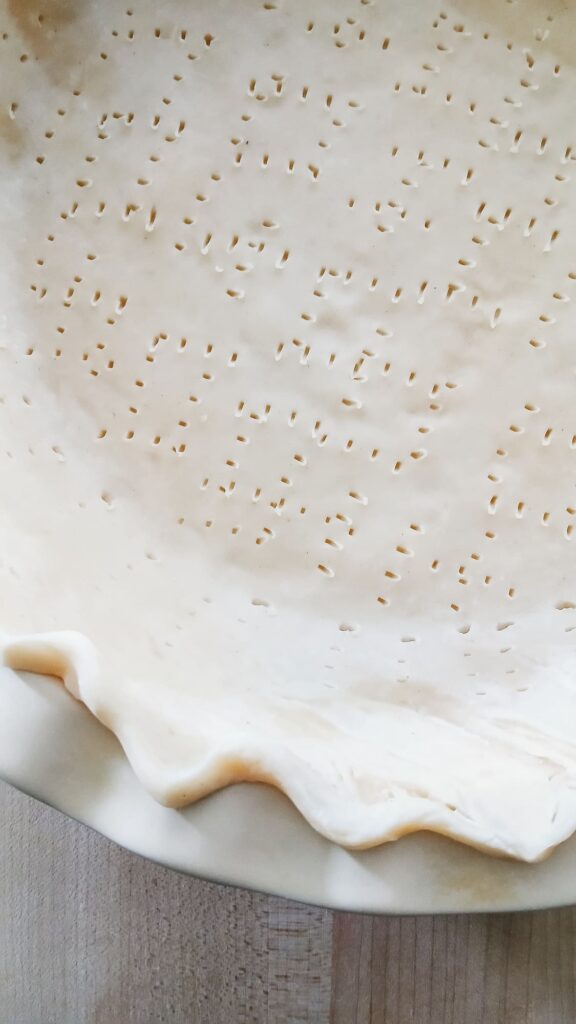
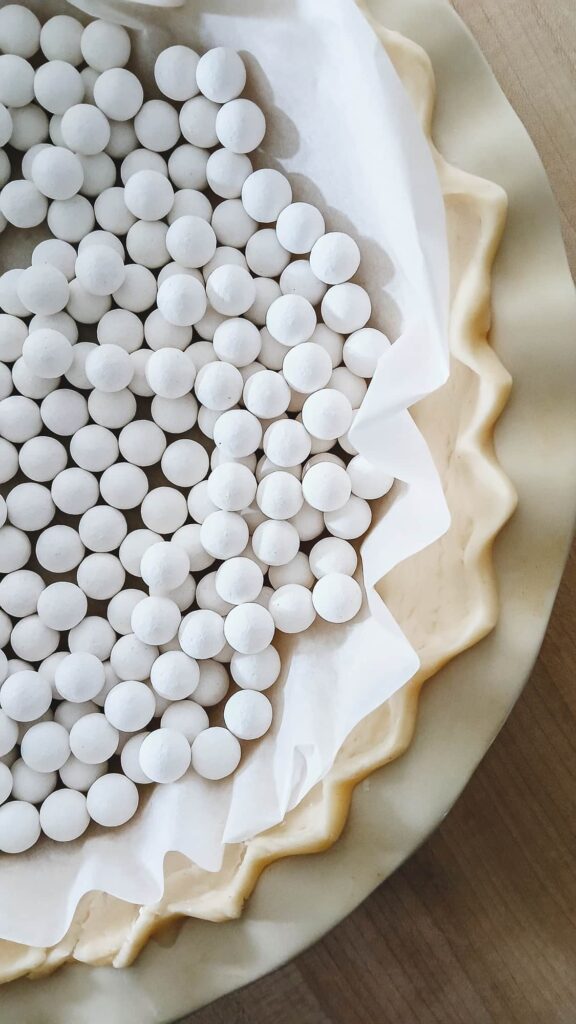
Once the dough is set, I always dock the crust by poking holes all over the bottom with a fork. This lets the steam escape so the dough doesn’t puff up. While you can technically skip the pie weights, I really recommend using them if you have them. They keep the sides from shrinking or sliding down the pan, which is especially important since this is a deep dish pie.
Since the brownie batter is so heavy and dense, you really can’t skip this blind bake. I bake the crust according to the package instructions until it is set and just starting to turn a pale golden color. Once it comes out of the oven, I carefully lift out the weights and let the crust cool completely on the counter. Getting the crust crisp before the filling goes in is the only way I’ve found to avoid a soggy bottom.
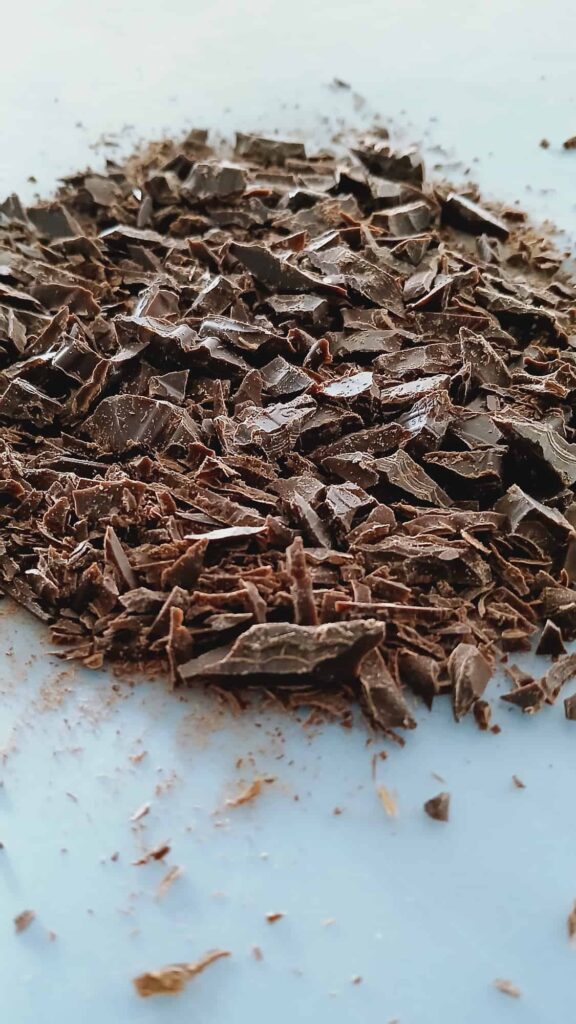
The Chopped Chocolate
While the crust is cooling, I move on to the chocolate. I like to take my time chopping the bittersweet bar into fairly small, uniform pieces. You don’t want giant chunks here because we need them to melt quickly and smoothly into the hot butter later on.
I always make sure the chocolate is ready to go before I even start the microwave. If you melt the butter first and then start chopping, the butter will cool down too much and won’t be hot enough to melt the chocolate into that smooth, glossy base we need.
Creating the Fudgy Filling
Melt and Mix
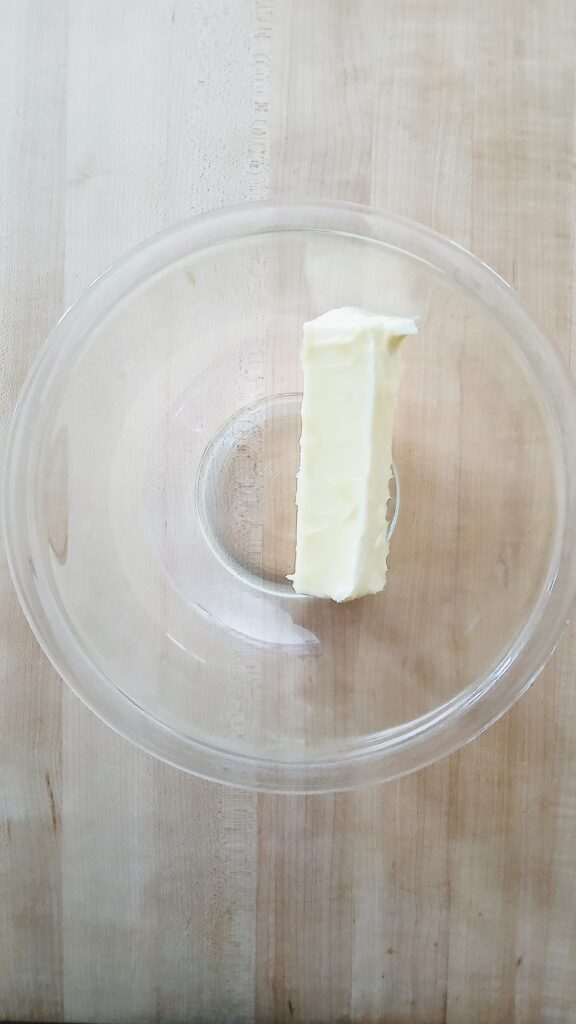
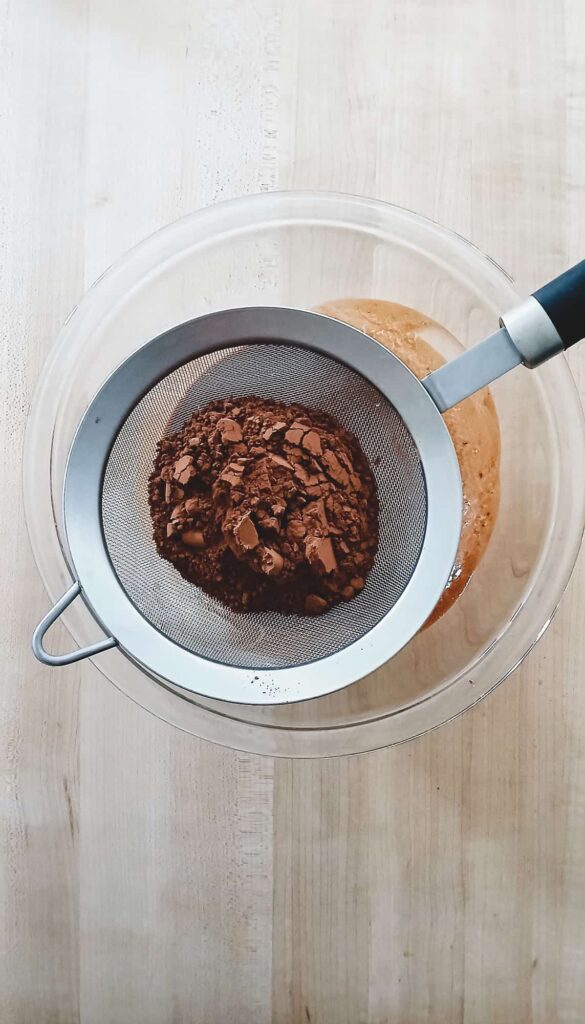
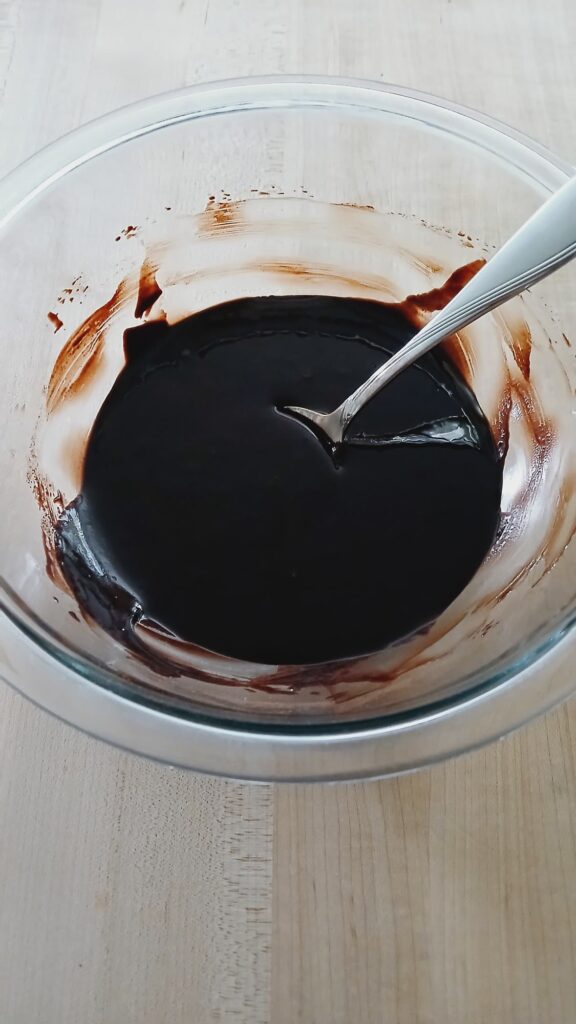
I start by melting the butter in the microwave in short bursts. Once it is liquid and hot, I stir in my chopped chocolate and sift the cocoa powder right into the bowl. Since the chocolate is already chopped and ready, the residual heat from the butter is usually enough to melt everything into a thick, glossy mixture. The most important thing here is to let this sit and cool for a few minutes while you move on to the eggs. If it is too hot when it hits the egg mixture, it can actually partially cook them or cause the batter to curdle.
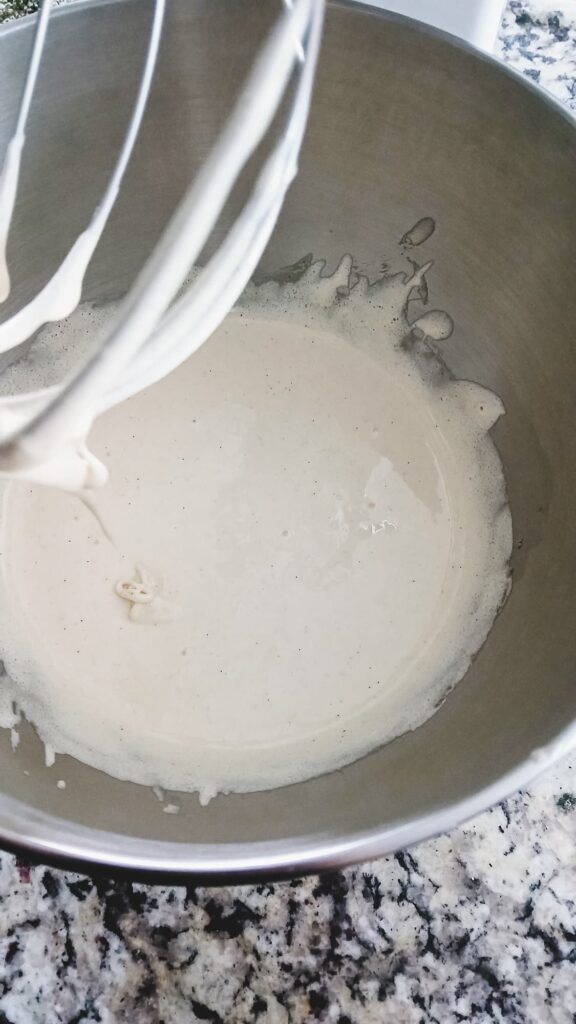
The 6-Minute Whip
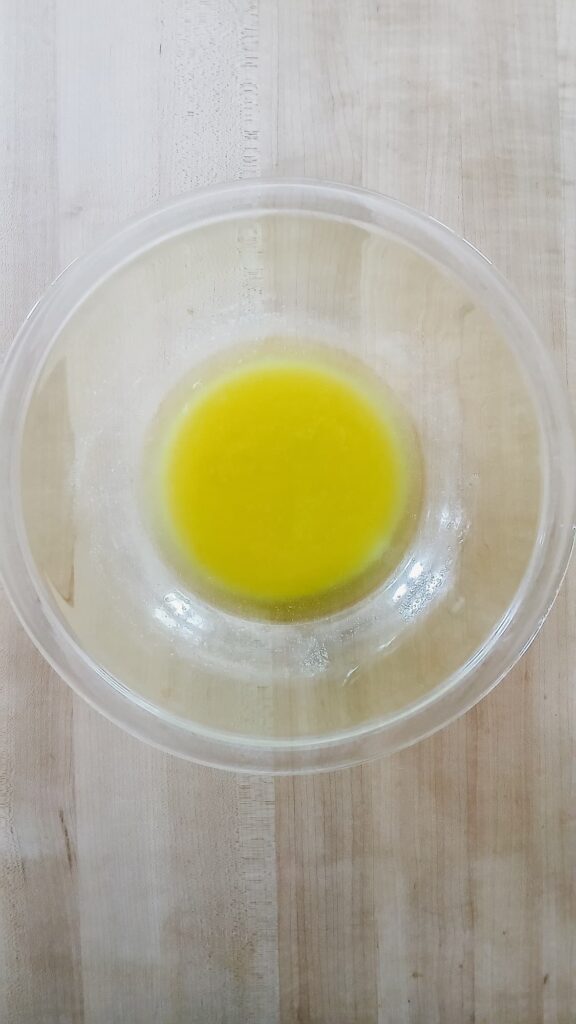
This is the part where you really have to trust the process. I combine the sugars, eggs, vanilla, and salt in my stand mixer (with the whisk attachment) and set a timer for exactly six minutes on medium speed. You’ll watch the mixture transform from a dark yellow to a very pale, thick, and almost frothy texture. This step is what creates that signature shiny, crackly top that makes this pie look so professional. For my mixer, six minutes is usually just right. I wouldn’t mix for more than ten minutes. If you go too long, you’ll end up with a fluffier, cake-like texture instead of the dense and gooey center we want.

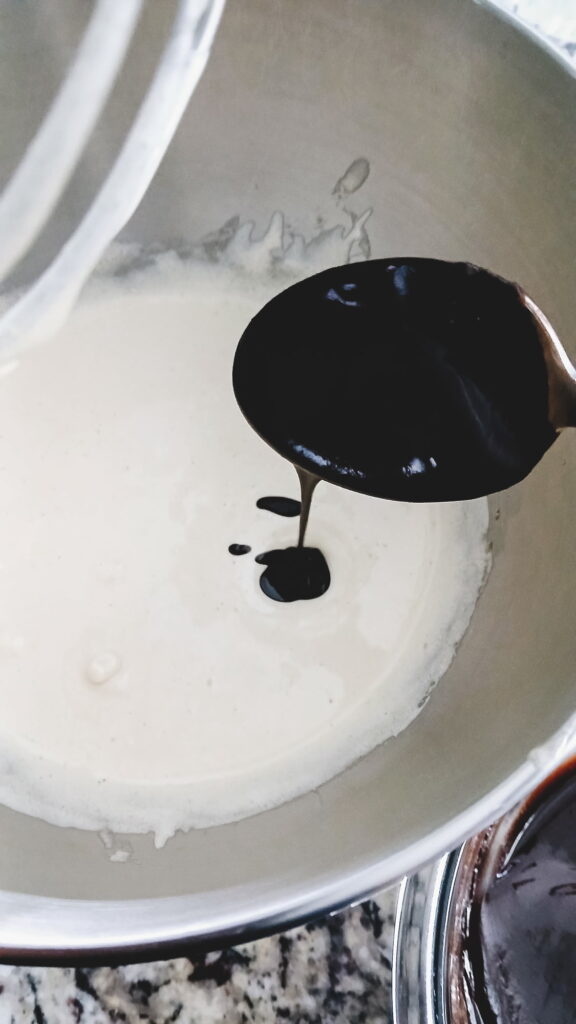
The Final Fold
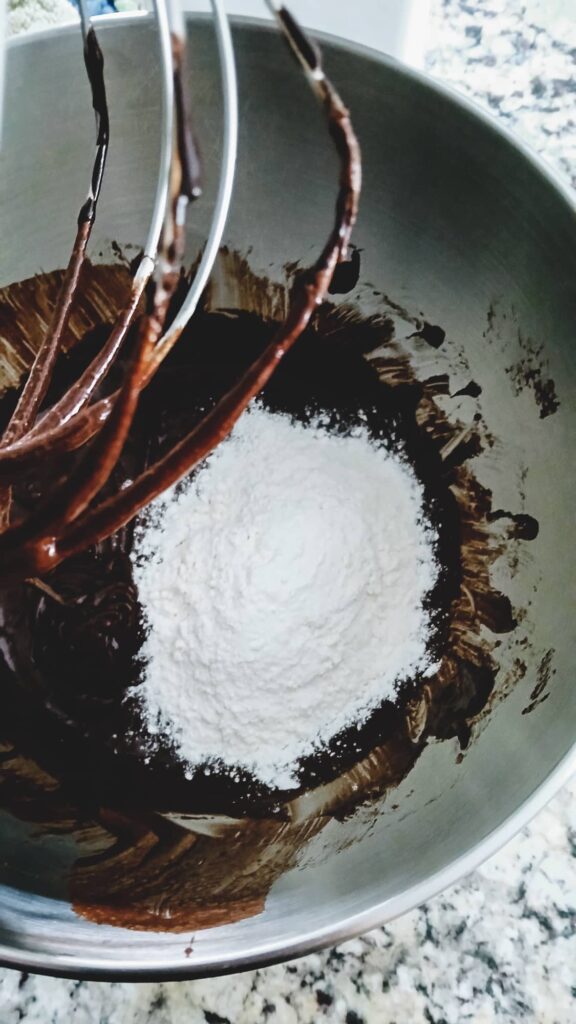
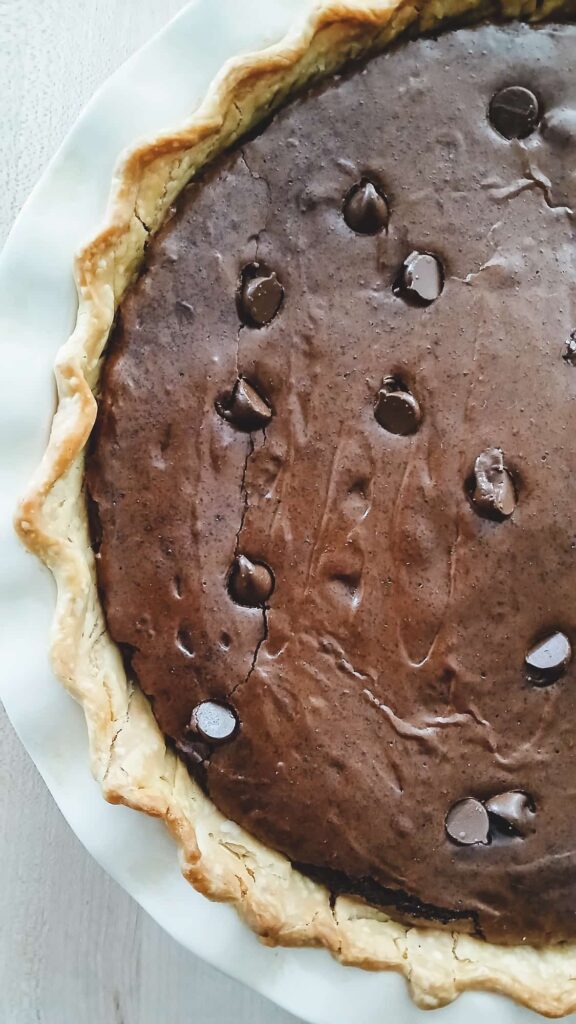
Once the eggs are pale and fluffy, I gently pour in the cooled chocolate mixture on the lowest setting just until it is incorporated. When it is time for the flour, I keep the mixing time very short. You really only want to mix until the flour is just combined and you don’t see any more white streaks. It is tempting to let the mixer keep running, but overmixing at this stage can make the brownie a bit tough. I usually just let it go for a few seconds, then stir in the chocolate chips and call it good. I always make sure to save a handful of chocolate chips to sprinkle on the top right before it goes into the oven.
Into the Oven
Filling the Shell
Once the batter is ready, I pour it right into my cooled, blind-baked pie shell. The batter should fill the crust nicely without overflowing. Be careful not to overfill your shell since the brownie will puff up as it bakes. Once the shell is filled, I use a spatula to smooth out the top so it bakes evenly and sprinkle those extra chocolate chips over the top.
If you find yourself with extra batter, don’t try to force it all into the pie. I don’t usually have extra batter but it depends and you might if you don’t use a deep dish pie pan. I usually just grease a few muffin tins or a small ramekin and bake the leftover batter right alongside the pie. These little “bonus brownies” are a great way to test the flavor before you ever slice into the main event. You could even save the extra batter in the fridge for a day or two and bake it up fresh when you need a quick chocolate fix.
Getting the Timing Right
Getting the baking time just right can be the trickiest part of this recipe. It really depends on your oven, the material of your pie pan and how deep your pan is. My pan is quite deep. This amount of batter is thick and takes a bit longer to bake than a standard shallow dish. If you use a shallow pie dish, your baking time will be shorter. Because of this, I always suggest keeping a close eye on the oven toward the end.

The Jiggle Test
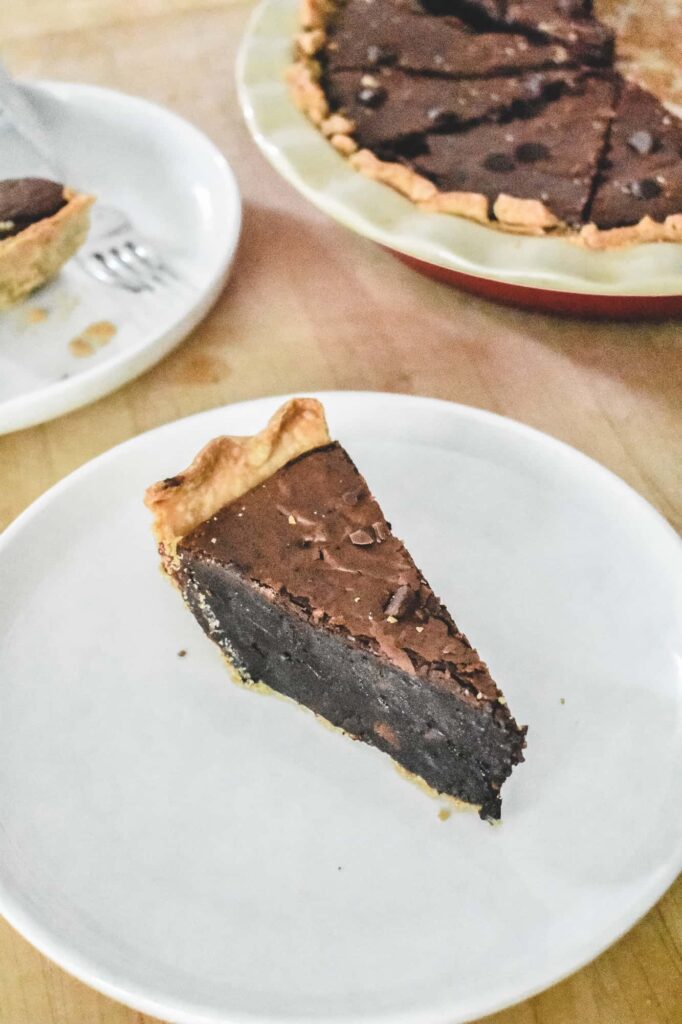
The best way to tell the pie is done is by giving the pan a very gentle nudge. The edges should look stable and slightly puffed but the center should still have a little jiggle to it. When in doubt, I always lean toward underbaking rather than overbaking. The pie will finish setting up as it cools which is the secret to that dense and gooey center.
Tip: The Toothpick Test
You want the toothpick to come out with a few fudgy crumbs attached. If it comes out completely clean, the pie is likely overbaked. If the toothpick has wet batter, it needs a few more minutes.
Protecting the Crust
Since the brownie filling takes a while to bake through, I make sure to check on the crust while it is in the oven. If the edges start looking too dark before the center has that perfect jiggle, I loosely cover them with a bit of foil or a crust shield. It is a simple way to make sure the crust stays golden and buttery without burning while the brownie finishes.
Cooling and Serving
The Cooling Process
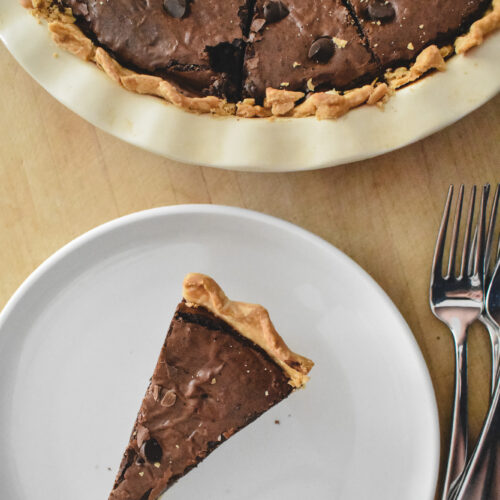
As hard as it is to wait, I always let the pie cool completely on a wire rack before I even think about slicing it. Because this filling is so rich and fudgy, it needs time to set up properly. If you cut it while it is still hot, the center will be a bit too messy. Letting it reach room temperature ensures you get those clean, beautiful slices that show off the dense texture.
The Wait is Worth It
I usually give it at least two hours on the counter. If you have the patience, this pie is even better if you let it sit for several hours or even overnight. The flavors deepen and the texture becomes incredibly velvety.
Serving Suggestions
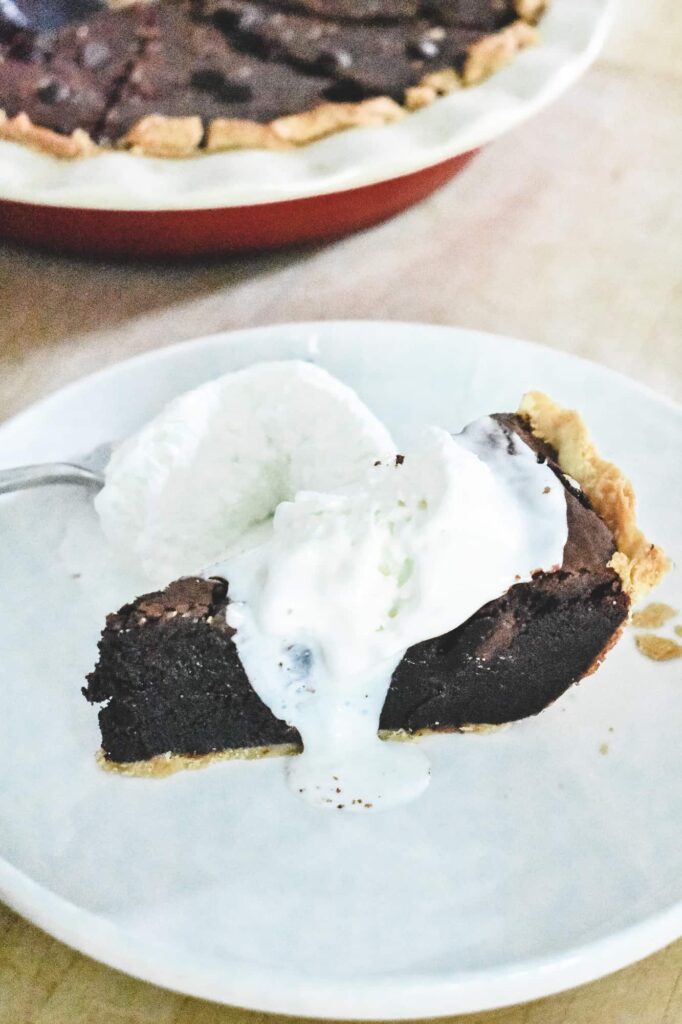
When I am ready to serve, I love to lean into that nostalgic, vintage feel. A big scoop of vanilla bean ice cream is the classic choice because the cold creaminess pairs so well with the rich chocolate. If I want something a little lighter, I will do a dollop of homemade whipped cream with just a tiny pinch of sugar.
Make it Your Own
While I love the classic fudgy version, this pie is really easy to customize. You can swap the semi-sweet chips for white chocolate chips or peanut butter chips if you want a different flavor profile. I also love to add a little texture by tossing in some chopped walnuts or pecans. If you want to balance all that rich chocolate, I recommend a light sprinkle of flaky sea salt on top right after the pie comes out of the oven.
Keep it Fresh
If you have leftovers, this pie keeps well. I usually just cover it tightly and keep it on the counter for a couple of days. If you want it to last longer, you can pop it in the fridge for up to a week. I actually think it tastes even fudgier when it is chilled, but a quick ten-second zap in the microwave works perfectly if you prefer that warm brownie experience.
Freeze for Later
This pie freezes great as well. You can wrap individual slices in plastic wrap and then foil to keep them fresh in the freezer for about three months. Just let a slice thaw on the counter whenever you need a quick chocolate fix.
Decadent Fudgy Brownie Pie
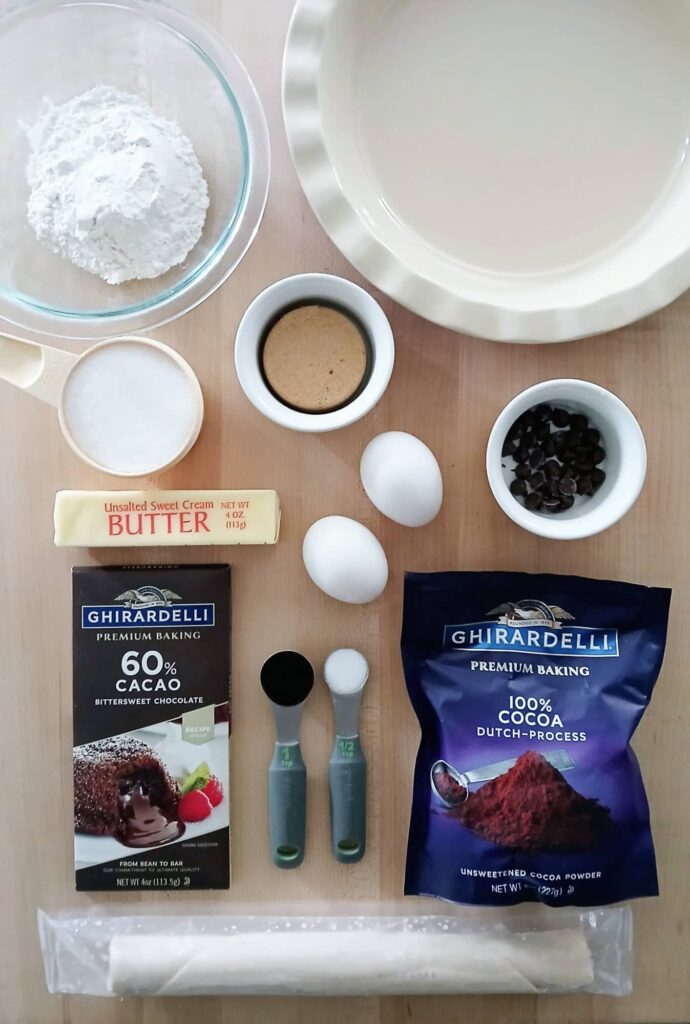
Ingredients
- 1 premade refrigerated pie crust
- 1 cup unsalted butter | 227g
- 4 ounces chocolate chopped | 114g
- 1 cup Dutch process cocoa powder | 90g
- 1 1/2 cups granulated sugar | 300g
- 1/2 cup brown sugar | 100g
- 4 eggs, room temperature
- 1 1/2 teaspoons vanilla extract
- 1 teaspoon salt
- 1 cup all purpose flour | 120g
- 1/4 cup chocolate chips | 40g
Instructions
Blind Bake the Crust
- Prepare and dock: Line a 9-inch pie pan with the crust and crimp the edges. Use a fork to poke holes across the bottom and sides of the dough.1 premade refrigerated pie crust
- Add weights: Top pie dough with a round piece of parchment paper and fill with pie weights or dry beans.
- Initial bake: Bake according to package instructions for blind baking. Remove the parchment paper and weights. Let the crust cool.
- Reset oven: Adjust the oven temperature to 350°F.
Make the Brownie Filling
- Melt chocolate: Microwave the butter in 30-second intervals until fully melted. Stir in the chopped chocolate and sifted cocoa powder until the mixture is smooth and glossy. Set aside to cool slightly.1 cup unsalted butter | 227g4 ounces chocolate chopped | 114g1 cup Dutch process cocoa powder | 90g
- Whip the eggs and sugar: In a stand mixer fitted with the whisk attachment, combine the granulated sugar, brown sugar, eggs, vanilla, and salt. Whip on medium speed (speed 6 on a KitchenAid) for 6 minutes, until the mixture is pale and fluffy.1 1/2 cups granulated sugar | 300g1/2 cup brown sugar | 100g4 eggs, room temperature1 1/2 teaspoons vanilla extract1 teaspoon salt
- Add the chocolate: Gently mix the cooled chocolate mixture into the egg mixture until fully incorporated.
- Incorporate flour: Mix in the flour until just combined. Do not overmix.1 cup all purpose flour | 120g
- Add the chocolate chips: Stir in the chocolate chips by hand, reserving a few to sprinkle on top.1/4 cup chocolate chips | 40g
Bake the Brownie Pie
- Assemble: Pour the brownie batter into the cooled pie crust and spread it evenly.
- Add topping: Sprinkle the remaining chocolate chips on top.
- Final bake: Bake for 40–45 minutes until the center is just set and no longer looks wet. It is normal for the center to jiggle slightly. Check the crust at the 30-minute mark. If the edges are golden brown, cover them loosely with foil to prevent over-browning. Be careful not to overbake.
Cool, Store, and Serve
- Cool completely: Remove pie from the oven and cool to room temperature. Once fully cooled, cover the top with a piece of parchment paper to prevent sticking, then wrap with plastic wrap. Store in the refrigerator.
- To serve: Bring to room temperature or warm individual slices in the microwave for a few seconds for extra gooeyness.
Notes:
Did you try this recipe?
Share your experience in the comments below!
I’d love to hear how it turned out
Let’s see your creations!
Share your photos
Tag me @flourtinbakes on social media