Marshmallow Cream Fudge with Peanut Brittle
I have a complicated relationship with fudge. So many holiday platters are filled with squares that are aggressively sweet or, worse, have that crumbly, gritty texture that makes you want to reach for a glass of water immediately. For a long time, I just didn’t see the appeal. It felt like a sugar bomb without much depth.
That changed when I started leaning into the science of a vintage marshmallow cream base. When you pull back on the sugar and introduce the salty, buttery crunch of peanut brittle, the fudge finally finds its balance. This isn’t just another heavy dessert. The semi-sweet chocolate provides a rich foundation, while the brittle adds a deep toasted sugar note and a necessary snap that breaks up the creaminess.
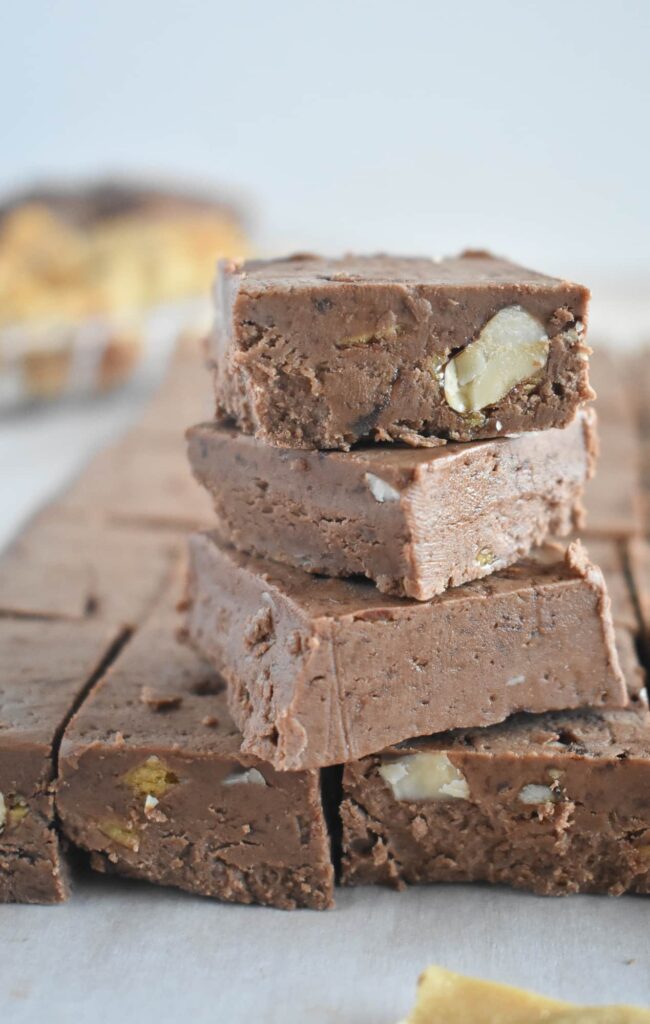
It is the perfect marriage of smooth, rich chocolate and a crunchy candy bar. If you are someone who usually skips the fudge tray because it is too sugary, this recipe is for you.
The Components of a Creamy Fudge
I have found that the success of this fudge really comes down to the specific items I keep in my pantry. These are the staples I reach for to make sure every batch comes out with that smooth, vintage texture I love.
Why I Choose Evaporated Milk
I always double check my labels to make sure I have evaporated milk and not sweetened condensed milk. They look similar on the shelf, but they behave very differently in a saucepan. I prefer evaporated milk because it gives me a creamy base without that heavy, syrupy sweetness that can sometimes take over a recipe.
Achieving a Pillowy Texture
Marshmallow fluff is what I consider my safety net for smooth fudge. Whether you call it fluff, cream, or creme, it is what gives the fudge that soft, pillowy bite instead of a hard or grainy one. I usually pop the jar in the microwave for about ten seconds and that makes it easier to get it out of the container.
I have noticed that depending on what part of the country you are in, you might find this labeled as marshmallow fluff or marshmallow cream. Different brands also tend to vary slightly in their jar sizes, usually between 7 and 7.5 ounces. I have tested this with both, and that small difference in weight does not change the final set, so you can use whichever jar you find at your local market.
Balancing the Richness
I almost always go with semi-sweet chips for this recipe. The slight bitterness is exactly what is needed to balance out the sugar in the brittle. If I have them on hand, I will use mini chips because they melt almost instantly. It saves me a lot of arm work when I am trying to get everything incorporated quickly.
Finding the Perfect Crunch
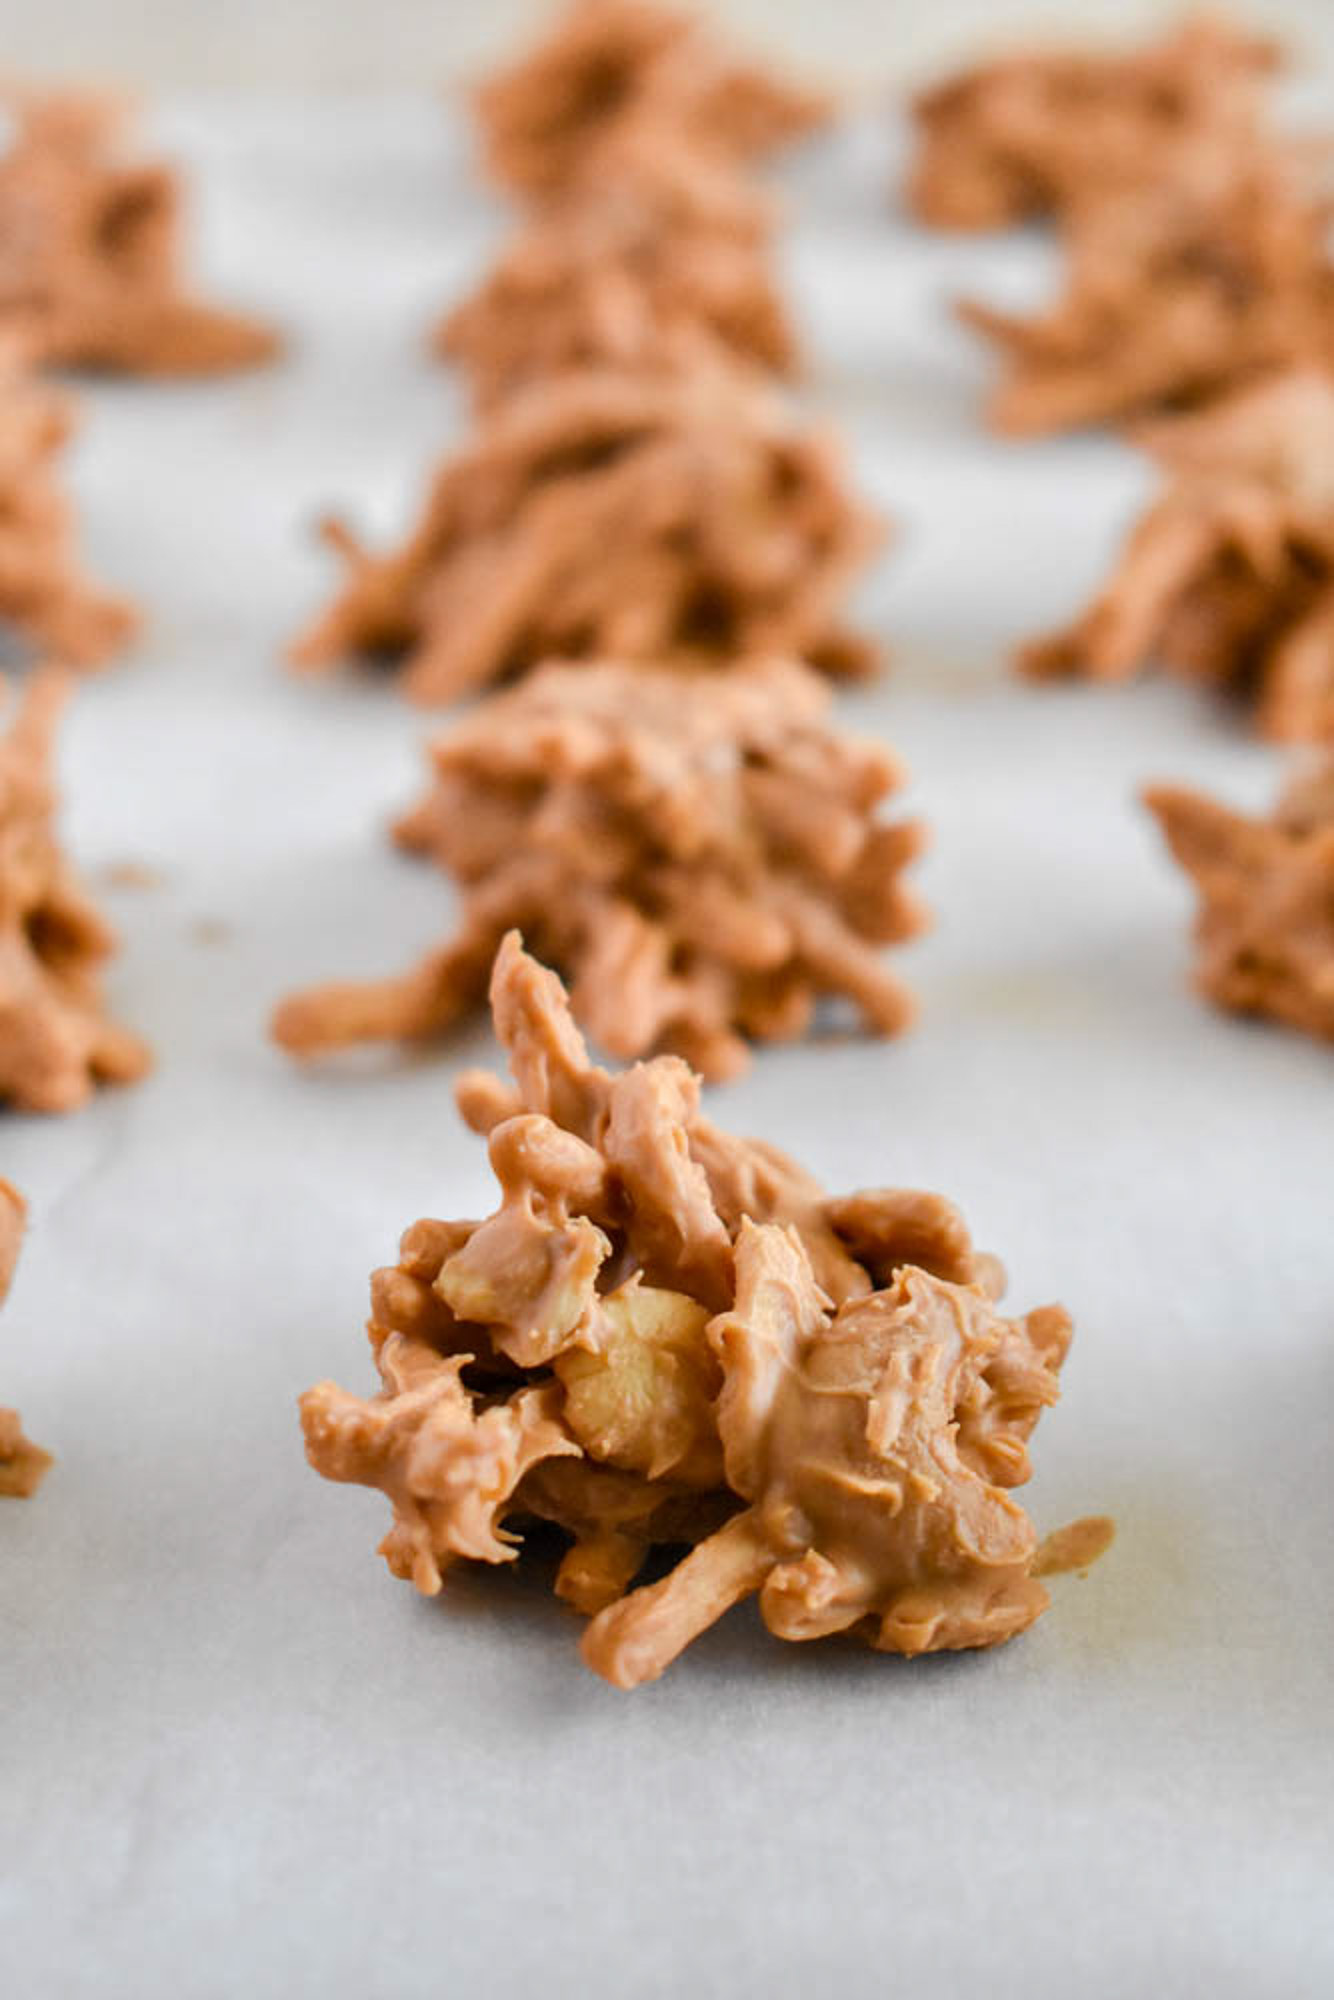
I do not think you need to spend all afternoon making brittle from scratch for this. I usually grab a bag from the store, and believe it or not, I find the brittle from the Dollar Tree works great. It has a solid snap that holds up well once it is mixed into the warm fudge. I give it a quick rough chop, so I get a good mix of tiny salty shards and bigger chunks of peanuts in every piece. Of course, you can always make your own brittle if you have a family recipe you love.
A Note on Sweetness
If I want a less sweet fudge, I simply reduce the granulated sugar to 1 1/2 cups. I have found that this smaller amount still allows the fudge to set perfectly without losing any of that creamy texture.
Before You Turn on the Stove
Making fudge is a fast process once that sugar mixture hits a boil. Because you are working with high heat and a specific window of time before the chocolate sets, I always recommend having every single ingredient measured out and sitting on the counter before you even start. There is nothing worse than hunting for a teaspoon of vanilla while a pot of sugar is threatening to overcook.
Prepping the Pan
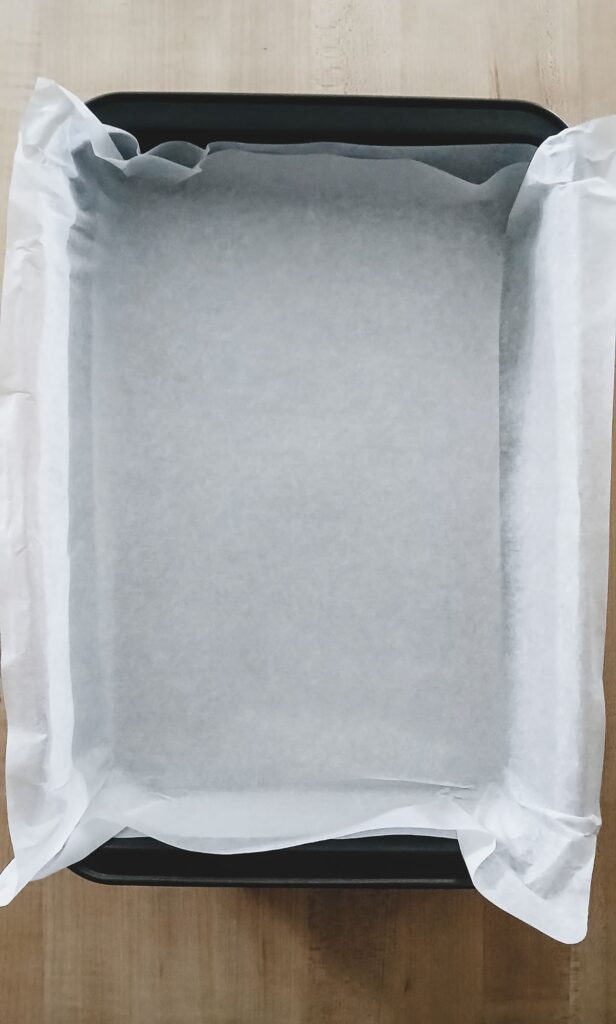
I start by lining a 9×13 inch pan with parchment paper. I like to leave a little bit of paper hanging over the long edges so I can lift the entire block of fudge out later. If you don’t have parchment, you can grease the pan well with butter, but the paper makes for much cleaner cuts and a lot less scrubbing later on.
Prepping the Fluff and Chocolate
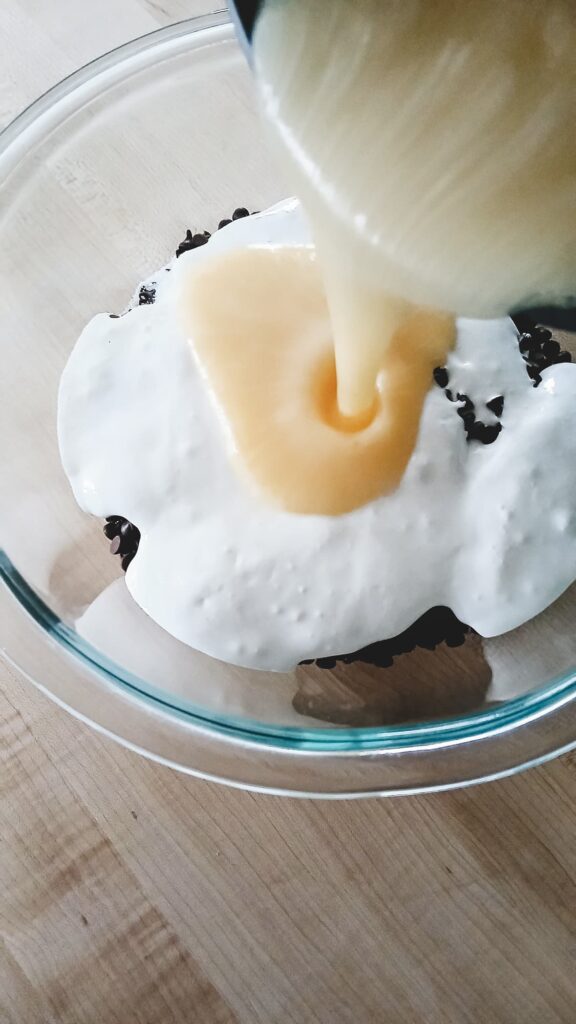
I like to get the marshmallow fluff out of the container before I even turn on the stove. This is one less step to worry about later and it means I don’t have to feel rushed while trying to scrape out a sticky jar. I place the chocolate chips and the fluff together into a large heat-safe mixing bowl so everything is ready to be melted and mixed the moment that sugar mixture is hot.

Organizing Your Space
I take a minute to chop the peanut brittle into a mix of small shards and larger chunks. Having this ready to go means I can fold it in the second the chocolate is melted. I also make sure my candy thermometer is clipped to the side of my heavy saucepan and within easy eyesight. Getting these small tasks out of the way first is what makes the actual cooking process feel easy rather than stressful.
The Steps to a Perfectly Smooth Set
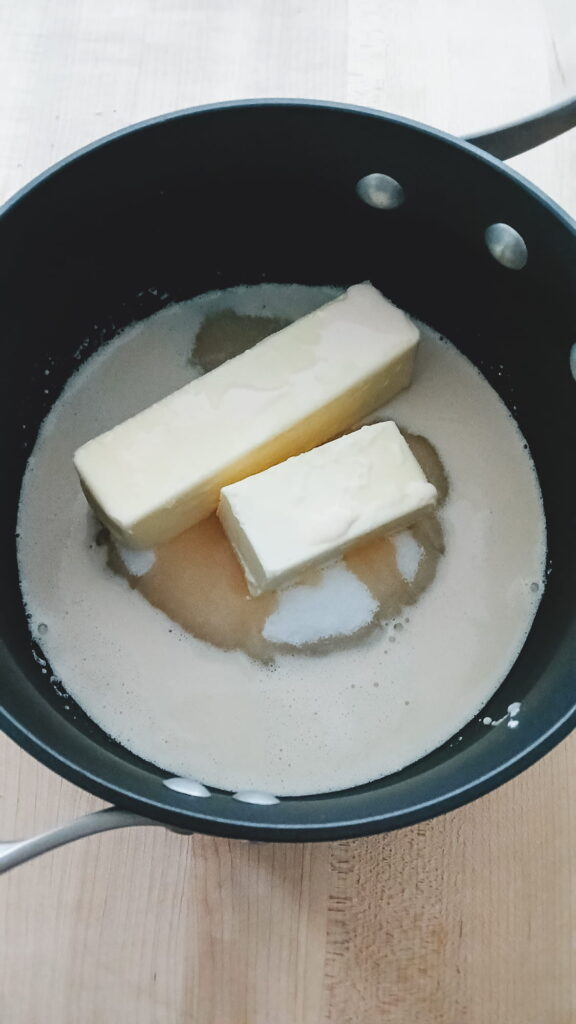
The most important part of this recipe happens during the five minutes the pot is on the heat. I start by heating the butter, granulated sugar, and evaporated milk in a heavy bottomed saucepan over medium heat.
I keep my spoon moving across the bottom of the pan to make sure the sugar dissolves completely before the mixture starts to bubble. I usually feel for the grit of the sugar against the bottom of the pot, and I do not stop stirring until that feeling is gone.
The Right Pot Matters
I always use my heaviest saucepan for this recipe. A thin pot creates hot spots that can scorch the sugar before the timer is up, but a heavy bottom ensures the heat stays perfectly even.
Watching for the Rolling Boil
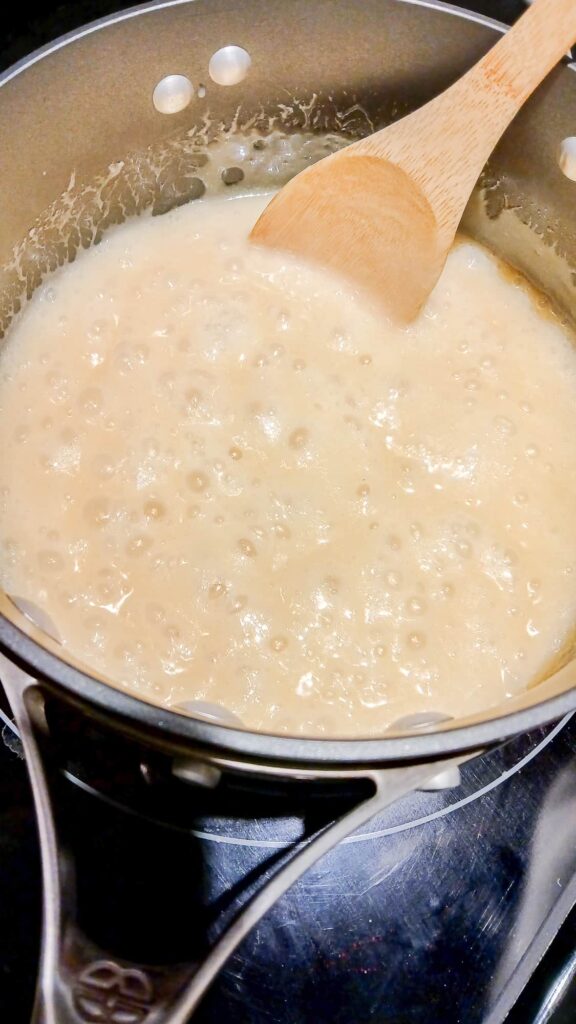
Once the mixture comes to a full rolling boil, where it continues to bubble while I am stirring, I start my timer for exactly five minutes. I find it is vital to keep my spoon moving across the entire bottom of the pan throughout these five minutes to prevent any scorching. If I am using a candy thermometer, I look for it to hit 238°F.
I usually watch for the bubbles to change from fast and thin to a much heavier and more deliberate burst. This shift in how the bubbles break the surface tells me the water has evaporated and the sugar is finally reaching that soft ball stage where it will set up firm but stay tender.
The Vigorous Stir
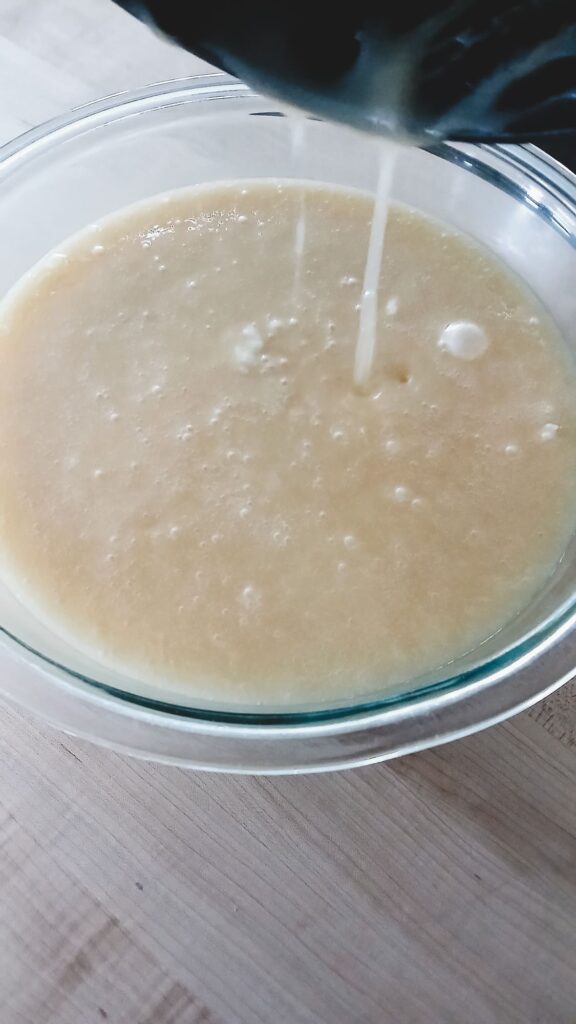
As soon as I pull the pan off the heat I move quickly. Instead of adding everything to the hot pot, I prefer to pour the boiling sugar mixture directly over my measured chocolate chips and marshmallow fluff in a large heat-safe bowl.
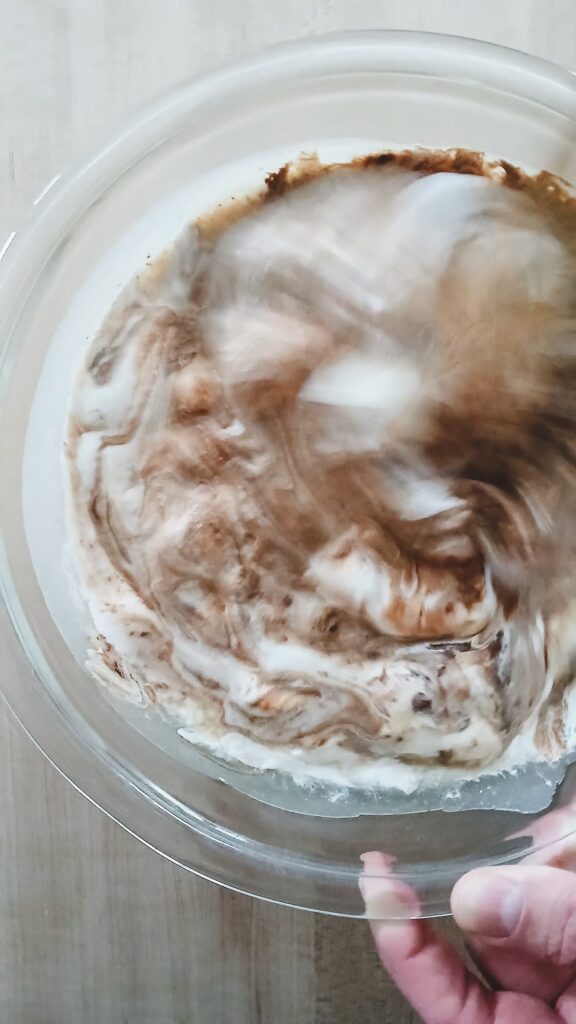
I have found that this “pouring over” method helps with the smooth texture. It protects the chocolate from the direct heat of the burner which can sometimes cause it to seize or turn grainy. Because I have to work fast having my mixing bowl ready with the fluff and chips means I am not fumbling with a sticky jar while the clock is ticking. I stir vigorously until the mixture is glossy and smooth. If it looks a little dull I just keep stirring for another thirty seconds until it is fully emulsified and smooth.
Folding and Setting
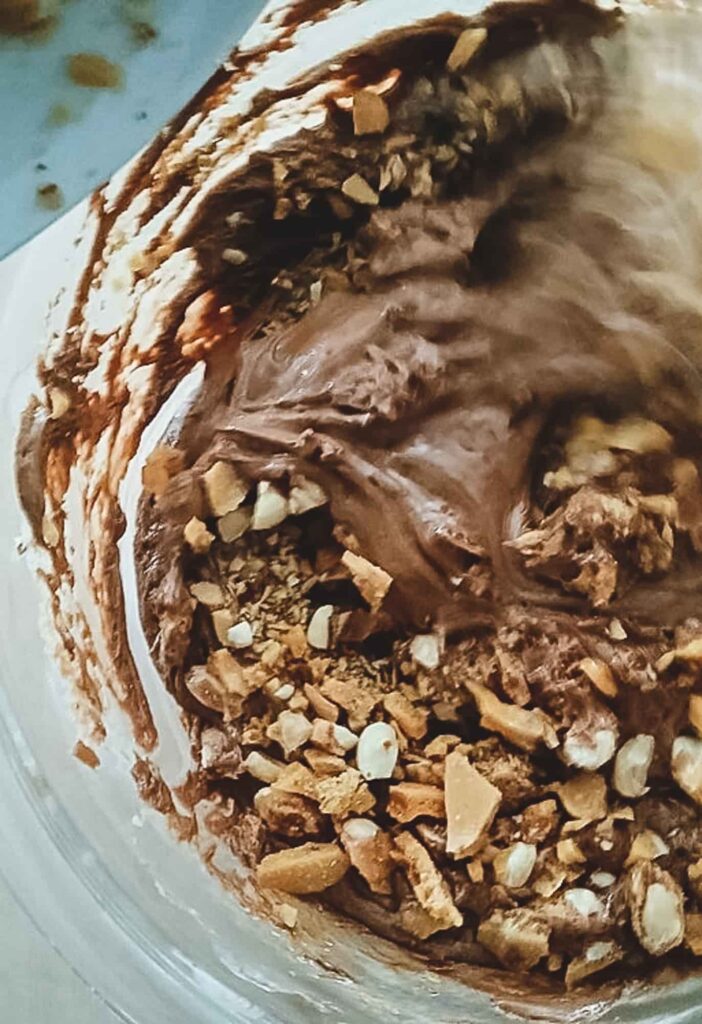
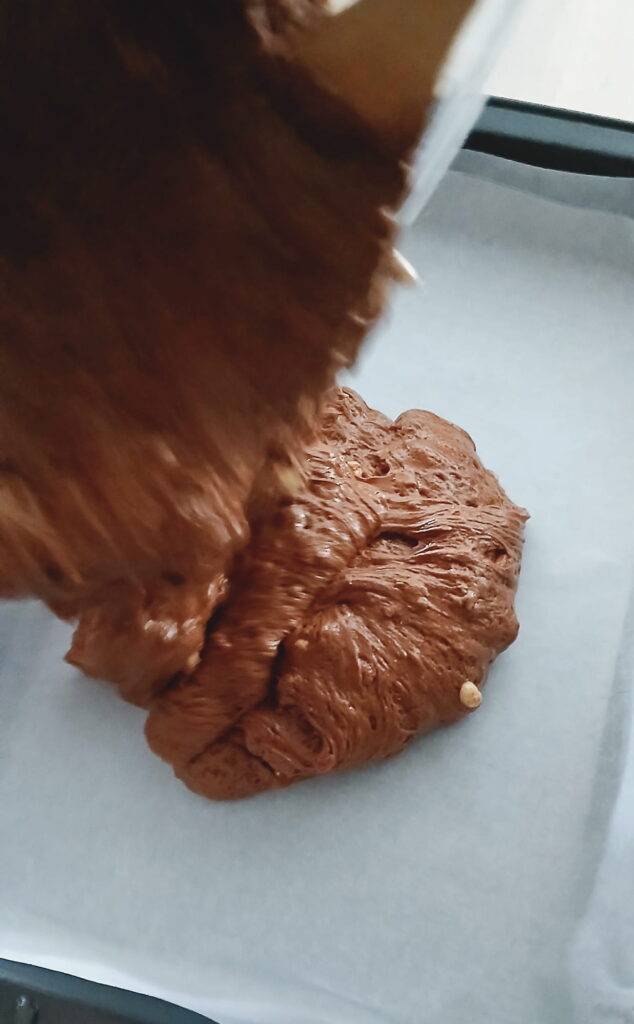
The very last step is folding in those chopped brittle pieces. I do this quickly so the residual heat does not melt the brittle too much. I want those crunchy pockets to stay intact so they provide a contrast to the soft fudge. Once it is combined, I pour it into the prepared pan and use a spatula to move the mixture it into the corners.
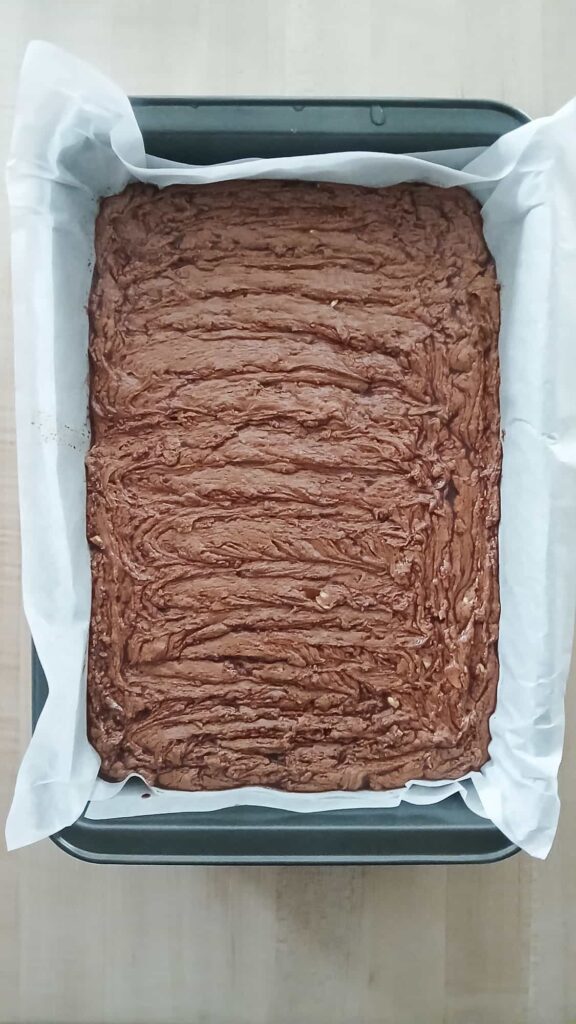
Now comes the hardest part of the whole recipe for me, which is letting it sit at room temperature for at least three hours. I always resist the urge to put it in the fridge immediately because I have found that a slow cool is what gives the fudge that signature melt in your mouth finish.
Achieving the Perfect Cut
I have learned the hard way that rushing the cooling process is the quickest way to end up with a mess. Even if the top feels firm to the touch after an hour, I always wait the full three hours before I even think about grabbing a knife. This patience is what allows the sugar structure to fully stabilize, so the fudge does not pull or tear when it is sliced.
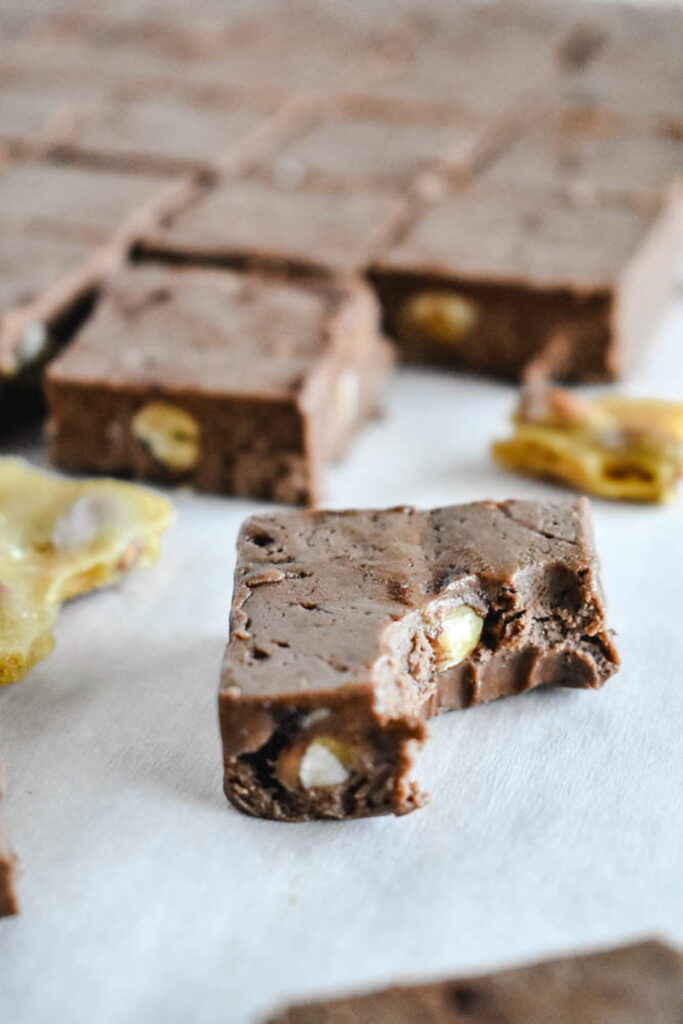
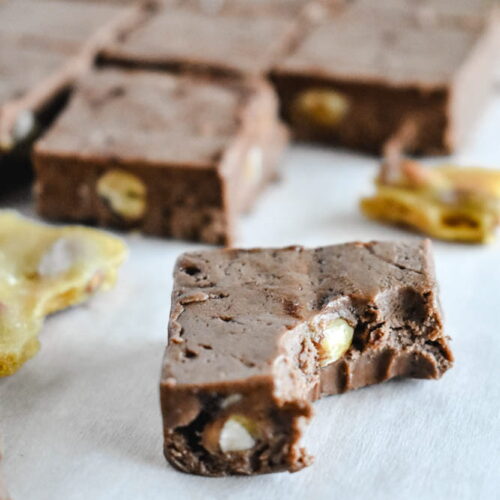
The Lift and Slide
Because I use the parchment paper sling method, I start by gently running a thin spatula along the edges that were not covered by paper. I then lift the entire block out of the pan and place it on a large wooden cutting board. This gives me a flat surface to work on without the high sides of the baking pan getting in the way of my hands.
My Knife Trick
To get those professional looking edges, I always use a long chef knife and a tall glass of very hot water. I dip the blade into the water and then wipe it completely dry before every single cut. The residual heat from the metal allows the knife to glide through the chocolate and the crunchy brittle without any sticking. I also make sure to press straight down rather than using a sawing motion, which helps keep those layers of peanut brittle perfectly intact.
Success Beyond the Pan
I always think of fudge as a very forgiving treat, but I know that sometimes the stove or the humidity can be unpredictable. If I find that my fudge is still too soft after the full cooling time, I do not let it go to waste. I simply repurpose it as a decadent hot fudge sauce for ice cream or a topping for brownies.
If I notice a greasy texture on the surface, it usually tells me that I did not stir vigorously enough to keep the butter from separating. I have found that I can easily fix this by gently blotting away any excess oil with a paper towel. The fudge still tastes wonderful, and this simple step takes care of the appearance.
Make it Your Own
While the peanut brittle is my favorite way to add crunch, I have found that this base is incredibly versatile. I often think of the chocolate and marshmallow mixture as a blank canvas for whatever is in my pantry. If I am out of brittle, I sometimes swap it for toasted pecans or even crushed pretzels to keep that salty and sweet balance.
Swapping the Baking Chips
I do not always stick to semi sweet chips for this recipe. I have found that using white chocolate chips creates a much creamier treat, while peanut butter chips add a deep nutty richness that I love. Sometimes I even mix my stash and use half semi-sweet and half milk chocolate to get a more mellow flavor profile that reminds me of old fashioned candy shop fudge.
Creative Mix Ins and Swirls
I love to personalize this fudge based on the season or whatever I am craving. While the brittle is my current favorite, I often swap it for chopped almonds or walnuts when I want a more traditional, nutty texture. On days when I want something even more indulgent, I have folded in crushed chocolate sandwich cookies or graham crackers for a modern twist.
If I want the fudge to look a bit more polished, I will sometimes drizzle warm caramel over the top before it sets. I use a butter knife to create a marbled swirl through the mixture, which adds a beautiful visual effect and a second layer of flavor in every bite.
For a festive holiday version, I like to use crushed peppermint candies or chopped dried fruit for a chewy contrast. This also reminds me of my Cherry Mash candy, which also relies on that perfect balance of a soft center and a crunchy finish.
Keep it Fresh
I always keep my fudge in an airtight container at room temperature. I find that the refrigerator can actually draw out the moisture and leave the texture feeling a bit tacky or damp. If I am stacking the squares I place a small piece of parchment paper between the layers to prevent them from sticking together. When it is stored this way it stays perfectly fresh for about two weeks, though it rarely lasts that long in my house.
Marshmallow Cream Peanut Brittle Fudge
Ingredients
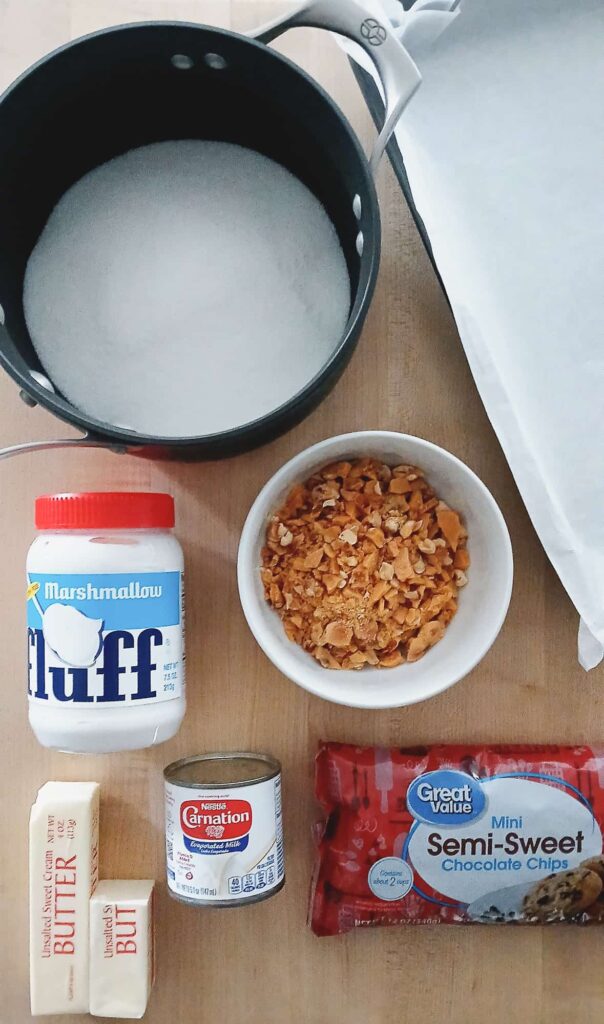
- 12 ounce bag semi-sweet chocolate chips | 340g
- 1 jar marshmallow fluff | 7 or 7.5 ounces | 198-213g
- 1 teaspoon vanilla extract
- 1/2 teaspoon salt
- 1 1/2 sticks butter | 12 tablespoons | 170g
- 5 ounce can evaporated milk | 142g
- 2 cups granulated sugar | 400g
- 1 cup peanut brittle candy, chopped | ~4.5 ounces, 128g
Instructions
- Prepare the pan: Line a 9×13 inch pan with parchment paper or grease it well. Set the prepared pan aside.
- Prep the mixing bowl: Place the chocolate chips, marshmallow fluff, vanilla, and salt into a large heat-safe bowl.12 ounce bag semi-sweet chocolate chips | 340g1 jar marshmallow fluff | 7 or 7.5 ounces | 198-213g1 teaspoon vanilla extract1/2 teaspoon salt
- Melt the butter: In a medium saucepan over medium heat, melt the butter completely.1 1/2 sticks butter | 12 tablespoons | 170g
- Combine milk and sugar: Add the evaporated milk and sugar to the melted butter. Stir until the sugar dissolves and the mixture is well combined.5 ounce can evaporated milk | 142g2 cups granulated sugar | 400g
- Timed boil: Bring the mixture to a boil while stirring continuously. Once boiling, stir for 5 minutes or until the temperature reaches 238°F soft-ball stage on a candy thermometer. Consistent stirring is crucial to prevent burning.
- Pour and stir: Carefully pour the boiling sugar mixture over the ingredients in your prepared mixing bowl. Stir vigorously until the chocolate is completely melted and the mixture is glossy and smooth.
- Fold in brittle: Stir in the chopped peanut brittle candy, ensuring it is evenly distributed throughout the chocolate mixture.1 cup peanut brittle candy, chopped | ~4.5 ounces, 128g
- Transfer to pan: Pour the fudge mixture into the prepared baking dish and spread it out evenly into the corners.
- Set the fudge: Allow the fudge to cool at room temperature for at least 3 hours until it is fully set.
- Slice and store: Cut the fudge into your desired size squares. Store leftovers in an airtight container at room temperature.
Notes:
Did you try this recipe?
Share your experience in the comments below!
I’d love to hear how it turned out
Let’s see your creations!
Share your photos
Tag me @flourtinbakes on social media