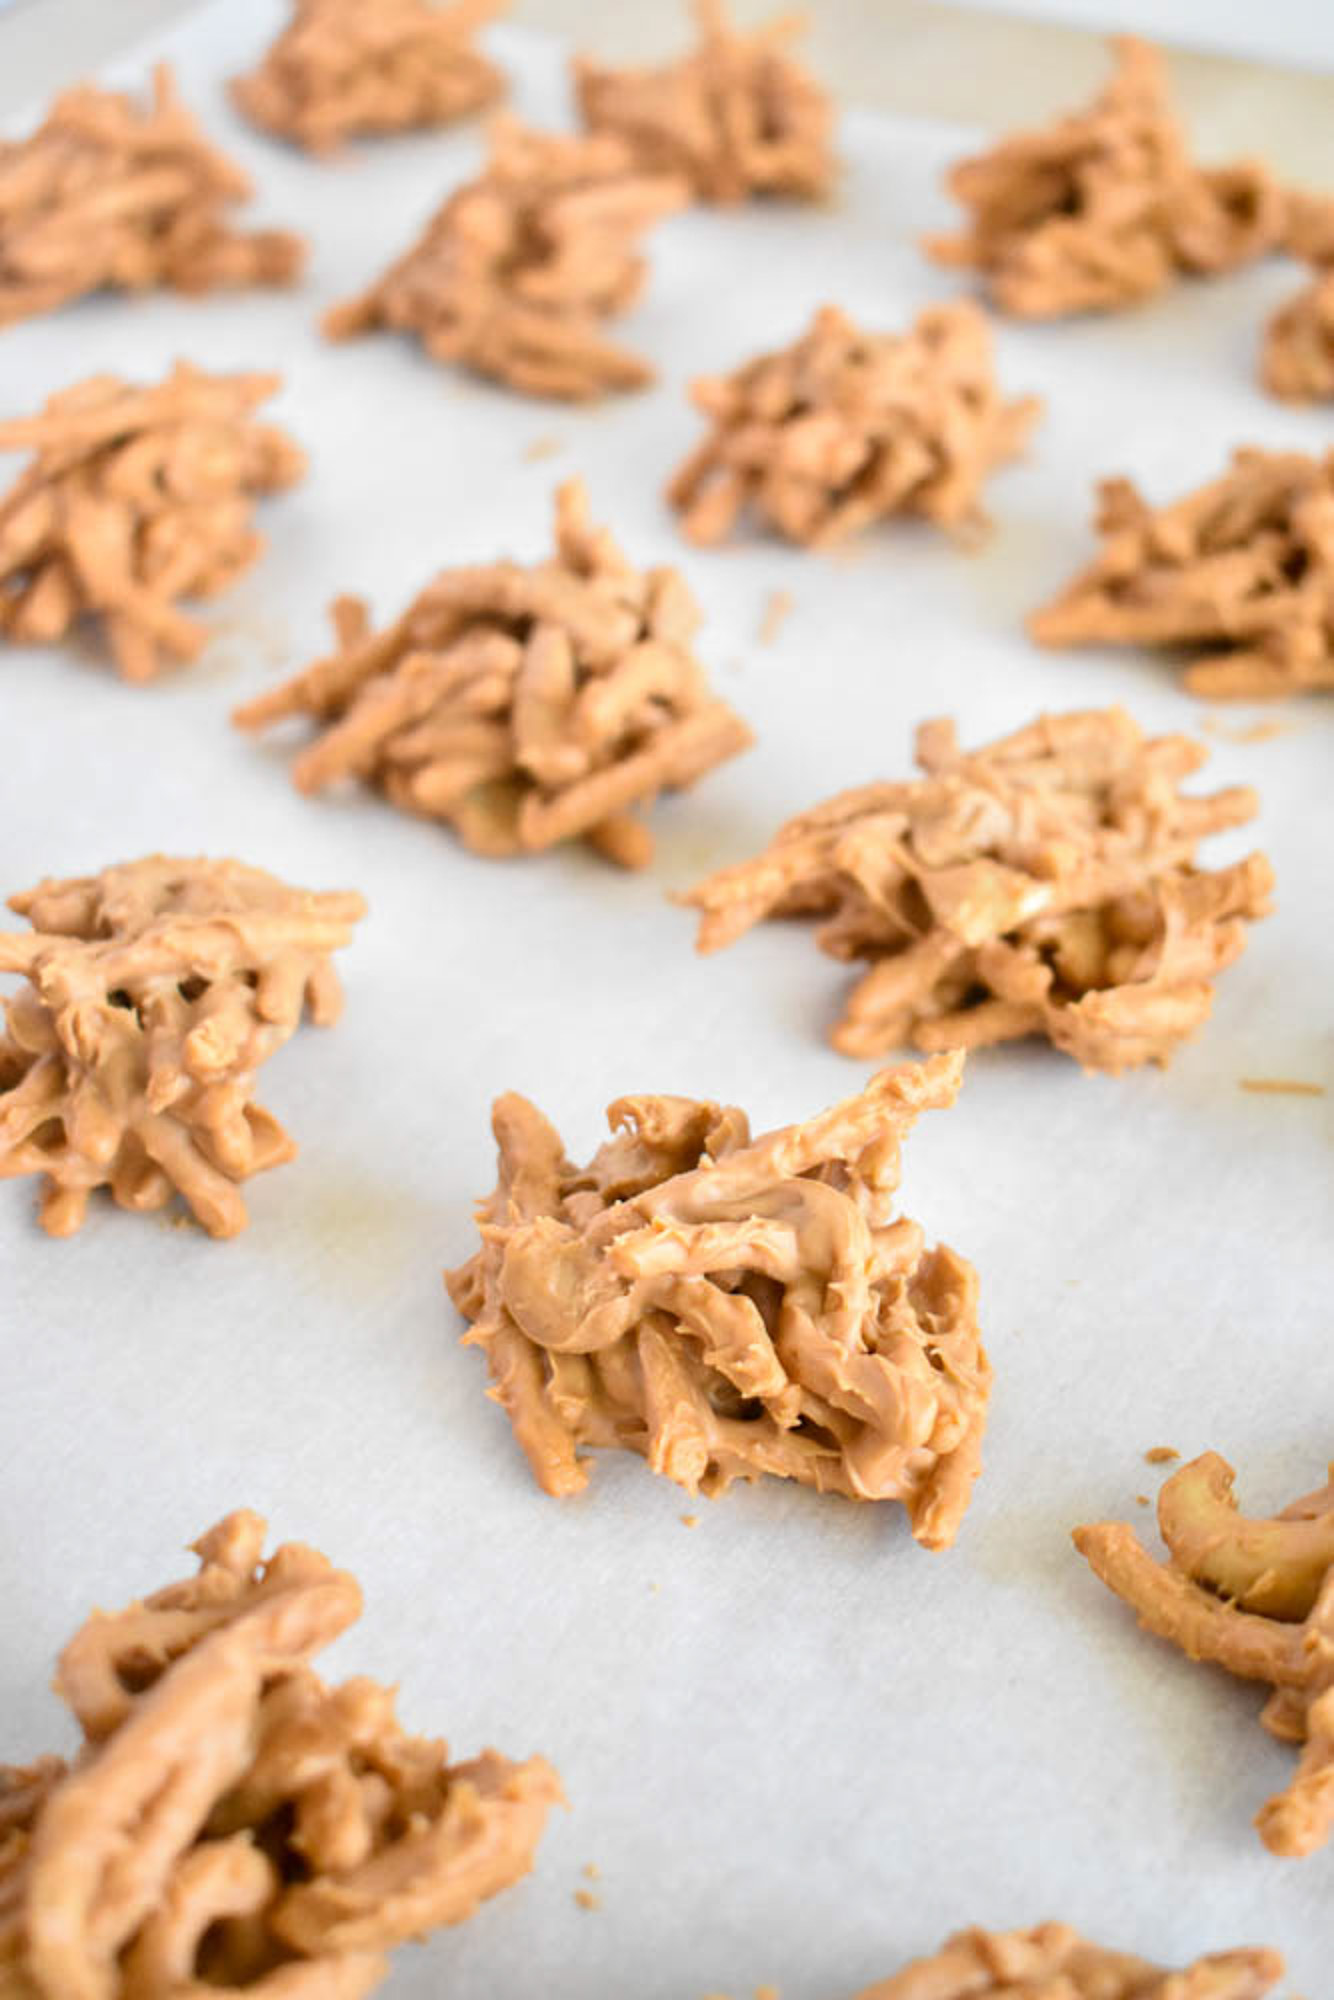
No-Bake Butterscotch Haystacks
If you’re looking for the ultimate salty sweet treat that requires zero time in the oven, these butterscotch haystacks are exactly what I reach for. With just three main ingredients and a few minutes of prep, they are my favorite nostalgic solution for holiday platters or a quick afternoon craving.
A Nostalgic No-Bake Classic
Some of my favorite holiday memories aren’t tied to fancy five course meals, but rather to the simple joy of a crowded cookie platter. Both my husband and I grew up with butterscotch haystacks as a staple of the fall and winter holidays, and even now, they are the first things he looks for when the weather starts to turn. There is something so incredibly satisfying about the combination of butterscotch and salt. It is a simple pleasure that never seems to go out of style.
While they are a classic “vintage” treat, I find myself making them year round. They are the ultimate no-bake solution for when you need a quick dessert but don’t want to turn on the oven. Whether you’re tucking them into a holiday gift box or just looking for a salty sweet crunch to get you through a Tuesday, these treats are proof that you don’t need a long list of ingredients to make something truly memorable. If you grew up with these on your grandma’s counter as we did, I hope this recipe brings back all that childhood magic.
The Secret to the Perfect Crunch
The beauty of this recipe lies in its simplicity, but because there are so few components, the quality and freshness of those ingredients really matter. You might notice that many brands have shifted their butterscotch chip sizes from the traditional 12 ounces down to 11 ounces lately, but do not worry because the recipe still works perfectly with that slightly smaller bag.
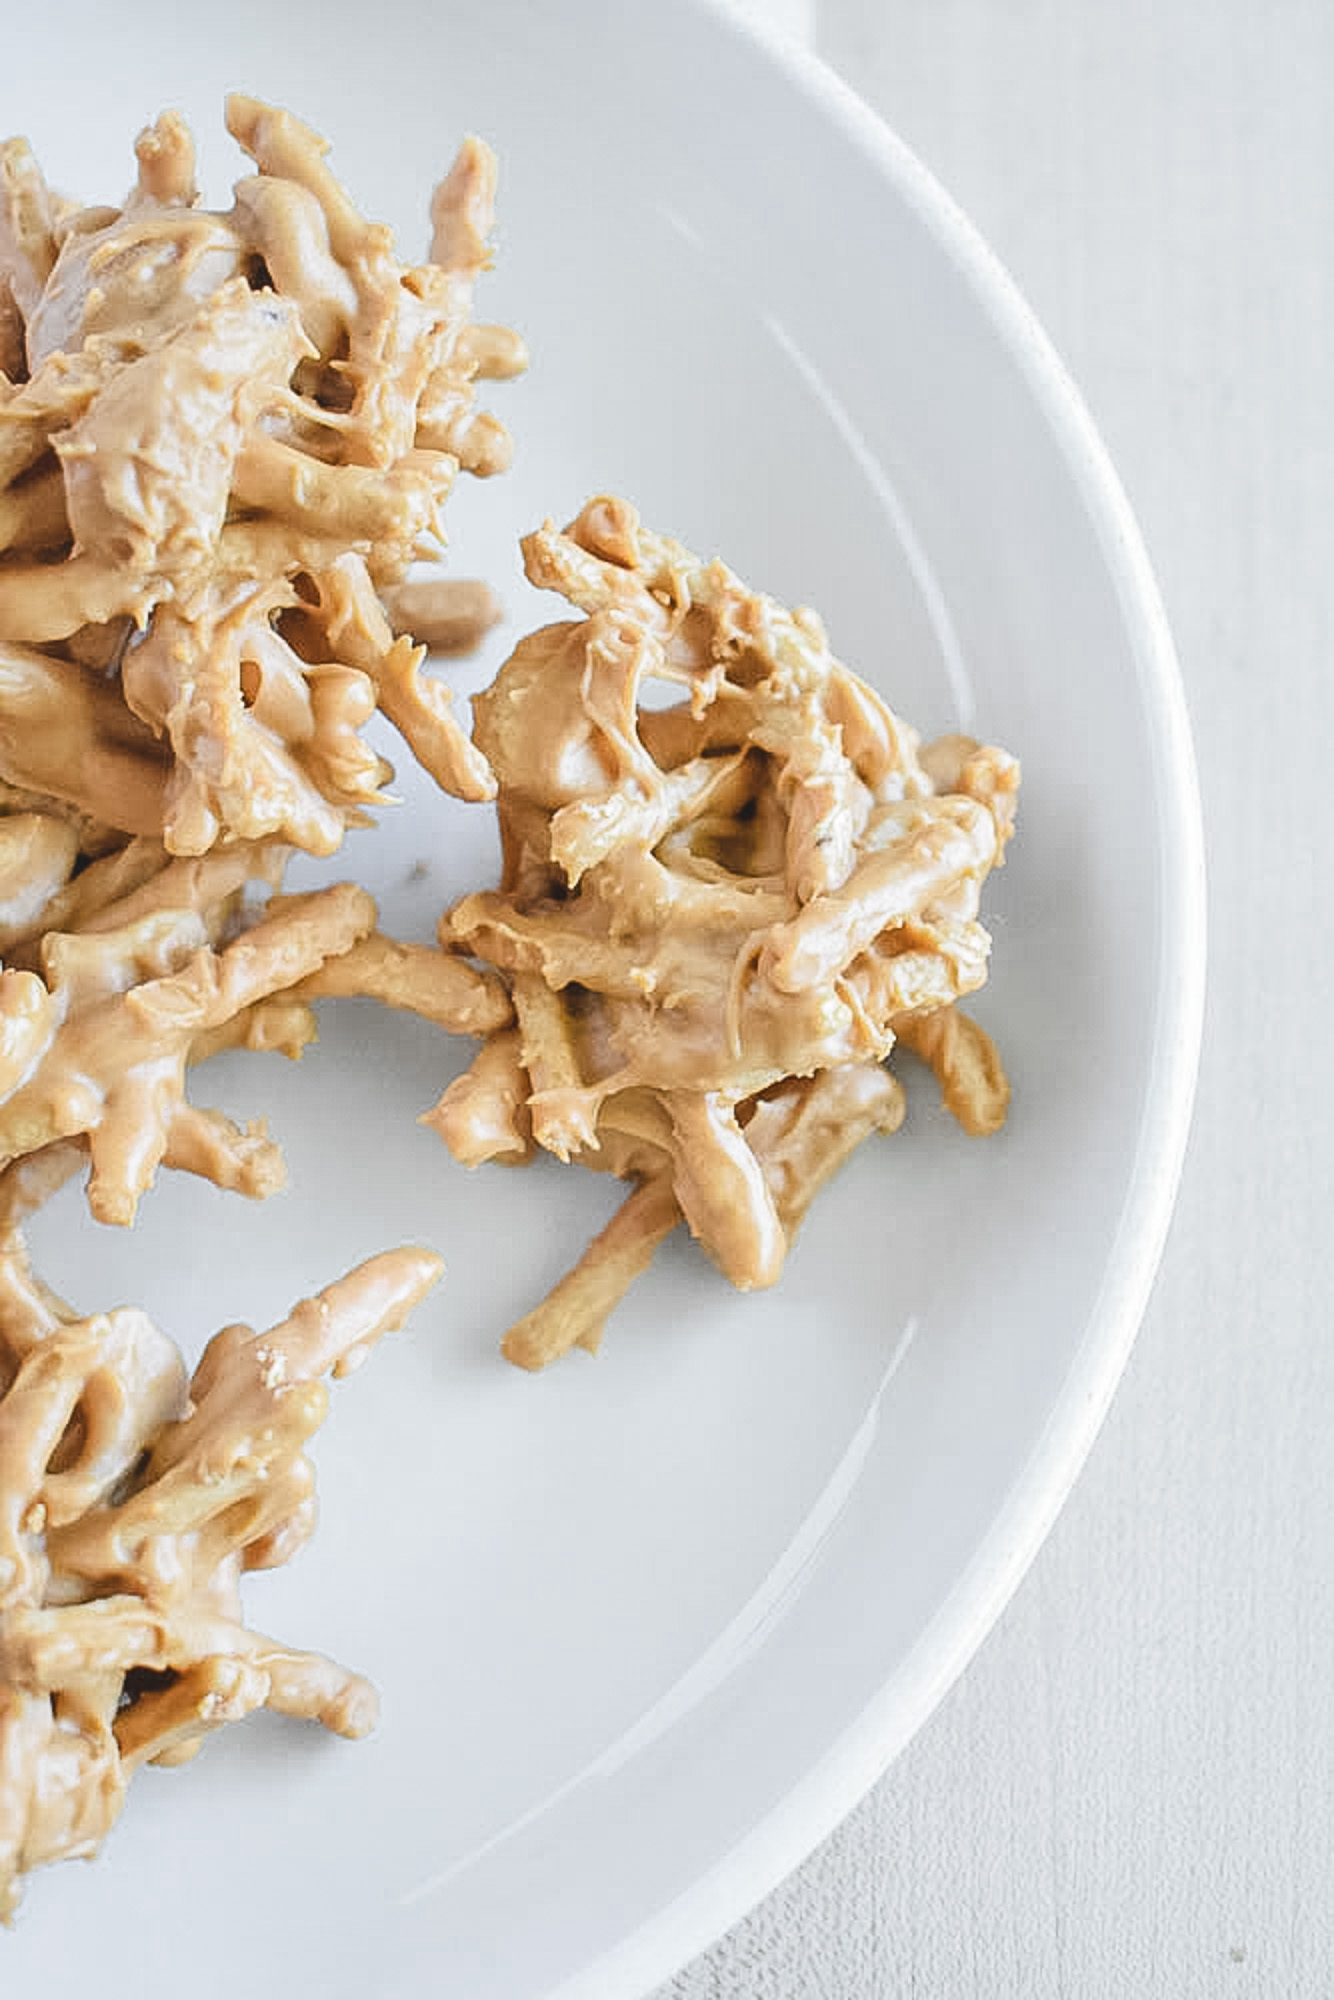
Beyond the Noodles
Chow mein noodles are the classic choice, but I have found that cornflakes or shoestring potato sticks (the canned kind) work just as well. The potato sticks add an extra salty kick that pairs perfectly with the sweet butterscotch!
Fresh Noodles are Key
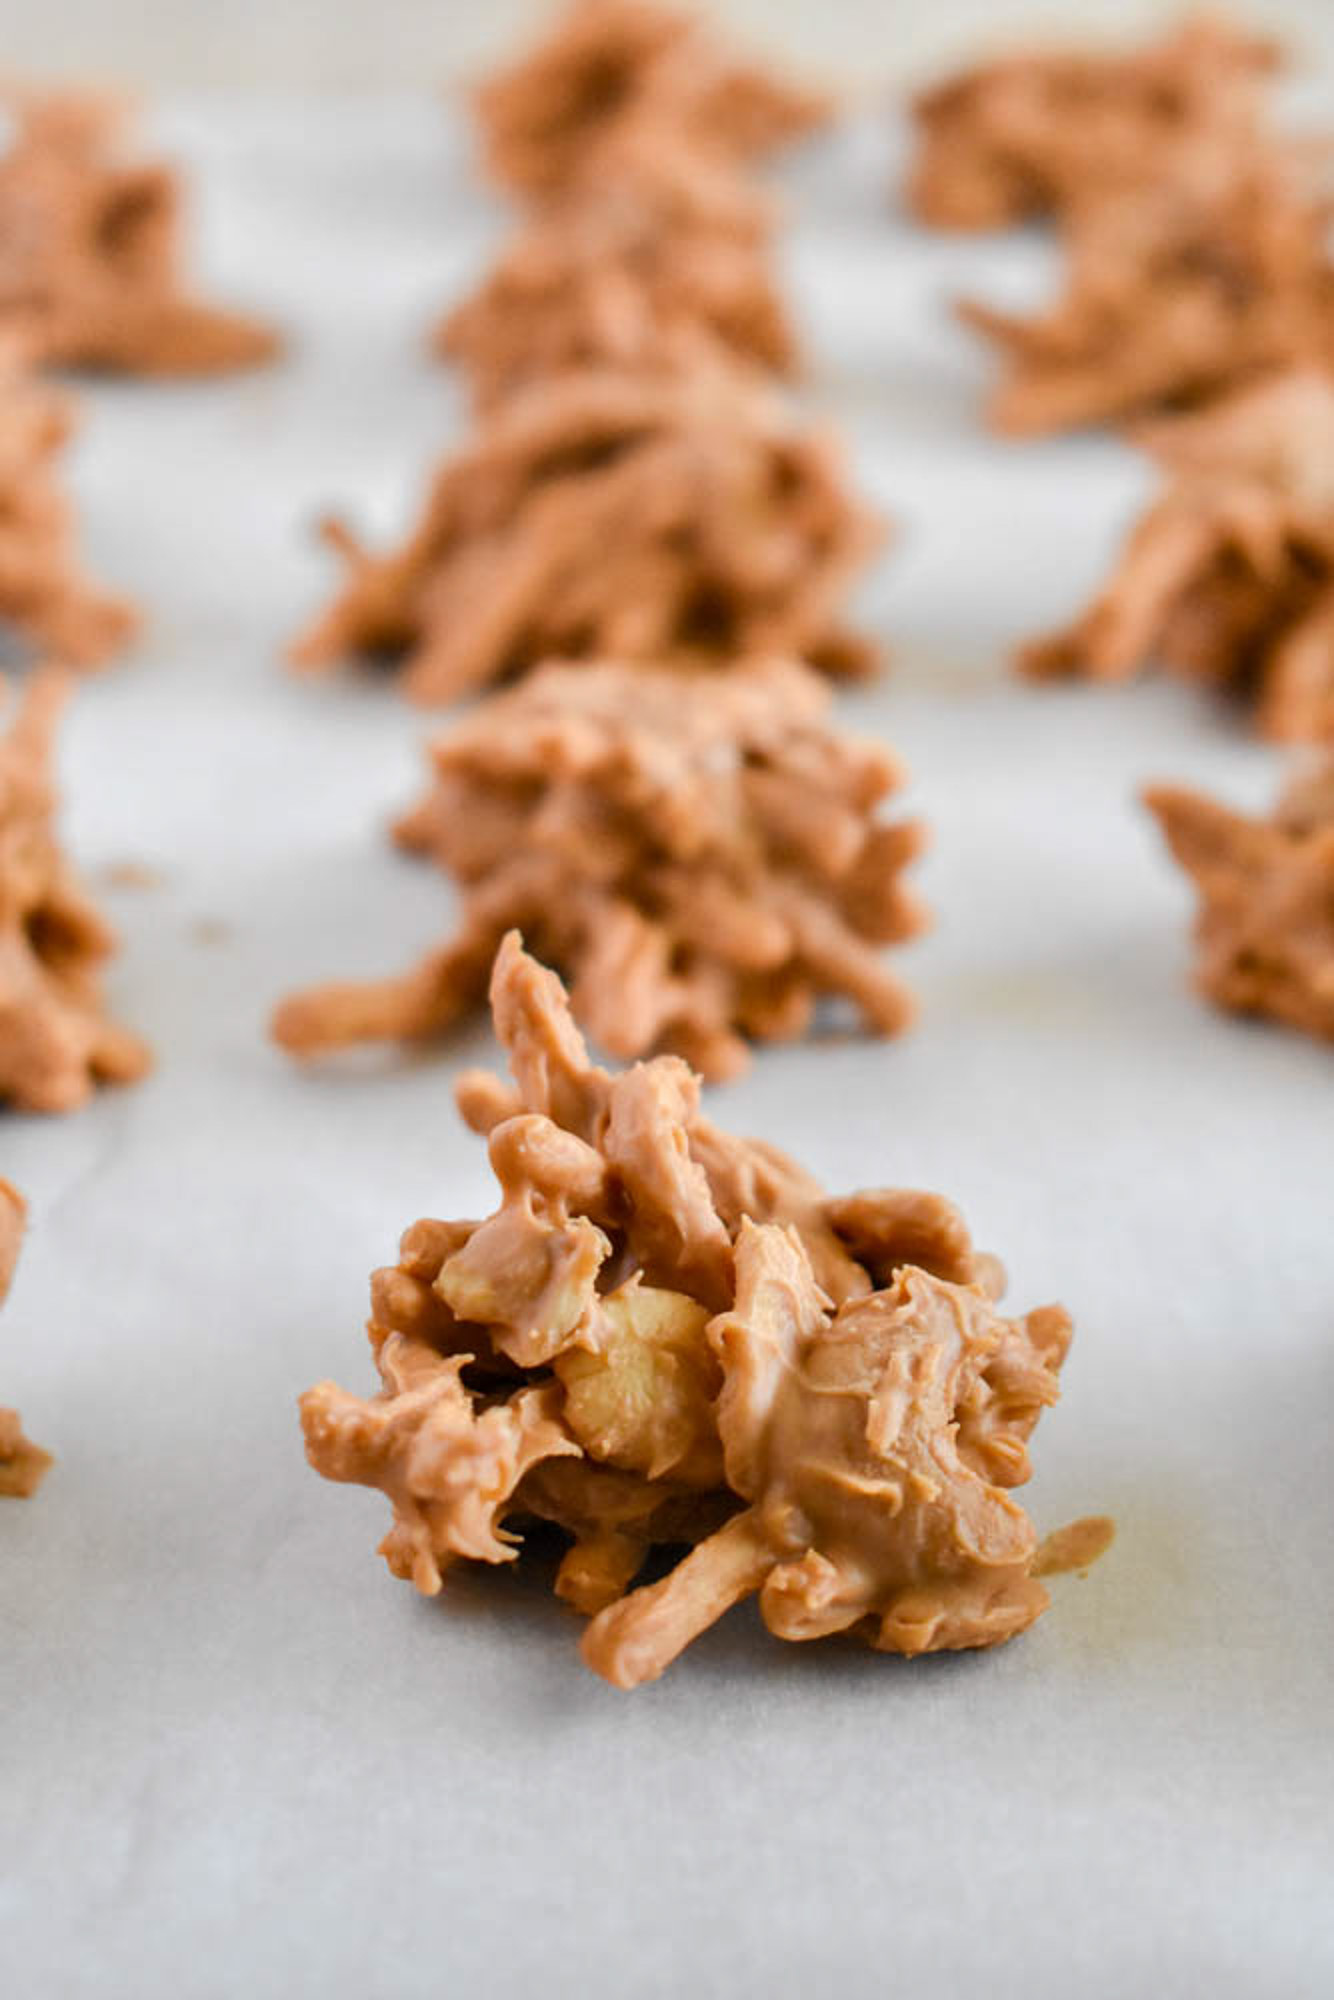
The real heart of the haystack is the chow mein noodle. These are the dry, crunchy noodles usually found in the international aisle, and my biggest piece of advice is to make sure yours are fresh. Stale noodles lose that signature snap and can make the treat feel chewy rather than crispy.
The Pro-Tip for Cashews
To balance out all that sweetness, I love adding cashews. They have a mild, buttery saltiness that pairs better with butterscotch than any other nut. Since cashews can be a bit of an investment, I will let you in on a little secret. I almost always pick up a bag or two at the Dollar Tree. It is the perfect way to get exactly the amount you need without having to buy a giant, expensive tin.
Setting Up for Success
Prep the Workspace
Before I even think about melting the butterscotch, I make sure my workspace is completely ready. Because this is a no bake recipe, the “cooking” happens very fast, and I do not want to be hunting for a sheet of parchment paper while my mixture is starting to set in the bowl. I like to line my baking sheets or even just a clean counter with parchment paper first. It makes cleanup a breeze and ensures my haystacks will not stick.
The Right Tools for the Job
I have also learned the hard way that a large, microwave safe mixing bowl is not negotiable. I need plenty of room to toss the noodles and nuts in the melted butterscotch without them jumping over the sides of the bowl. Once I have my bowl ready, a sturdy spoon for mixing and two small teaspoons for portioning are all the tools I really need to get the job done.
Melting, Mixing, Mounding
Low and Slow in the Microwave
When I am ready to start, I always remind myself to work quickly. I melt my butterscotch chips in the microwave in short 30 second intervals, and I make sure to give them a good stir between each session. I am looking for them to be just melted and smooth because I have learned that if I overheat them, the mixture can become grainy. That makes it much harder to coat the noodles properly.
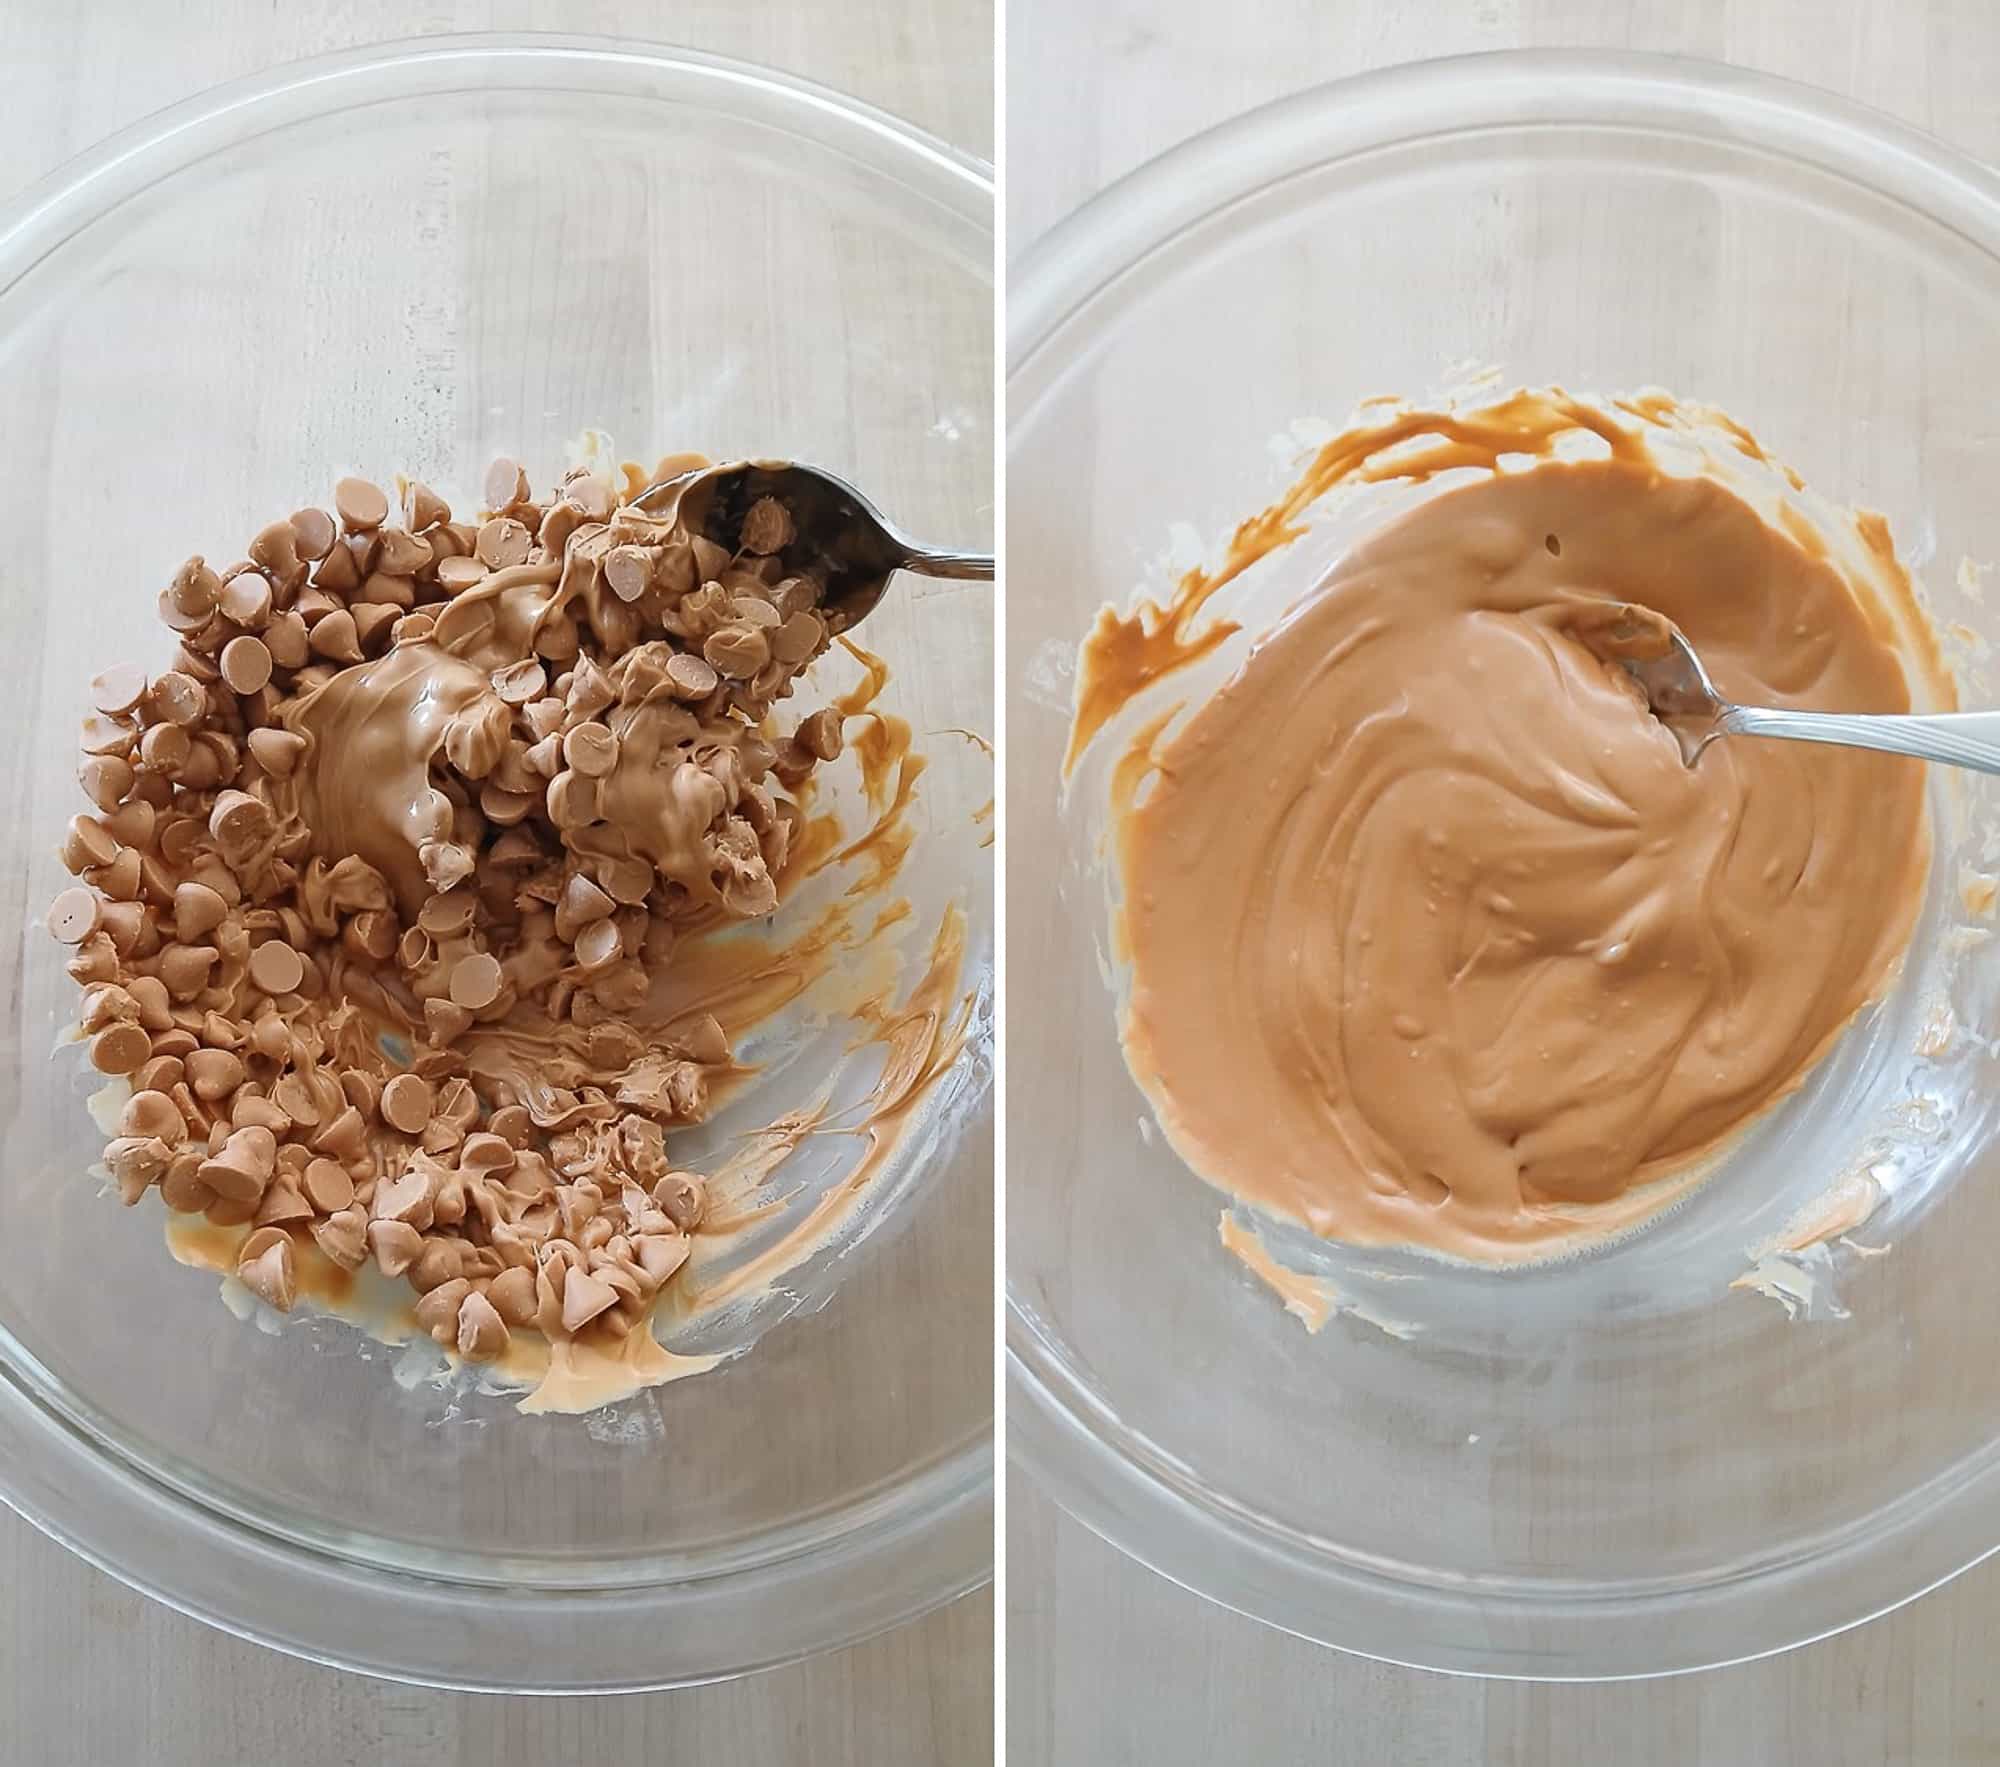
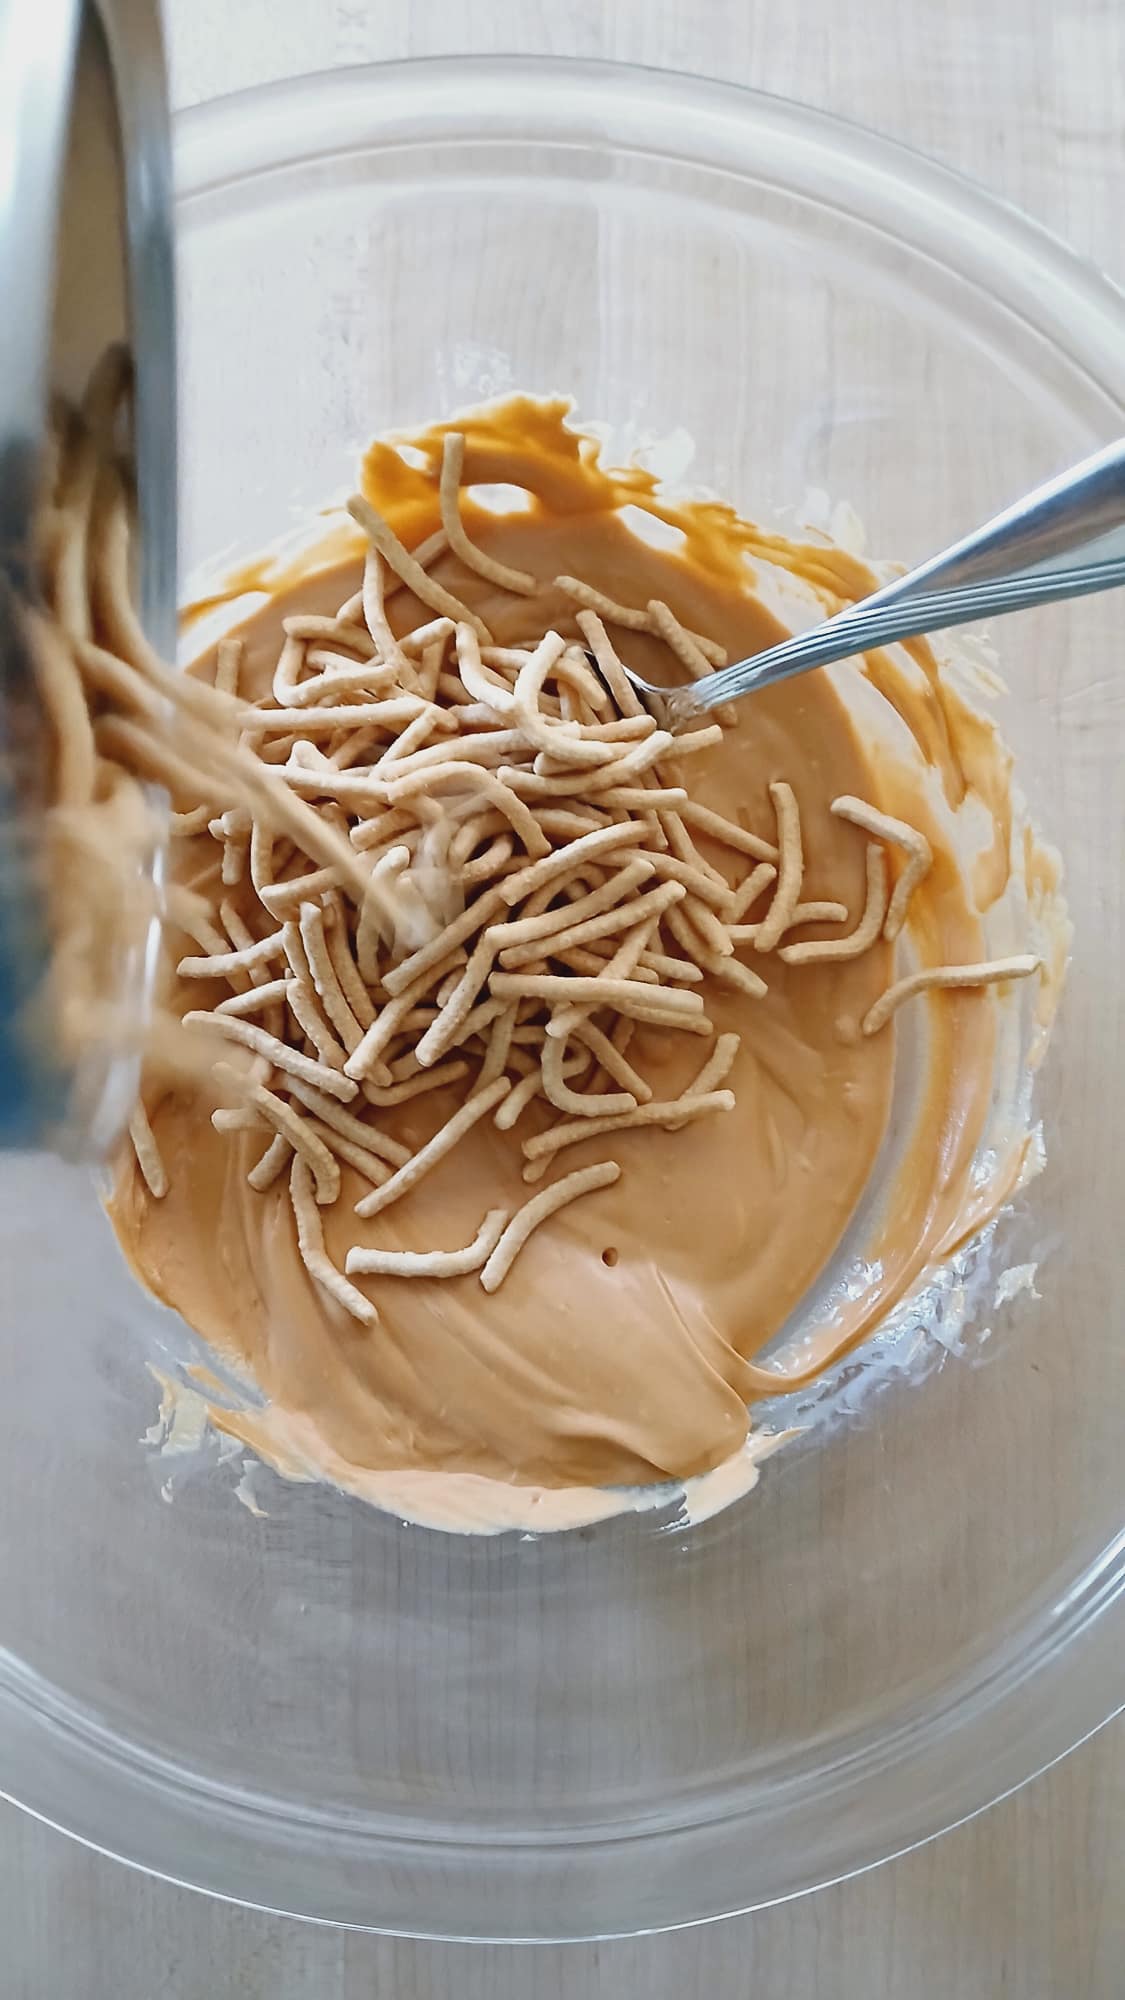
A Gentle Fold
Once that butterscotch is silky, I gently fold in the noodles and the cashews. I try to be careful not to crush the noodles too much because I love those long, spindly shapes since they are what give the haystacks their character.
Portioning the Perfect Bite
To form the mounds, I use two teaspoons to drop the mixture onto the parchment paper. I use one spoon to scoop and the second to scrape it off, which gives me much more control. I usually aim for the size of a golf ball because these are quite rich, and for me, a smaller portion is the perfect bite.
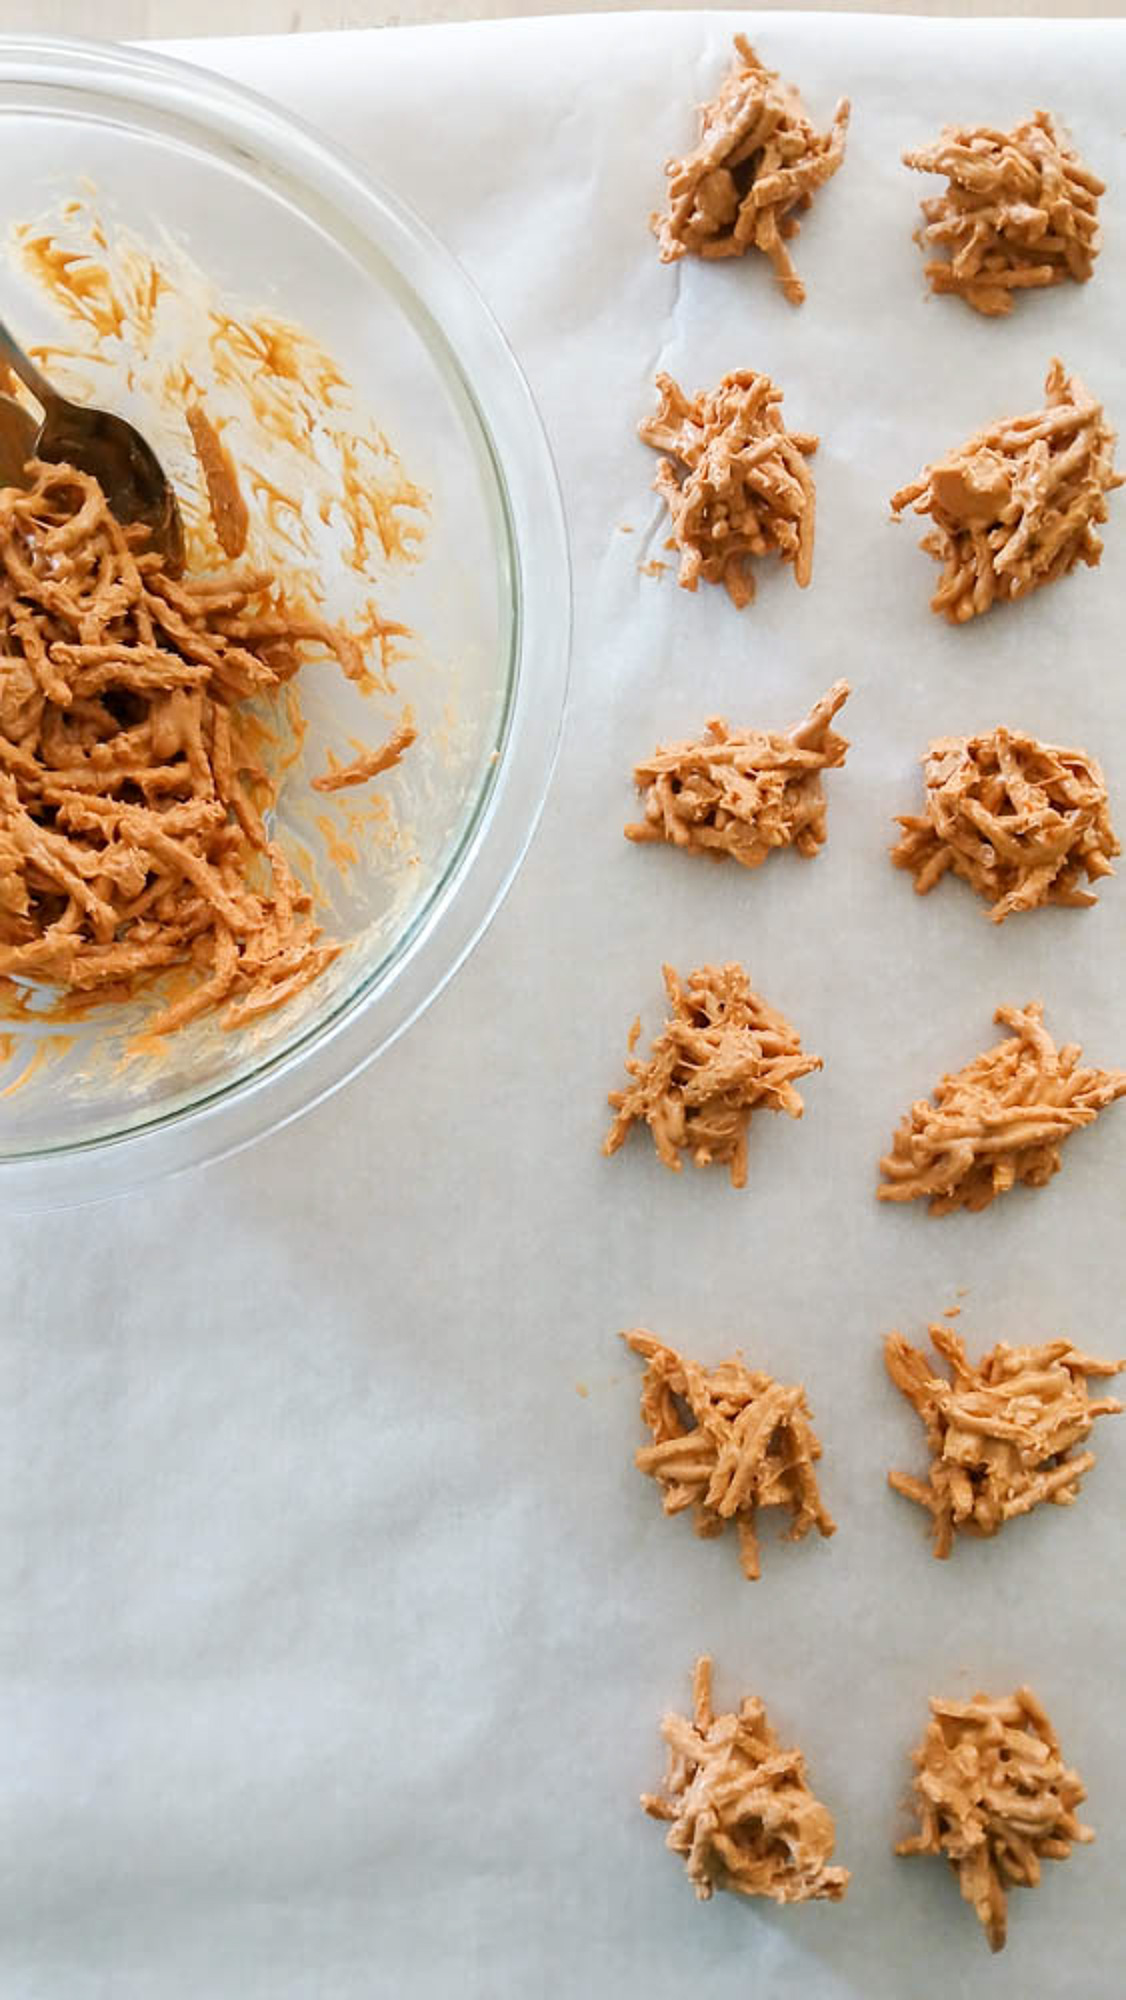
I often have to keep a close eye on the kitchen while I work. My husband is notorious for sneaking a haystack off the parchment paper before they have even had a chance to set. They really are hard to resist when the butterscotch is still warm and melty. If I notice the mixture in the bowl starting to thicken too much before I am finished, I just pop it back in the microwave for about 20 seconds to loosen it up again.
The Finishing Touch: The Waiting Game
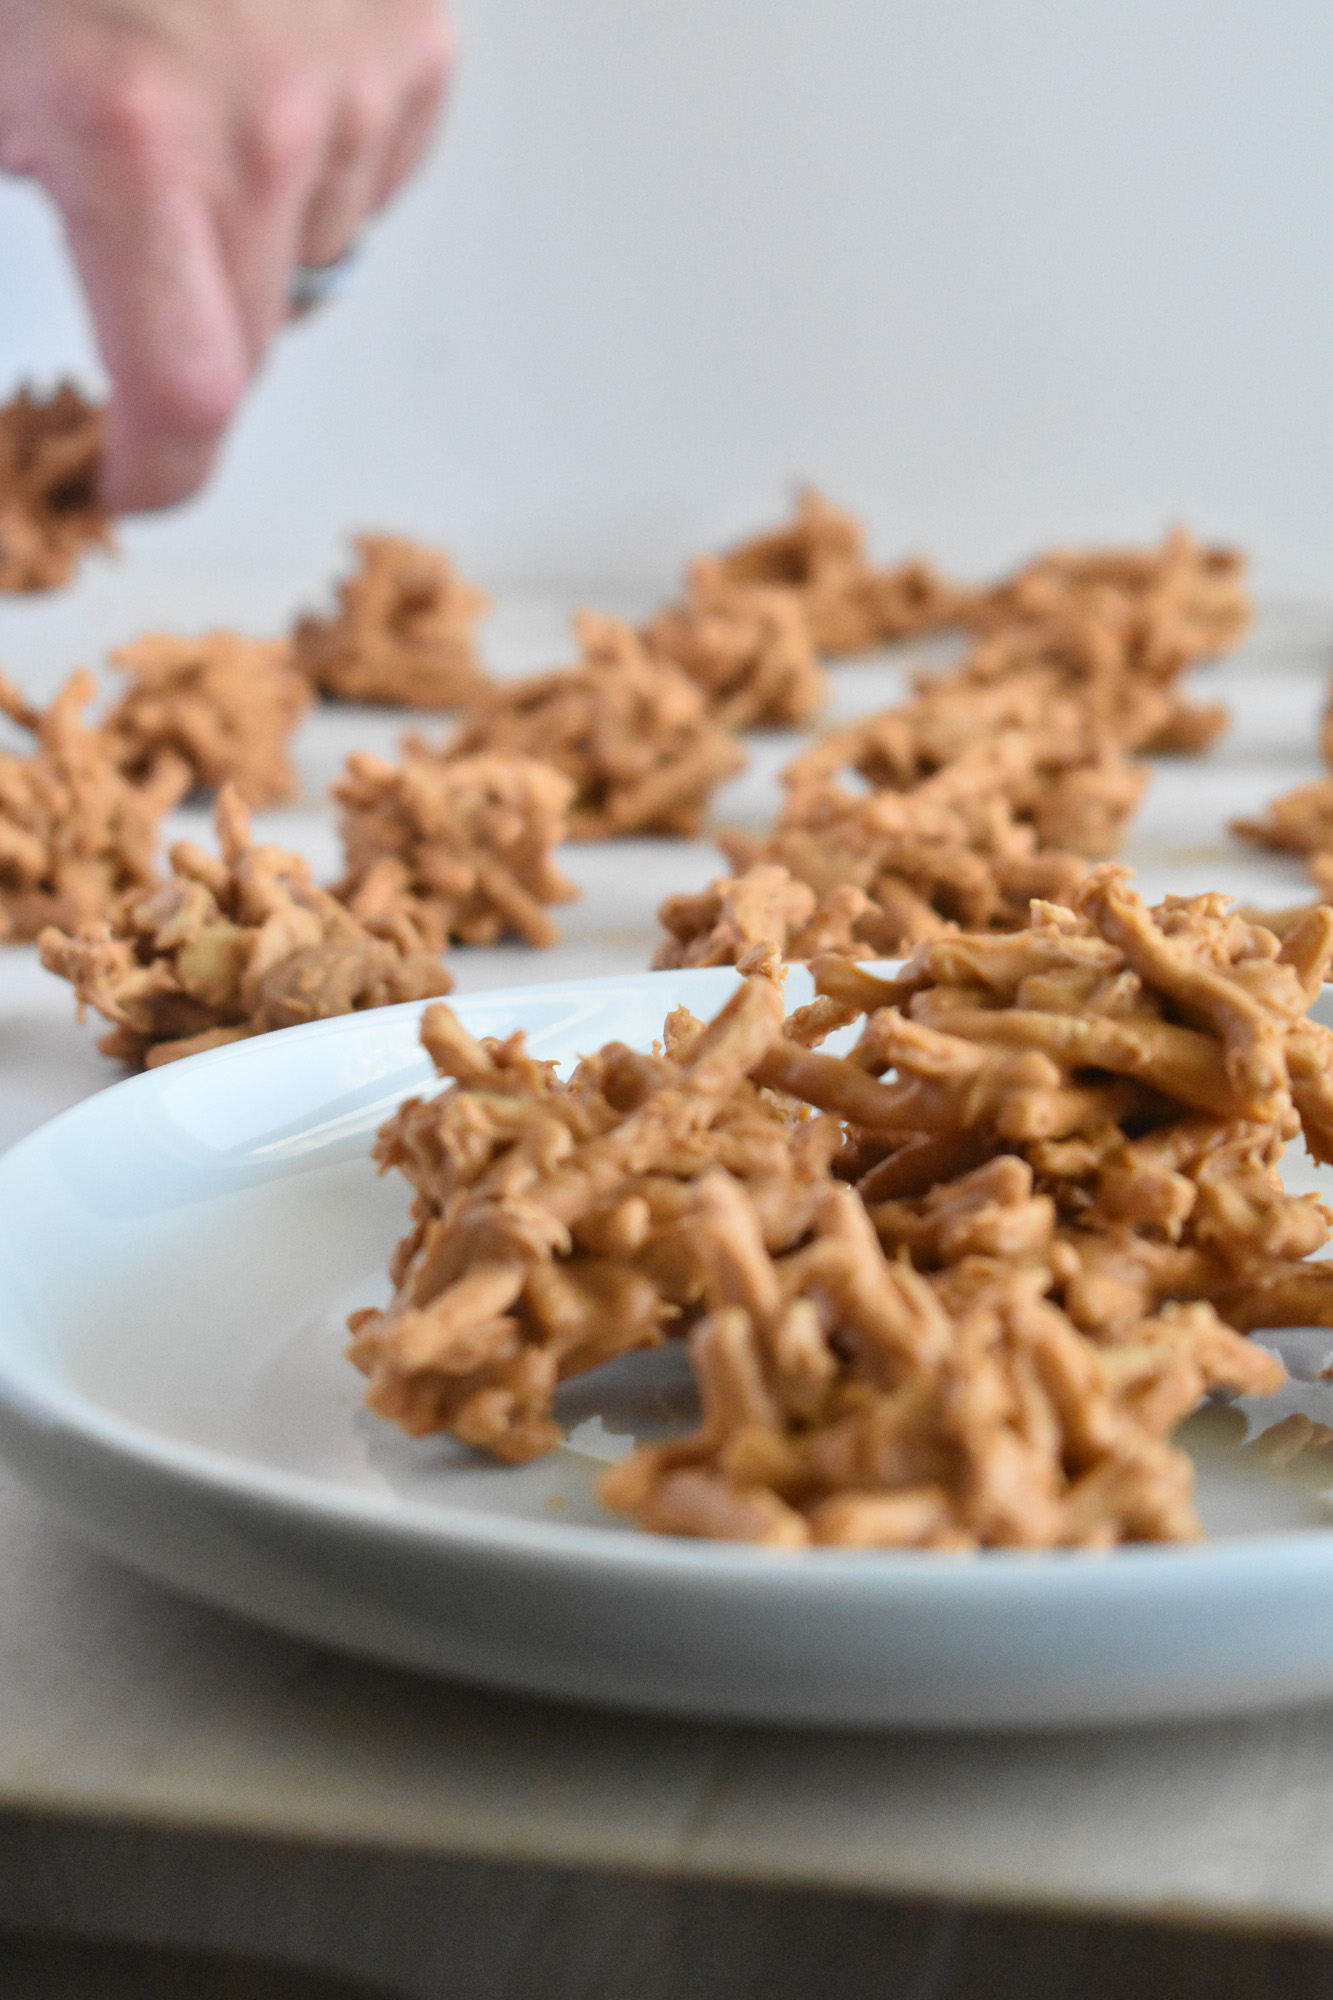
Once my haystacks are all portioned out, the hardest part begins: waiting for them to firm up. While it is tempting to dive in right away, I know the butterscotch needs time to fully set so the haystacks hold their shape. At room temperature, this usually takes me about 30 to 45 minutes, depending on how warm my kitchen is.
The Quick Chill Method
If I am in a hurry or if my house is on the warmer side, I put the parchment paper on baking sheets and slide them into the refrigerator for about 15 minutes. This speeds up the process and gives the haystacks a great, firm snap. I personally think they are at their best when they have had that little bit of chill time. I know they are ready when they no longer feel tacky to my touch and lift easily off the parchment paper without leaving any butterscotch behind.
Notes for Success
While I find these incredibly simple to make, I have noticed a few small details make all the difference in getting that perfect professional looking crunch. I always give my chow mein noodles a quick taste test before I start because I have found that stale noodles lose their snap once they are coated.
If I notice the mixture in my bowl beginning to set before I have finished scooping, I just pop it back in the microwave for fifteen seconds to loosen everything up again. Finally, I always rely on the tacky test. I give the top of a haystack a light tap before moving them, and if they still feel sticky I know it needs a few more minutes to firm up so it does not fall apart when it is picked up.
Make it Your Own
Easy Ingredient Swaps
One of the reasons this recipe has stayed a favorite of mine for so many years is how easy it is to customize. While I am a purist for the butterscotch and cashew combination, I have swapped things out many times based on what I have in my pantry. If I am out of cashews, I find that peanuts or honey roasted peanuts are fantastic substitutes. If I need a nut free version for a party, I leave them out entirely and just add a few more noodles to keep that signature shape.
The Peanut Butter Variation
I usually make these without peanut butter, but if I’m in the mood for it, I’ll melt a half cup of creamy peanut butter right along with my baking chips. It adds a great richness to the base. I also love playing with extra mix-ins like mini marshmallows or pretzel pieces. I’ve found that the key is to keep those extra additions between a half and three quarters of a cup. That way, there is still enough melted coating to hold everything together. If my mixture ever feels a little too soft after I have added my favorite extras, I just remind myself that a quick ten minute chill in the fridge is the ultimate fix to help everything bond together.
Mix & Match
I love playing with the coating. Try a 50/50 split of butterscotch and peanut butter chips, or go for a “Reese’s” style with half chocolate and half peanut butter. Even white chocolate mixed with butterscotch is a creamy winner!
Keep it Fresh
If I manage not to eat them all in one sitting, I find these haystacks store beautifully. I keep mine in an airtight container at room temperature, where they stay crunchy for up to a week. However, if my kitchen feels a bit warm, I highly recommend keeping that container in the fridge. My family actually prefers the texture when they are cold, and it ensures the butterscotch stays perfectly firm.
I also love to freeze these when I want to get a head start on my holiday baking. I just tuck them into a freezer safe container for up to two months. When I am ready to serve them, I let them sit on the counter for a few minutes. I sometimes see a little moisture on the surface as they thaw, but I do not worry because I have found they firm right back up as they reach room temperature.

No-Bake Butterscotch Haystacks
Equipment
- Parchment paper
- Large microwave-safe mixing bowl
- Large spoon for mixing
- Teaspoons for dropping
Ingredients
- 11 ounces of butterscotch baking chips | 312g
- 5 ounce can of chow mein noodles | 141g
- 1/2 cup of chopped cashews | 2.5 ounce | 70g
Instructions
- Prepare your workspace: Line your countertop or baking sheet with parchment paper to prevent sticking.
- Melt the butterscotch chips: In a large microwave-safe bowl, melt the butterscotch baking chips in 30-second intervals, stirring between each, until smooth. Be careful not to overheat or burn the chocolate. You can also melt the butterscotch using a double boiler if you prefer.11 ounces of butterscotch baking chips | 312g
- Coat the noodles and nuts: Add the chow mein noodles and chopped cashews to the melted butterscotch. Gently stir or fold the mixture to evenly coat the noodles, being careful not to break them too much.5 ounce can of chow mein noodles | 141g1/2 cup of chopped cashews | 2.5 ounce | 70g
- Form the haystacks: Drop a spoonful of the mixture onto the parchment paper. Use the spoon to shape them, if needed, into small mounds resembling haystacks.
- Let them set: Allow the haystacks to harden at room temperature, or place them in the refrigerator for faster setting.
- Store and serve: Once set, transfer the haystacks to an airtight container. They can be stored at room temperature, but we prefer keeping them in the fridge for a firmer, chilled texture.
Did you try this recipe?
Share your experience in the comments below!
I’d love to hear how it turned out
Let’s see your creations!
Share your photos
Tag me @flourtinbakes on social media