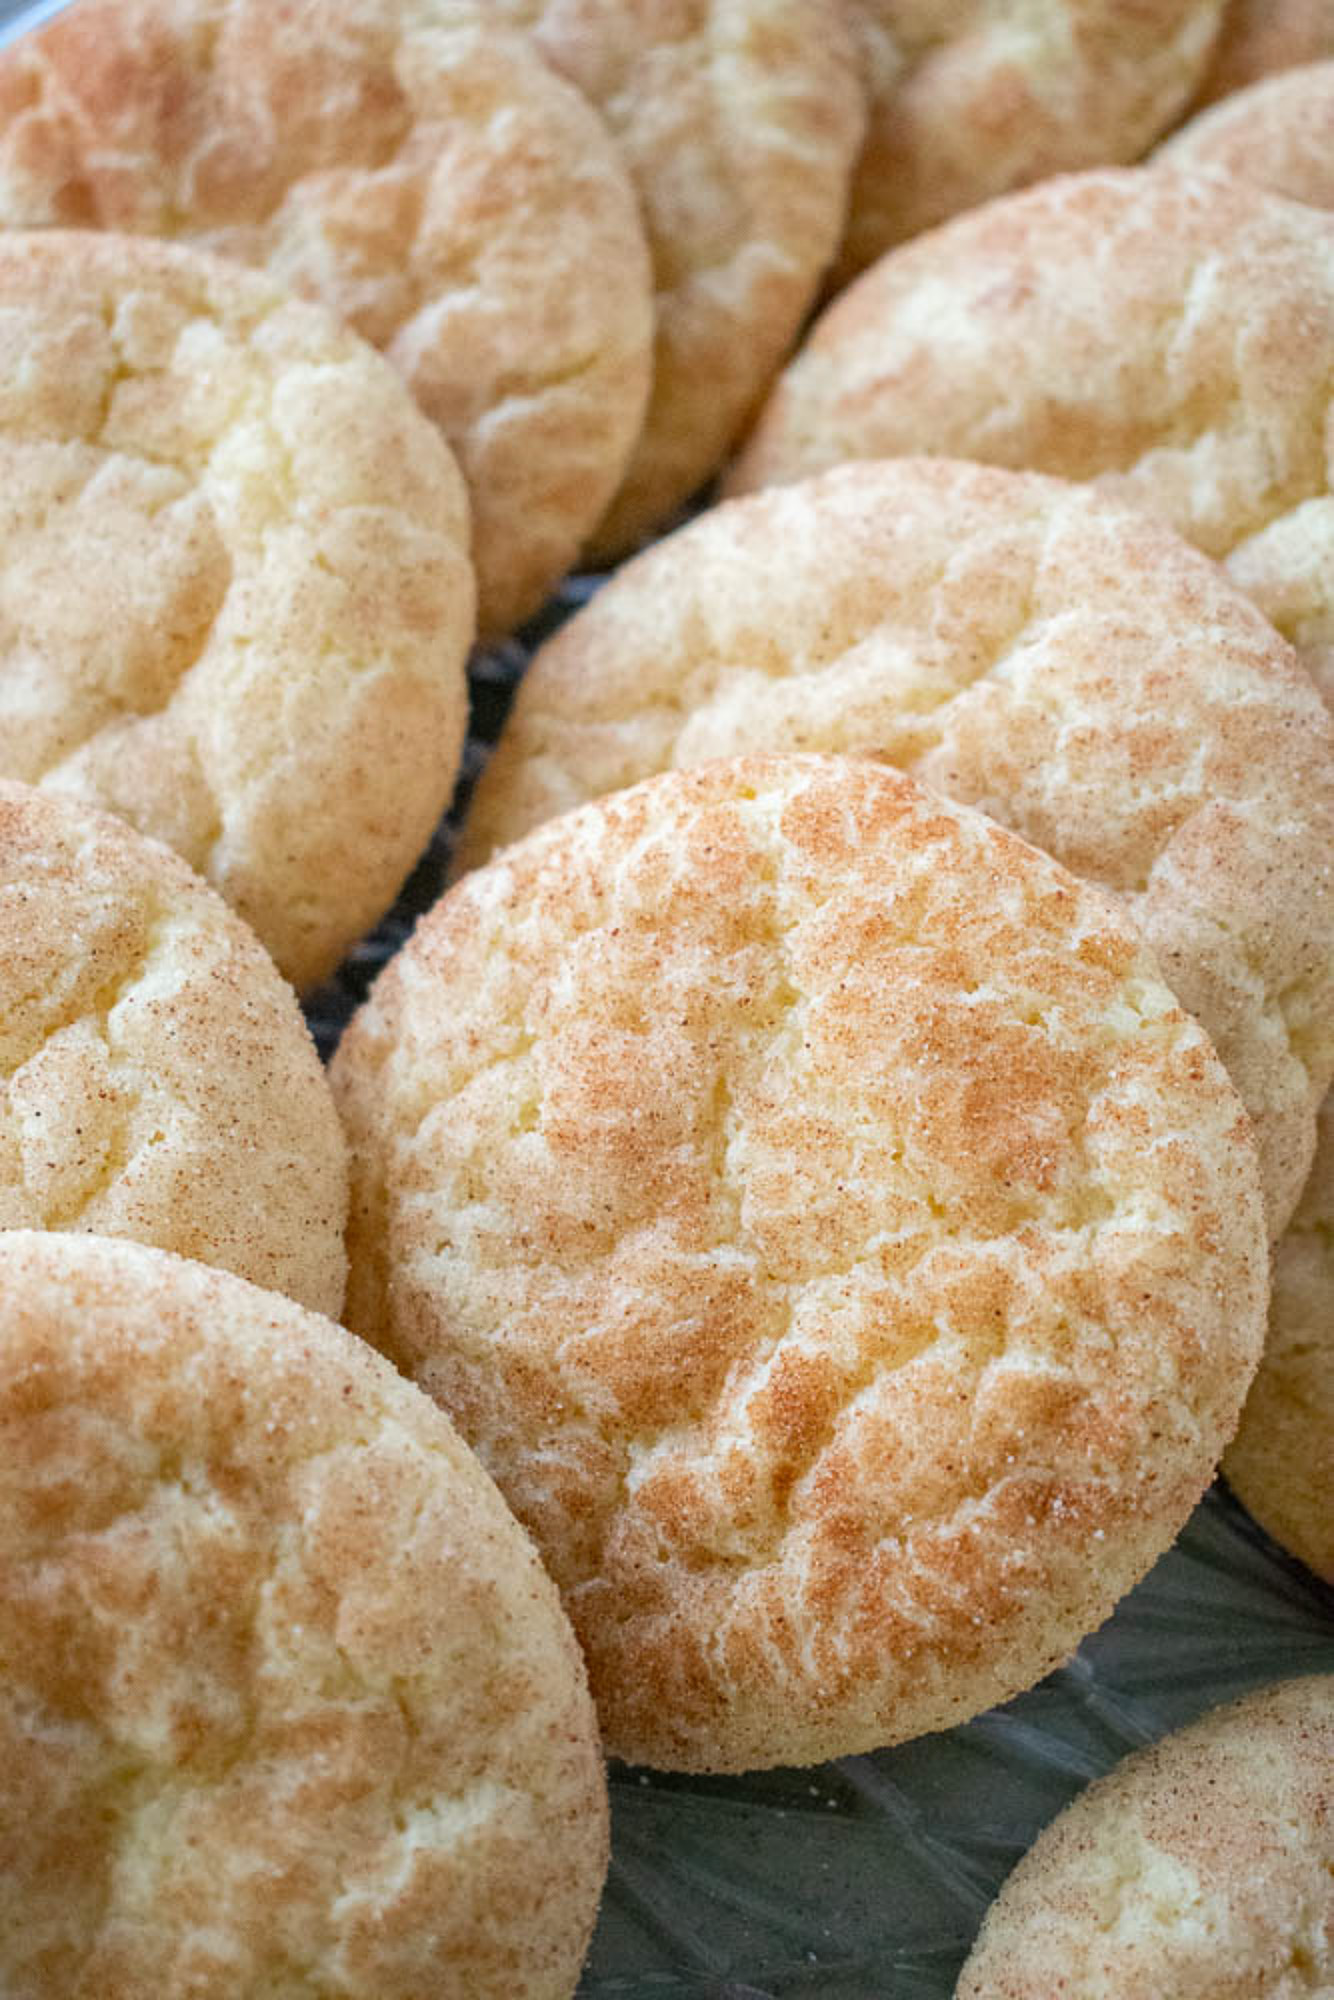
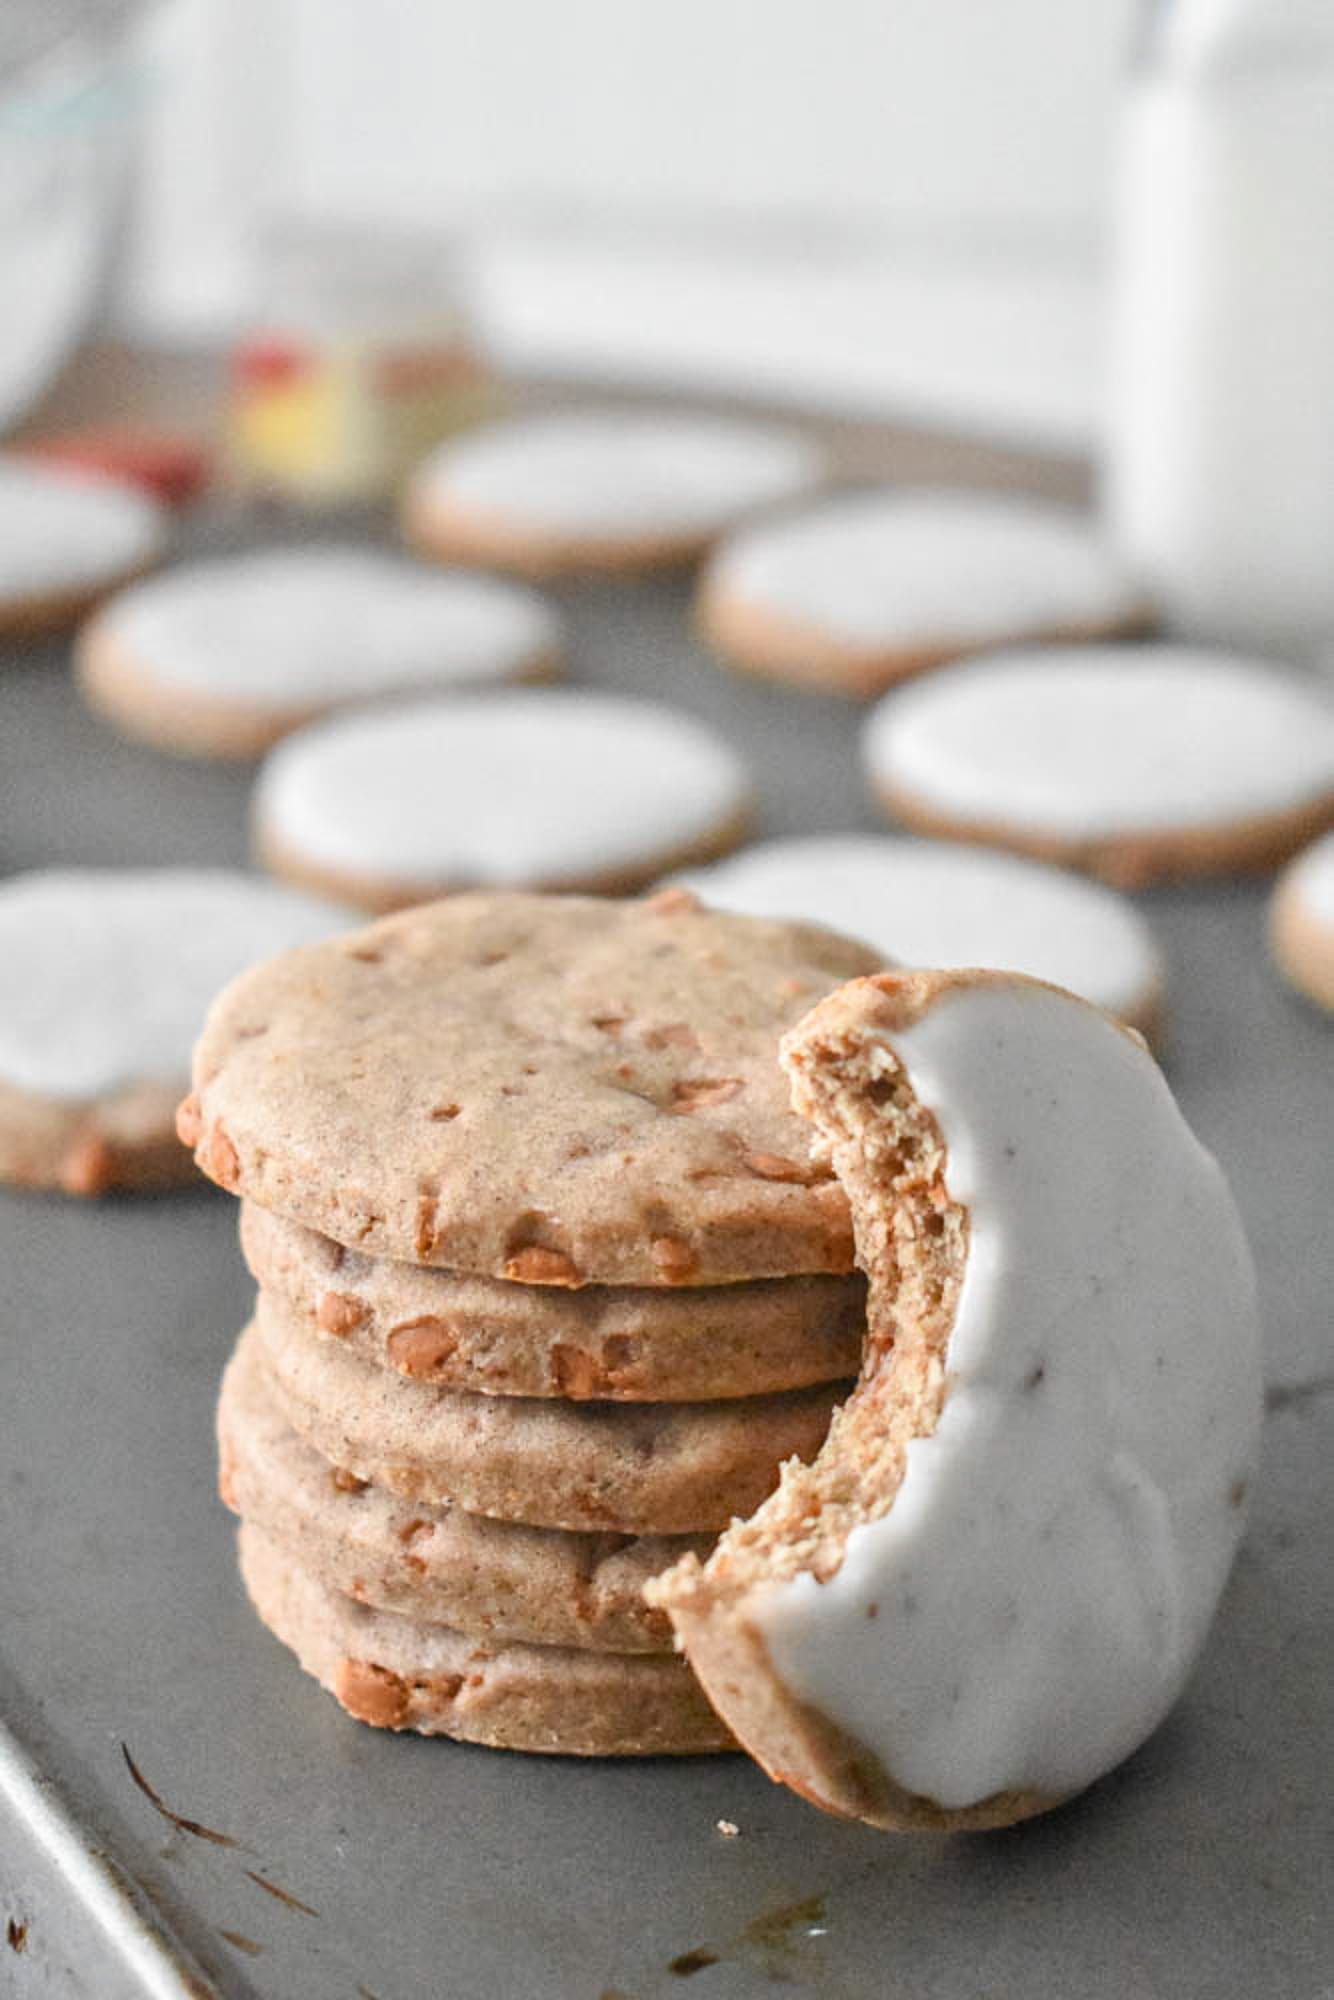
Whipped Shortbread Cookies
There is something so incredibly nostalgic about a cookie that doesn’t just crumble but actually dissolves the moment you take a bite. These whipped shortbread cookies are a permanent fixture in my kitchen because they are so simple to make, but they feel like something special.
Unlike traditional shortbread, which is dense and crumbly, whipping this dough for a full ten minutes incorporates enough air to give it a light, melty texture. If you have ever had a shortbread that felt a bit too heavy, this version is exactly what you need.
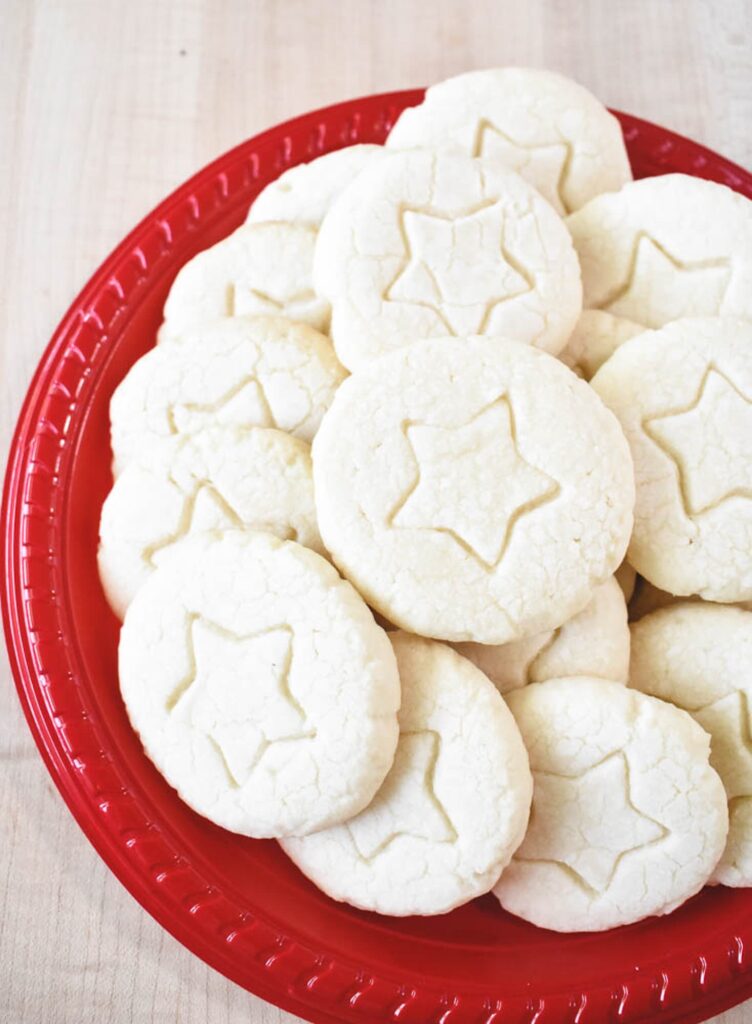
The magic here is really just about having a little patience with your mixer. By spending those extra minutes whipping the butter, we are turning basic pantry staples into a cloud like dough that stays perfectly pale and buttery. Whether I am piping them into rosettes or using my favorite mini cutters to leave a little imprint on top, they always feel like a special treat even if I am just grabbing one for a quick snack.
The Shortbread Essentials

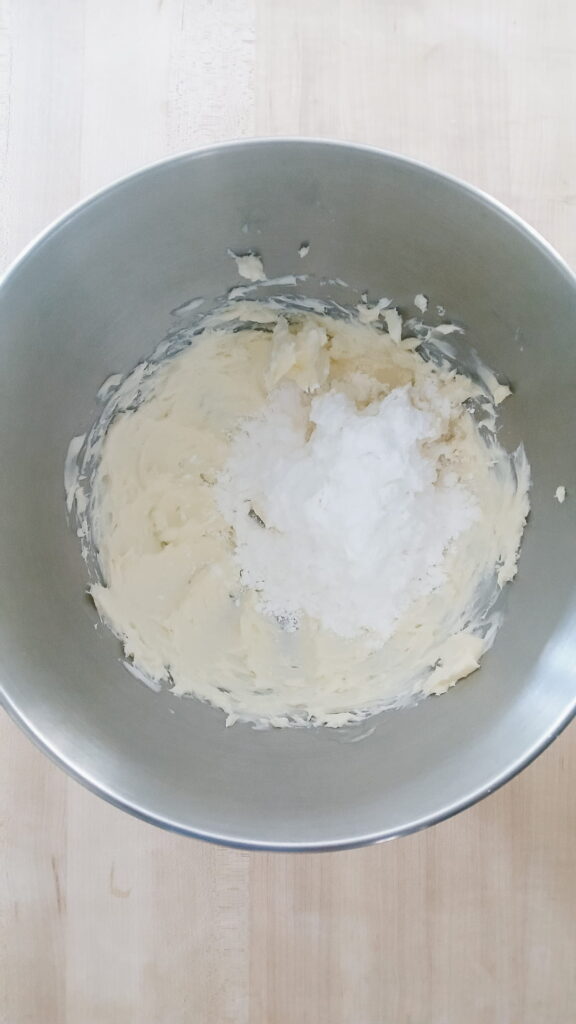
I always recommend using unsalted butter for these cookies because it gives you total control over how salty the dough becomes. Using powdered sugar instead of granulated sugar is also a must. I always sift my sugar before adding it to the butter because it helps everything mix in much more smoothly and helps create that airy, whipped consistency we are after.
Keeping the Cookie Shape
The temperature of your butter is everything here. You want it to be soft but not so warm that it is starting to melt. If the butter is too oily, the cookies will spread in the oven and lose that beautiful shape.
Balancing Flavor and Texture
Since we are using a combination of vanilla and almond extracts, the flavor is very rich. Almond extract is quite strong, so I only use a small amount to complement the butter without overpowering it. The last little addition is the cornstarch. It might seem like a small amount, but it is what gives the cookies that signature melt in your mouth feel. It works with the flour to keep the texture delicate instead of crunchy.
Can I Skip the Cornstarch?
I don’t recommend it! Cornstarch is what gives these cookies a meltaway texture. It softens the proteins in the all-purpose flour, preventing the cookie from becoming tough.
Preparing for a Melt in Your Mouth Cookie
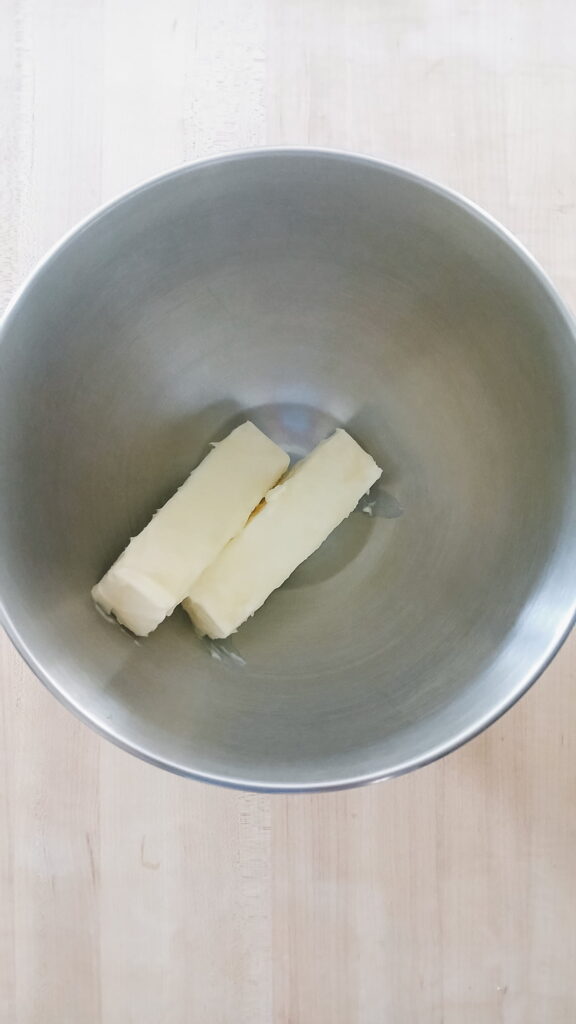
Before I even think about turning on the mixer, I make sure my butter has had enough time to sit out on the counter. For a whipped cookie, you need the butter to be truly room temperature so it can aerate properly. If it is even a little bit too cold, you will struggle to get that light and fluffy texture that makes these cookies so special.
My Favorite Tips for Consistency
I highly recommend using an oven thermometer. I have learned the hard way that most ovens are a bit finicky and the display on the front isn’t always telling the truth. Since these cookies are meant to stay pale and delicate, knowing your exact oven temperature is the only way to ensure they bake evenly without getting too dark on the bottom.
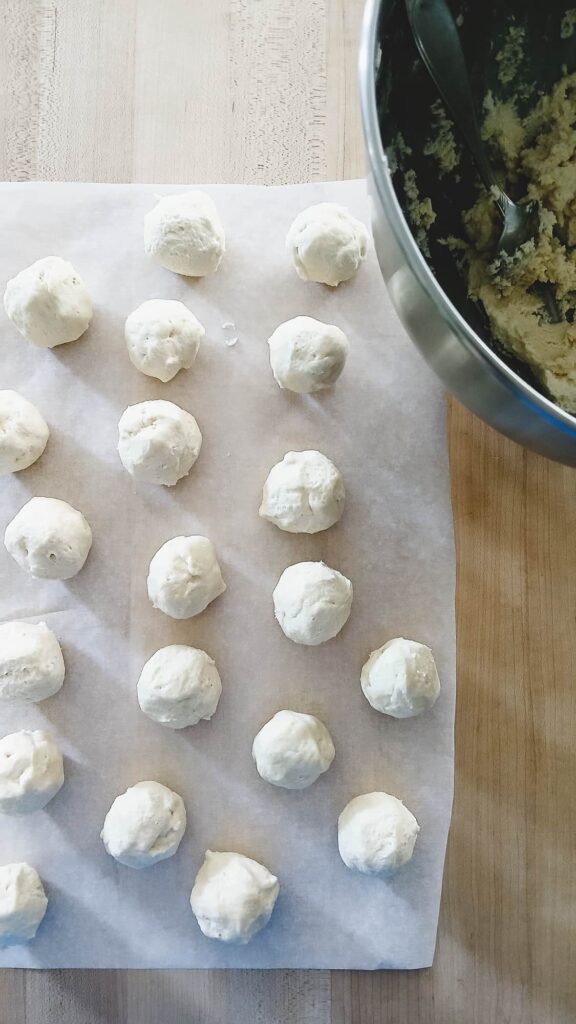
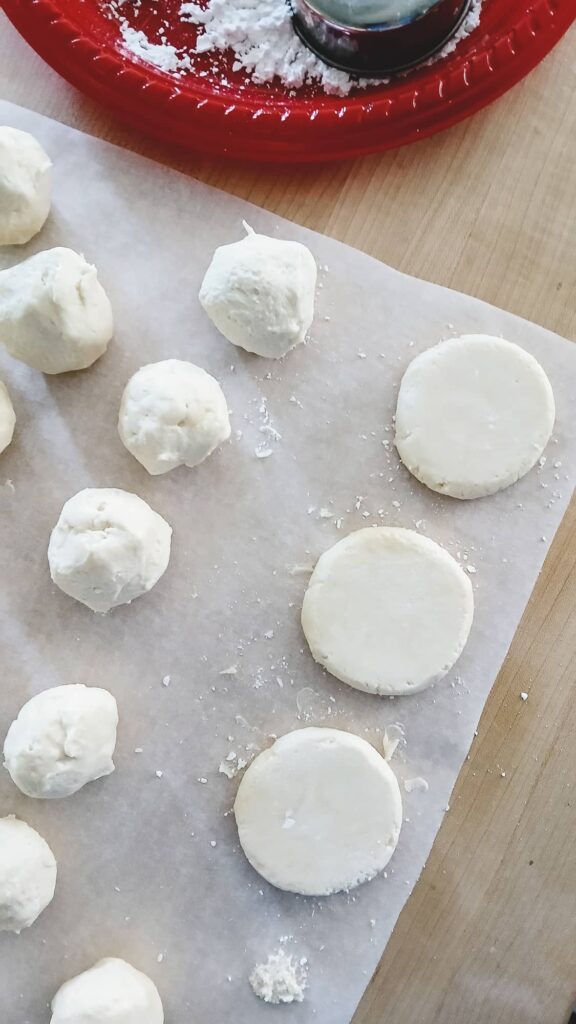
To keep things consistent, I always rely on my kitchen scale to portion my dough into balls that weigh between 20 and 22 grams. If you have a scale, it is the best way to ensure every cookie on the tray is the same size so they all finish baking at the exact same time. However, if you don’t have one, please do not let that stop you from making these! You can easily just aim for a rounded tablespoon of dough for each cookie. While you are getting everything ready, go ahead and line your baking sheets with parchment paper. It prevents sticking and makes the cleanup much faster once the baking is done.
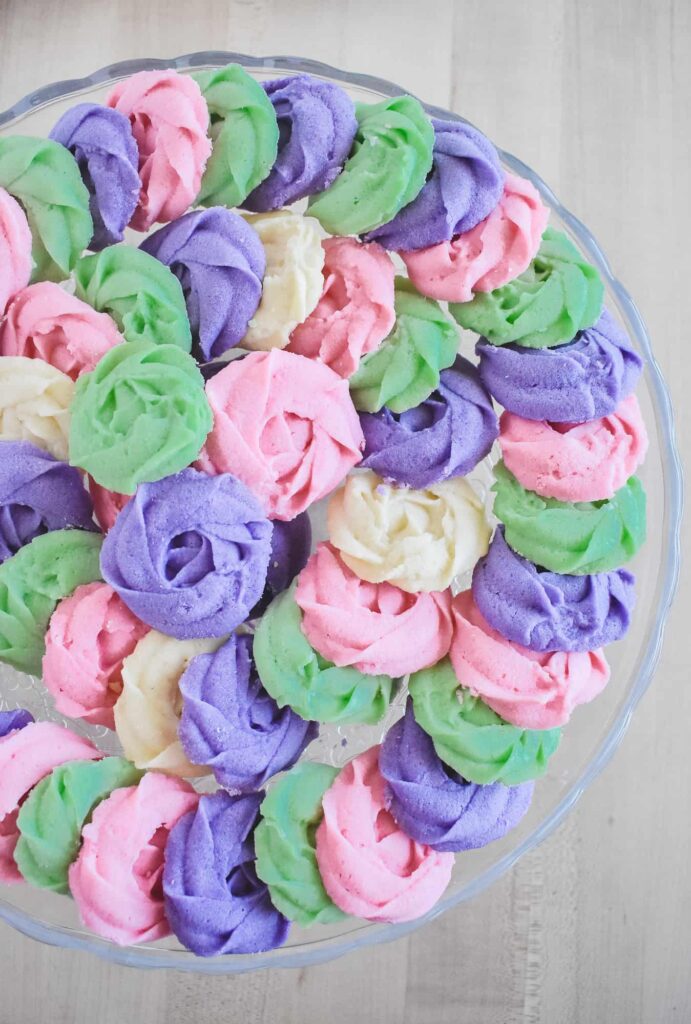
Adding a Pop of Color
I have been asked before if you need to make separate batches of dough to get different colors and the answer is a big relief. You definitely do not have to do that much extra work. I handle the coloring in two different ways depending on what I have planned for my cookies that day.
Coloring the Whole Batch
If I want every cookie in my batch to be the exact same shade, I find the easiest time to add my food coloring is right when I add the extracts. This allows the mixer to do all the heavy lifting for me. I just add a few drops of gel coloring and it whips right into that butter and sugar mixture to create a perfectly even tone throughout the entire bowl.
Creating Multiple Colors
When I want a variety of colors, I wait until my dough is completely finished and the flour is fully incorporated. Once the dough is ready, I divide it into separate small bowls and then add a tiny bit of gel color to each one. This way I can have three or four different colors without having to wash the mixer bowl four times.
Mix with a Gentle Touch
When I am adding color to these separate bowls, I always fold it in by hand with a spatula instead of stirring. I am very gentle during this part because I do not want to lose all that beautiful air I spent ten minutes building up. I just fold the dough over itself until the color is uniform and then I move right into my favorite shaping method. Try to avoid overmixing here so your cookies stay as light and fluffy as possible.
Mixing the Dough
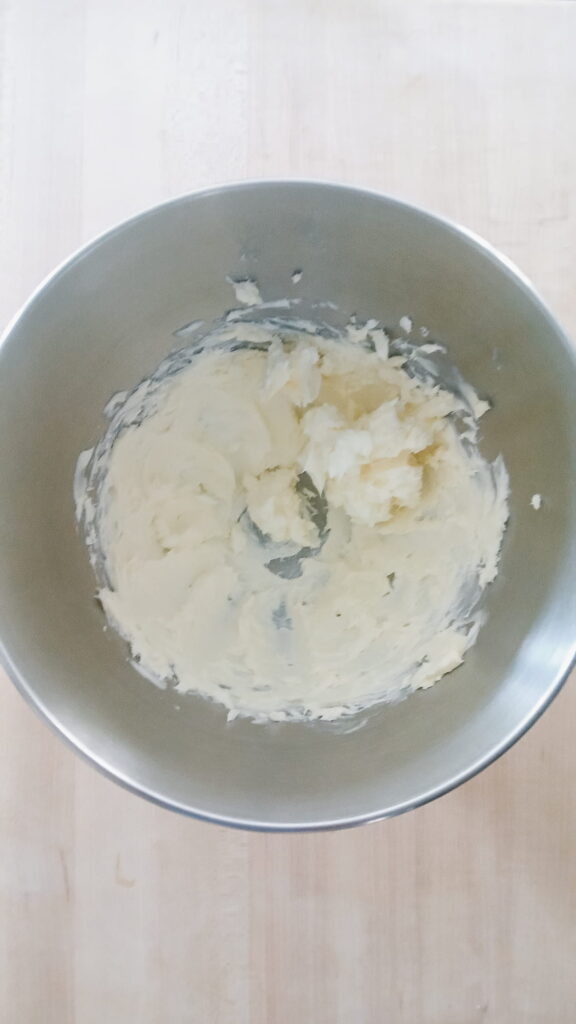
I start by putting my room temperature butter into the mixer and giving it a quick whip for about a minute. You want to make sure the butter is completely smooth and creamy before you add anything else to the bowl. Once that is ready, I add in the sifted powdered sugar and get ready for the long haul.
The 10 Minute Whip
This is the part where you really have to trust the process. You are going to turn that mixer on and let the butter and sugar whip together for a full ten minutes. I know that feels like a lifetime when you are standing in your kitchen, but that long whip is exactly what builds the air into the mixture to give you that melt in your mouth finish.
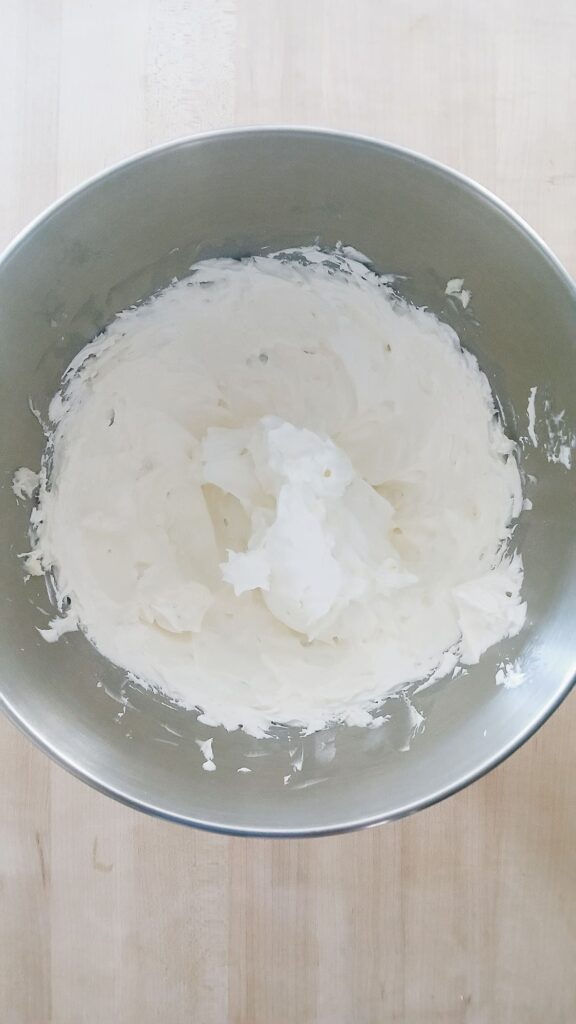
While the mixer is running, I usually take that time to tidy up or get my baking sheets ready. You are looking for the mixture to become very pale, almost white, and incredibly light. Once that timer hits ten minutes, that is when I finally add in the vanilla and almond extracts and give it one more quick mix until everything is incorporated.
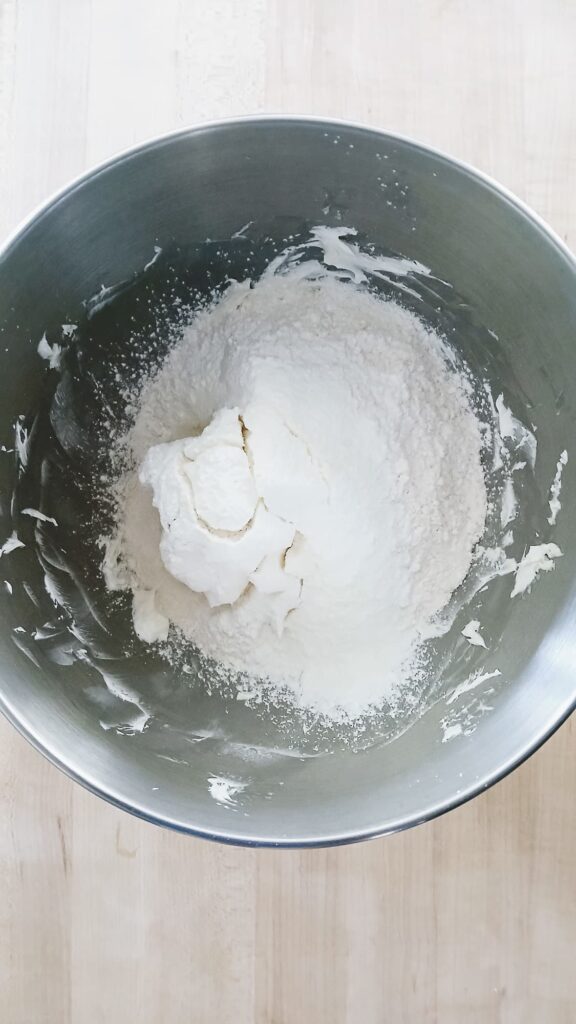
Incorporating the Dry Ingredients
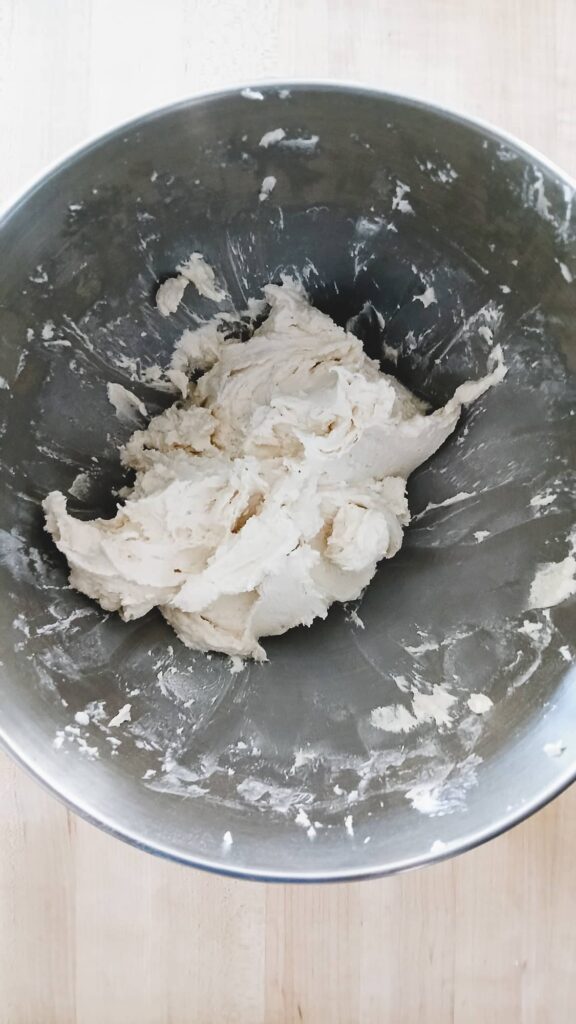
Next, I turn the mixer down to its lowest speed. This is when I slowly add in the flour and the cornstarch. You want to mix it just until the flour streaks disappear. If you keep the mixer going too long at this stage, you will lose all that beautiful air we just spent ten minutes building. The dough will be very soft and might even feel a little bit greasy to the touch because of the high butter content, but that is exactly how it should look.
Choosing the Shaping Method
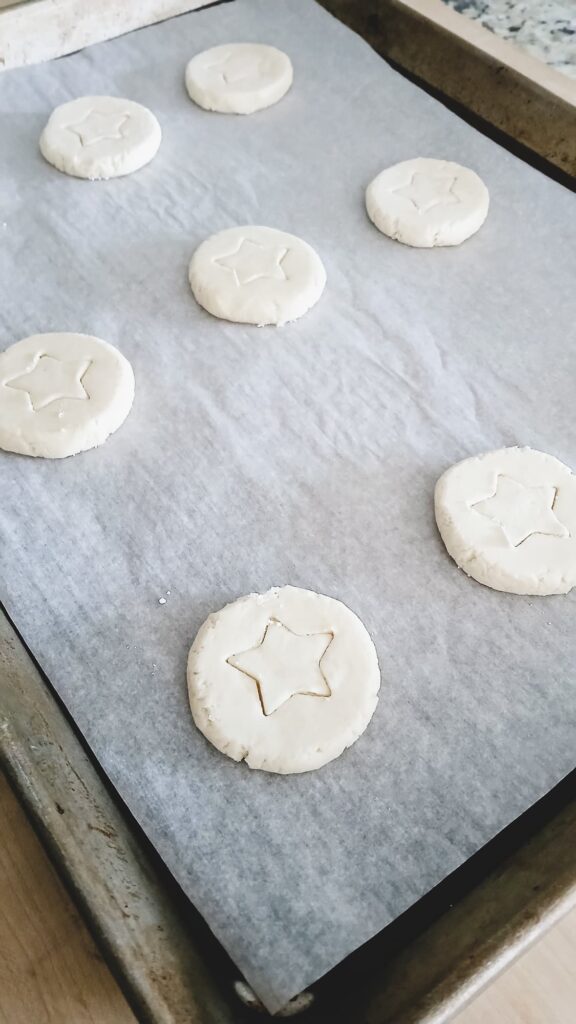
What I love about this dough is how versatile it is. Depending on the look you want, there are three different ways you can shape these cookies. No matter which method I choose, I always make sure the cookies end up on a tray that will actually fit in my freezer. This is a step you don’t want to skip because the dough needs that quick chill to hold its shape perfectly before it hits the heat of the oven.
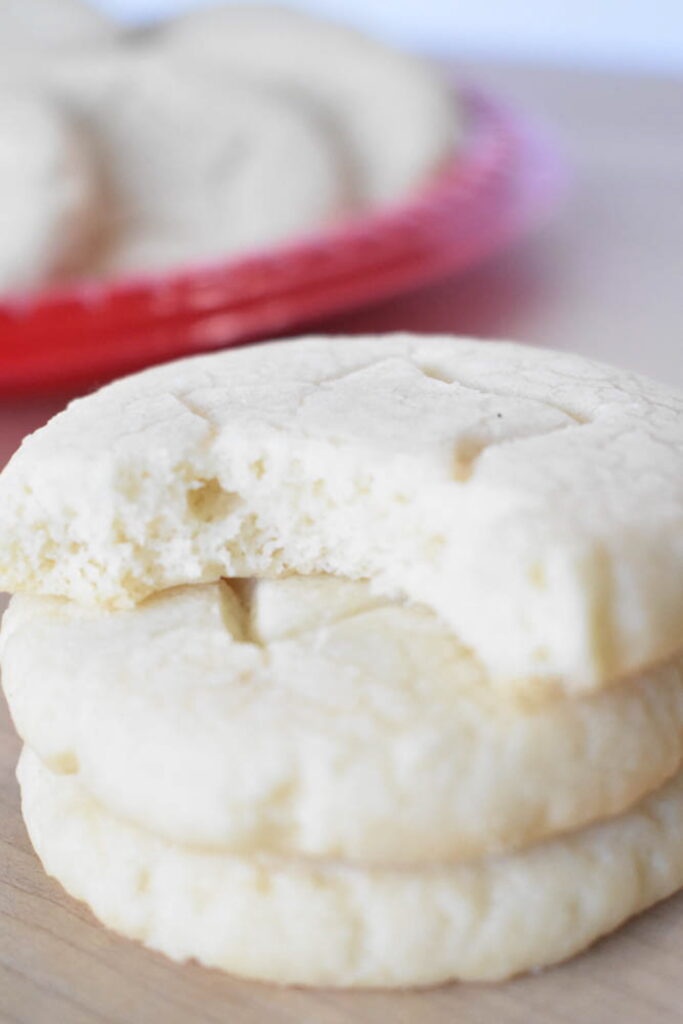
The Classic Hand-Rolled Method
This is my personal favorite because it gives you that classic, home-baked look. I scoop out those 20 gram portions and roll them into smooth balls between my palms. I place them on the baking sheets about two inches apart and use the bottom of a glass or a measuring cup to gently press down on the top of each ball.
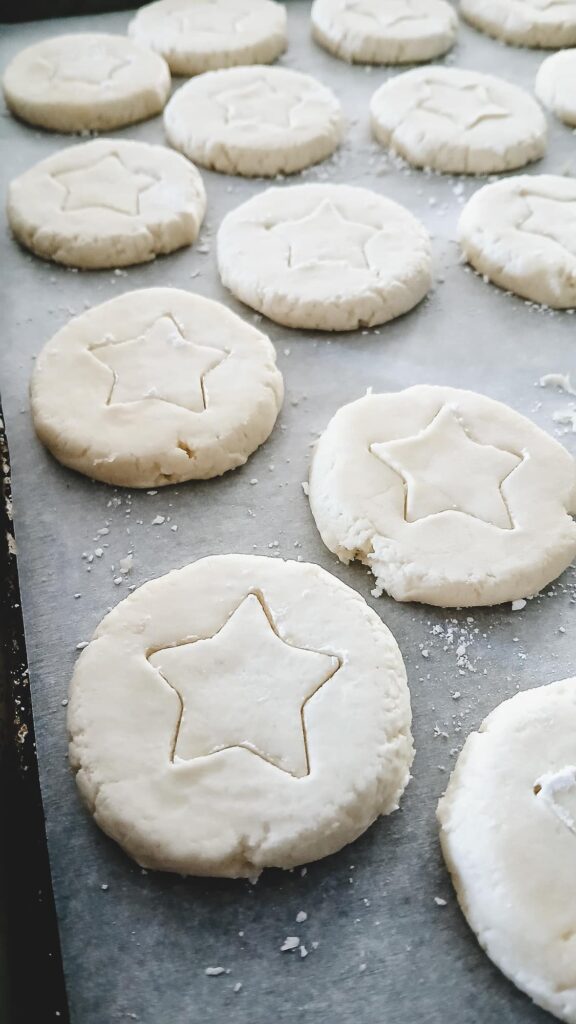
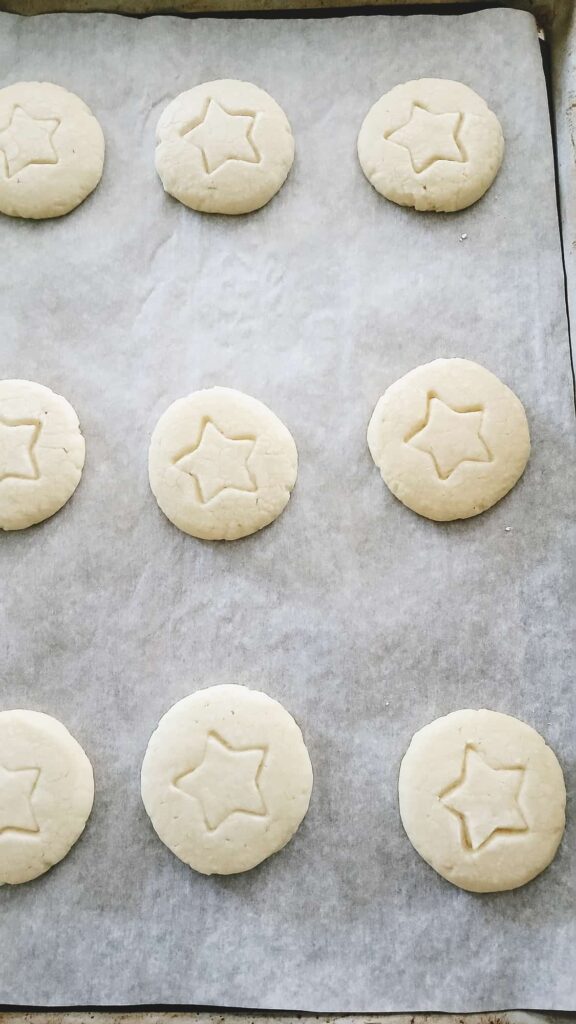
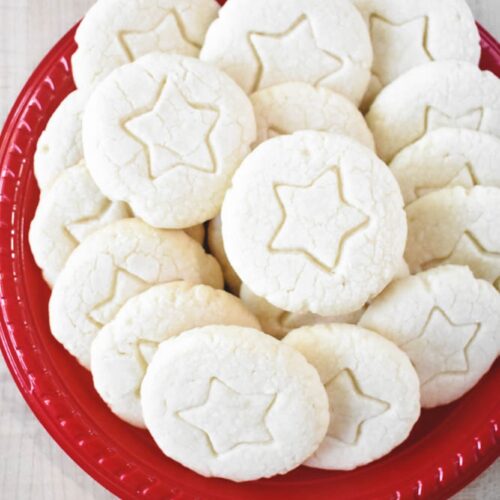
Sometimes I will also criss-cross the tops with a fork for those classic ridges. If the dough is sticking to my fork, I just dip the tines into a little bit of extra flour or powdered sugar to keep things moving. This is also when I might use a small cookie cutter to gently imprint a shape into the top for a little extra decoration.
Slicing for a Clean Edge
If I want a more uniform look, I roll the dough into a log and chill it until it is firm enough for me to slice. This is a great, easy option. I always make sure my knife is sharp so I don’t squish the dough as I cut. Since the top is nice and flat after slicing, this is also the perfect time for me to use a clean textured glass to leave a pattern or use a cutter to imprint a design on the top.
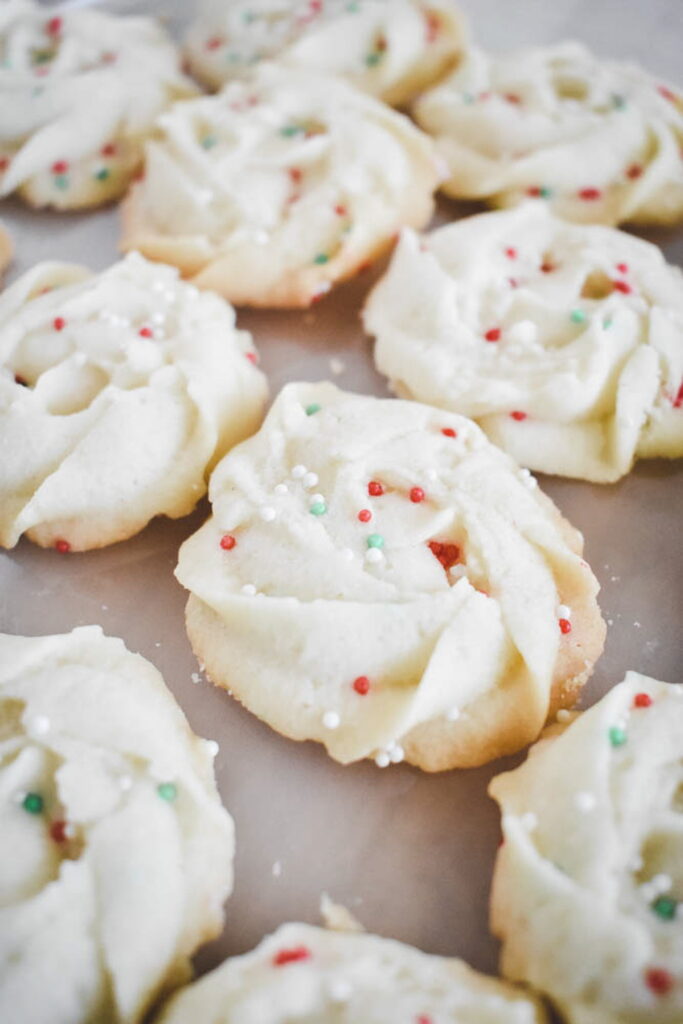
Piping for a Fancy Finish
When I want something that looks a bit more elegant, I actually pipe this dough. Because it is so soft and whipped, it moves through a piping bag beautifully. I like to use a large open star tip to create small rosettes or swirls. I just make sure I am piping them onto a cool baking sheet so they hold their shape during that quick freezer chill.


Cold Dough and a Quick Bake
Once my cookies are shaped, I pop the entire tray into the freezer for a full hour. This is a non-negotiable step in my kitchen. Because we spent so much time whipping air into that butter, the dough is quite soft by the time the shaping is finished. That hour of chilling is what firms the butter back up so that when the cookies finally hit the heat of the oven, they hold every single fork ridge and piped detail instead of spreading out into a flat puddle.
Watching the Oven
When the hour is up, I move the frozen dough onto a room temperature baking tray, spacing them about two inches apart. I only take out enough dough to fill one tray at a time, leaving the rest in the freezer so they stay perfectly cold while the first batch is in the oven.
The Room Temp Swap
While the dough must be frozen for one hour to hold its shape, always move the chilled dough onto a room temperature baking sheet before it goes into the oven. This ensures an even bake.
These cookies bake quickly, so I stay close by and start checking them around the ten to twelve minute mark. The goal is a cookie that is perfectly set but still pale. Unlike a chocolate chip cookie, you really do not want these to brown at all. I look for the edges to be just barely firm to the touch while the tops stay a soft, snowy white.
If you see the edges starting to turn golden, they are already overdone. I find that taking them out when they still look a little “under” is the best way to ensure they stay soft. They will finish setting up right on the hot baking sheet as they cool on the counter.
The Secret to a Perfect Set
The hardest part of this entire recipe is the few minutes spent waiting for the cookies to cool. When they first come out of the oven, they are incredibly fragile and will fall apart if you touch them too soon. I leave my cookies on the baking sheet for just a few minutes until they are stable enough to move without breaking.
Moving to the Wire Rack
As soon as they feel set, I carefully move them to a wire cooling rack. I want them off the hot tray quickly so they don’t keep cooking and lose that soft, melt in your mouth texture we worked so hard for. I let them sit on the rack until they are completely cool to the touch.
Make it Your Own
I love how easily this dough adapts to different flavors and occasions. Since the base is so buttery and simple, you can really get creative with what you have in your pantry.
A Little Extra Flavor and Crunch
One of my favorite ways to change things up is by adding a burst of fresh citrus. I sometimes mix in a teaspoon of lemon or orange zest right into the dough. It gives the cookies a bright, zesty flavor that is perfect for a spring or summer treat. If you want a bit of a crunch, you can also fold in some finely chopped walnuts, pecans, or pistachios before you start the chilling process.
For those cozy fall or winter vibes, I like to dust the tops with a cinnamon sugar mixture before they head into the oven. It adds a warm, comforting aroma that fills the whole kitchen.
Festive Decorations and Finishes
If I am baking for a holiday or a party, I always reach for the sprinkles. I find that adding a few colored sprinkles or a bit of coarse sanding sugar before the freezer chill adds a fun, festive touch and a nice little crunch to every bite.
When I want something really decadent, I wait for the cookies to cool completely and then dip the edges or even half the cookie into melted dark, milk, or white chocolate. While the chocolate is still wet, you can top it with crushed nuts or a tiny pinch of sea salt. Just make sure you let the chocolate set fully before you try to serve them!
Keep it Fresh
I usually store these cookies in a tin or an airtight container on the counter. They stay soft for about a week, but they never actually last that long in my house before they get eaten.
Freezing for Later
If I need them to last longer, I put the container in the freezer. They stay good for about three months and thaw out almost immediately. It’s also incredibly easy to just keep the extra unbaked dough in a freezer bag. Since I’ve already done the work to shape and freeze them for that first hour, I can just grab a few pieces whenever I want a fresh batch. I just move the frozen dough to a room temperature tray and they are ready to bake.
Whipped Shortbread Cookies
Ingredients
- 1 cup butter, room temperature | 2 sticks or 226g
- 2/3 cup powdered sugar | 65g
- 1/4 teaspoon salt
- 1 teaspoon vanilla extract
- 1/4 teaspoon almond extract
- food coloring, optional
- 1 1/2 cups all purpose flour | 210g
- 3 tablespoons cornstarch | 30g
Instructions
Prepare the Dough
- Whip the butter: In a stand mixer fitted with the whisk attachment (not the paddle), whip the butter for 30 seconds to 1 minute until smooth and lump-free.1 cup butter, room temperature | 2 sticks or 226g
- Incorporate sugar and salt: Sift the powdered sugar into the mixing bowl with the butter. Add the salt.2/3 cup powdered sugar | 65g1/4 teaspoon salt
- The ten-minute whip: Whip the mixture on medium-high speed for 5 minutes. Scrape down the sides of the bowl and clear any mixture from inside the whisk. Continue whipping for another 5 minutes. This total of 10 minutes is essential for the light, airy texture.
- Add extracts and color: Add in the vanilla and almond extracts. If you want to color your entire batch one single color, you can add a little food coloring now and mix briefly until the color is even. This is completely optional. Be careful not to use too much coloring because excess liquid can change the delicate texture of the dough.1 teaspoon vanilla extract1/4 teaspoon almond extractfood coloring, optional
- Incorporate dry ingredients: Sift the flour and cornstarch into the mixing bowl. Start mixing on low speed, then gradually increase. The dough will look crumbly at first but will come together within 1–2 minutes. Stop once no streaks of flour remain. Do not overmix.1 1/2 cups all purpose flour | 210g3 tablespoons cornstarch | 30g
- For multiple colors: If you want to make multiple colors from this single batch of dough, now is the time to divide your finished dough into separate bowls. Add a small amount of food coloring to each bowl and gently fold it in by hand with a spatula until the color is uniform. Try not to overmix so the dough stays light and fluffy.
Choose the Shaping Method
- Option 1: Rolled: Chill the dough in the fridge for 30–40 minutes. Scoop teaspoon-sized portions and roll into balls and place on parchment paper lined tray. Flatten gently with the bottom of a measuring cup dipped in powdered sugar. To add the decoration, lightly press a mini cookie cutter into the top of each flattened disc for an imprint (do not cut all the way through). Dip the cutter in powdered sugar between each cookie to prevent sticking.
- Option 2: Slice-and-Bake: Form the dough into a log using plastic wrap. Refrigerate for 45 minutes until firm. Slice into discs 1/4 to 3/8 inch thick and then place on a parchment paper lined tray.
- Option 3: Piped: Immediately after mixing, fit a piping bag with a large open star tip. Pipe round swirls or stars onto a parchment paper lined baking sheet.
Freeze
- The freeze step: Once your cookies are shaped on the tray, place the entire tray in the freezer for 1 hour. This ensures they hold their shape and stay thick.
Bake
- Preheat: Set your oven to 325°F.
- Bake: Bake the frozen cookies 2 inches apart on a baking tray lined with parchment paper.
- Piped or small cookies: 15–18 minutes.
- Large rolled or sliced cookies: 18–22 minutes.
- The tops should remain pale while the edges and bottoms become slightly golden.
- Cool: Gently transfer to a cooling rack and allow them to cool completely before storing in an airtight container.
Notes:
Did you try this recipe?
Share your experience in the comments below!
I’d love to hear how it turned out
Let’s see your creations!
Share your photos
Tag me @flourtinbakes on social media
Love this star design. Making these for the Fourth of July!
Sorry for this dumb question but, if I want to make 3 different color cookies, do I need to make 3 different batches since the food color is added before the measured dry ingredients?
Thank you,
Lisa
Hi Lisa! First off, that is not a dumb question at all. It was actually so helpful that I went back and updated the recipe card and the post to make it clearer for everyone.
You definitely do not need to make three separate batches. Once you finish mixing the dough, just divide it into three bowls and fold in your food coloring by hand with a spatula. Just be gentle so you do not lose that light, airy texture we worked so hard to whip into the butter.
I personally prefer to use gel food coloring because it is much more concentrated and not as watery as the liquid kind. If you only have liquid drops on hand, just make sure to use them sparingly so the extra moisture doesn’t change the texture of your dough too much.
I hope you love how they turn out!