Soft Cut-Out Sugar Cookies
There is something incredibly nostalgic about the clinking of cookie cutters against a floured countertop. While many people think of cut-out cookies as “Christmas only” I’ve found that a truly reliable sugar cookie recipe is a year round essential. Whether it’s hearts for February or simple rounds for a Sunday afternoon, this is the dough I return to every single time.
If you have been searching for the best cut-out sugar cookie, your search ends here. You’ll definitely want to add this one to your recipe box.
A Tried and True Family Classic
This recipe was given to my mother by a neighbor and friend back in the 1980s, and it has been a staple in our home for decades. What I love most is how reliable this dough is. These cookies have a beautiful, soft texture that holds decorative shapes perfectly. You might notice they spread and puff just a little bit in the oven, but that lift is exactly what makes them so tender. I have used this recipe more times than I can count and they always bake up great.
Essential Ingredients for Soft Sugar Cookies
To get that signature soft texture, there are a few things I am very particular about when gathering my ingredients. Many sugar cookie recipes call for baking powder, but I have found that using baking soda is the key to achieving that perfect, slight puff without losing the detail of your cookie cutters. It is easy to get the two confused, and while it isn’t a fatal flaw if you swap them by accident, the cookies will rise much more than you want.
Freshness Test
Make sure your baking soda is active! To test it, drop a spoonful into a small bowl of vinegar. If it fizzes vigorously, you’re good to go. If it just sits there, it’s time for a fresh box.
I also cannot stress enough the importance of using room temperature butter and eggs. This is the secret to ensuring everything creams together nicely into a smooth, consistent dough. If your eggs are a bit too cold, you might notice the mixture starting to look a little chunky or curdled as you mix. If you see this happening, do not worry and definitely do not start over! Just keep moving forward and your cookies will still turn out beautiful.
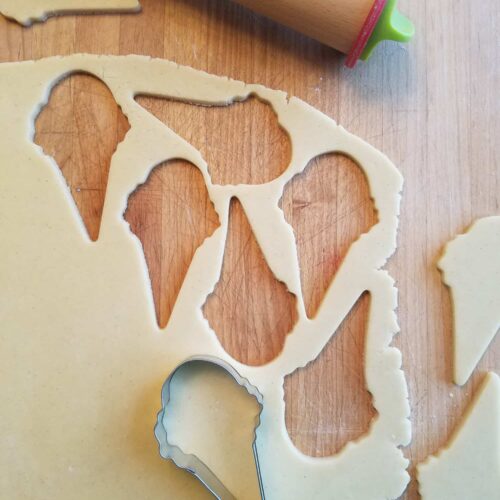
My Assembly Line Strategy
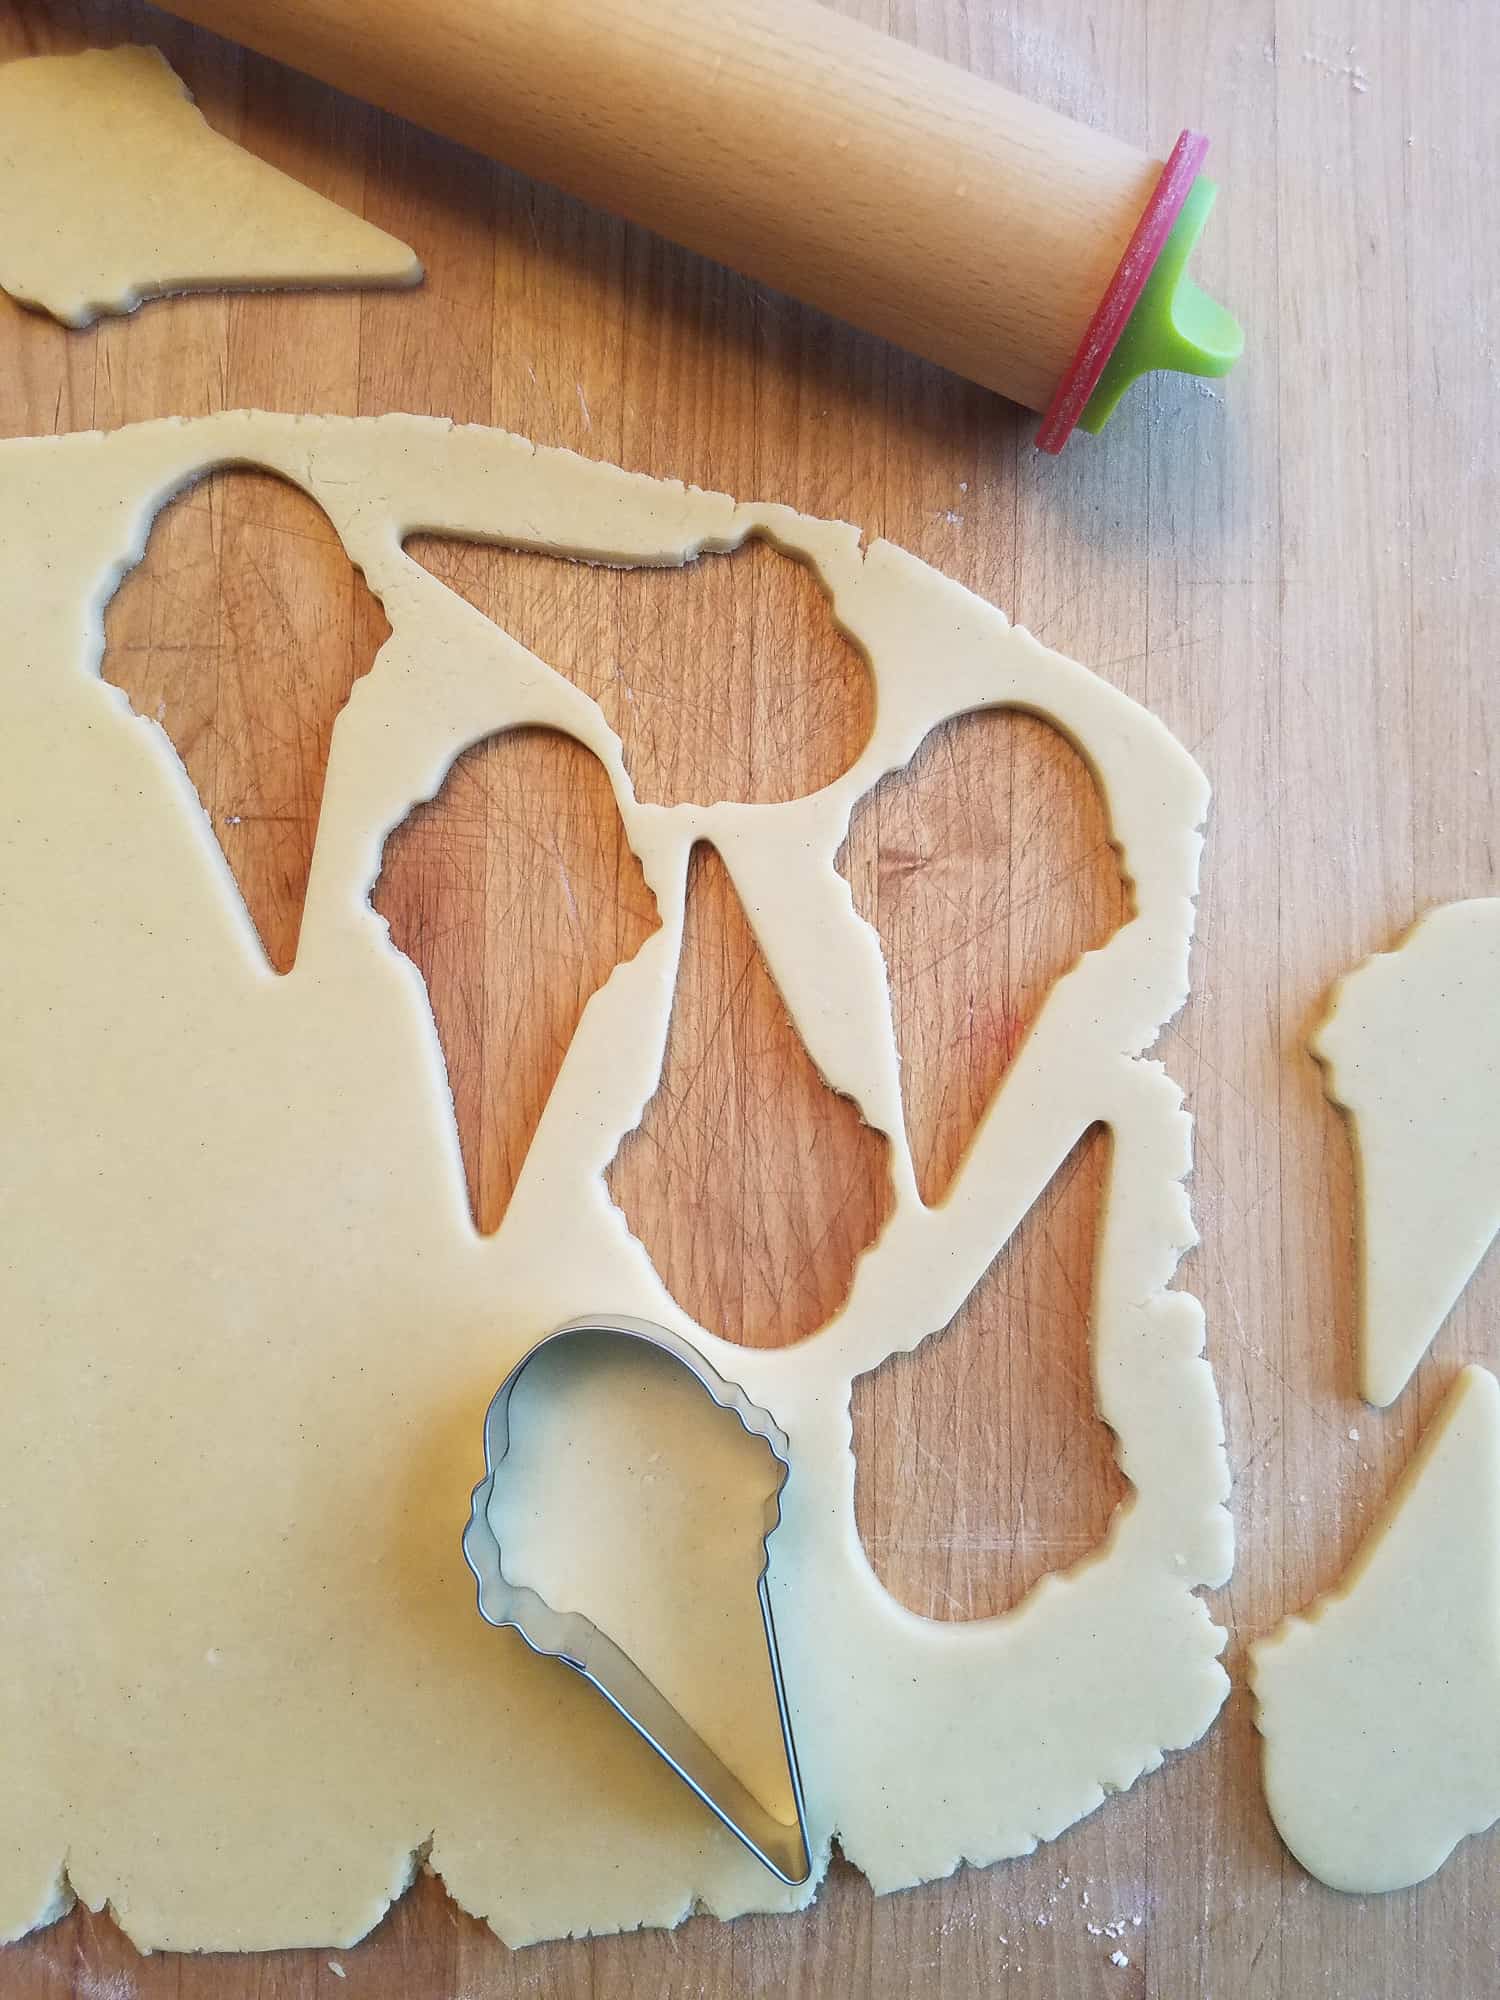
I have a few favorite tools and I set up my baking day to make this process go so much smoother. If you have ever struggled with cookies that are thin on one side and thick on the other, a rolling pin with guides is a total game changer (I use the Joseph Joseph brand). It takes all the guesswork out of rolling and ensures every cookie in the batch bakes at the exact same rate.
I also never bake without parchment paper. I personally swear by the Kirkland brand from Costco because it is high quality and lasts me a long time. I always make sure to bake my cookies on a sheet of parchment. It makes it so much easier to slide them off the tray once they’ve cooled without any sticking or breaking. The best part? I use the same sheet of parchment paper during my entire baking day. No need to swap it out for every new tray you are baking. I even use the parchment for chilling my dough shapes in the fridge before they hit the oven. If you don’t have parchment paper, you can also use a silicone mat.
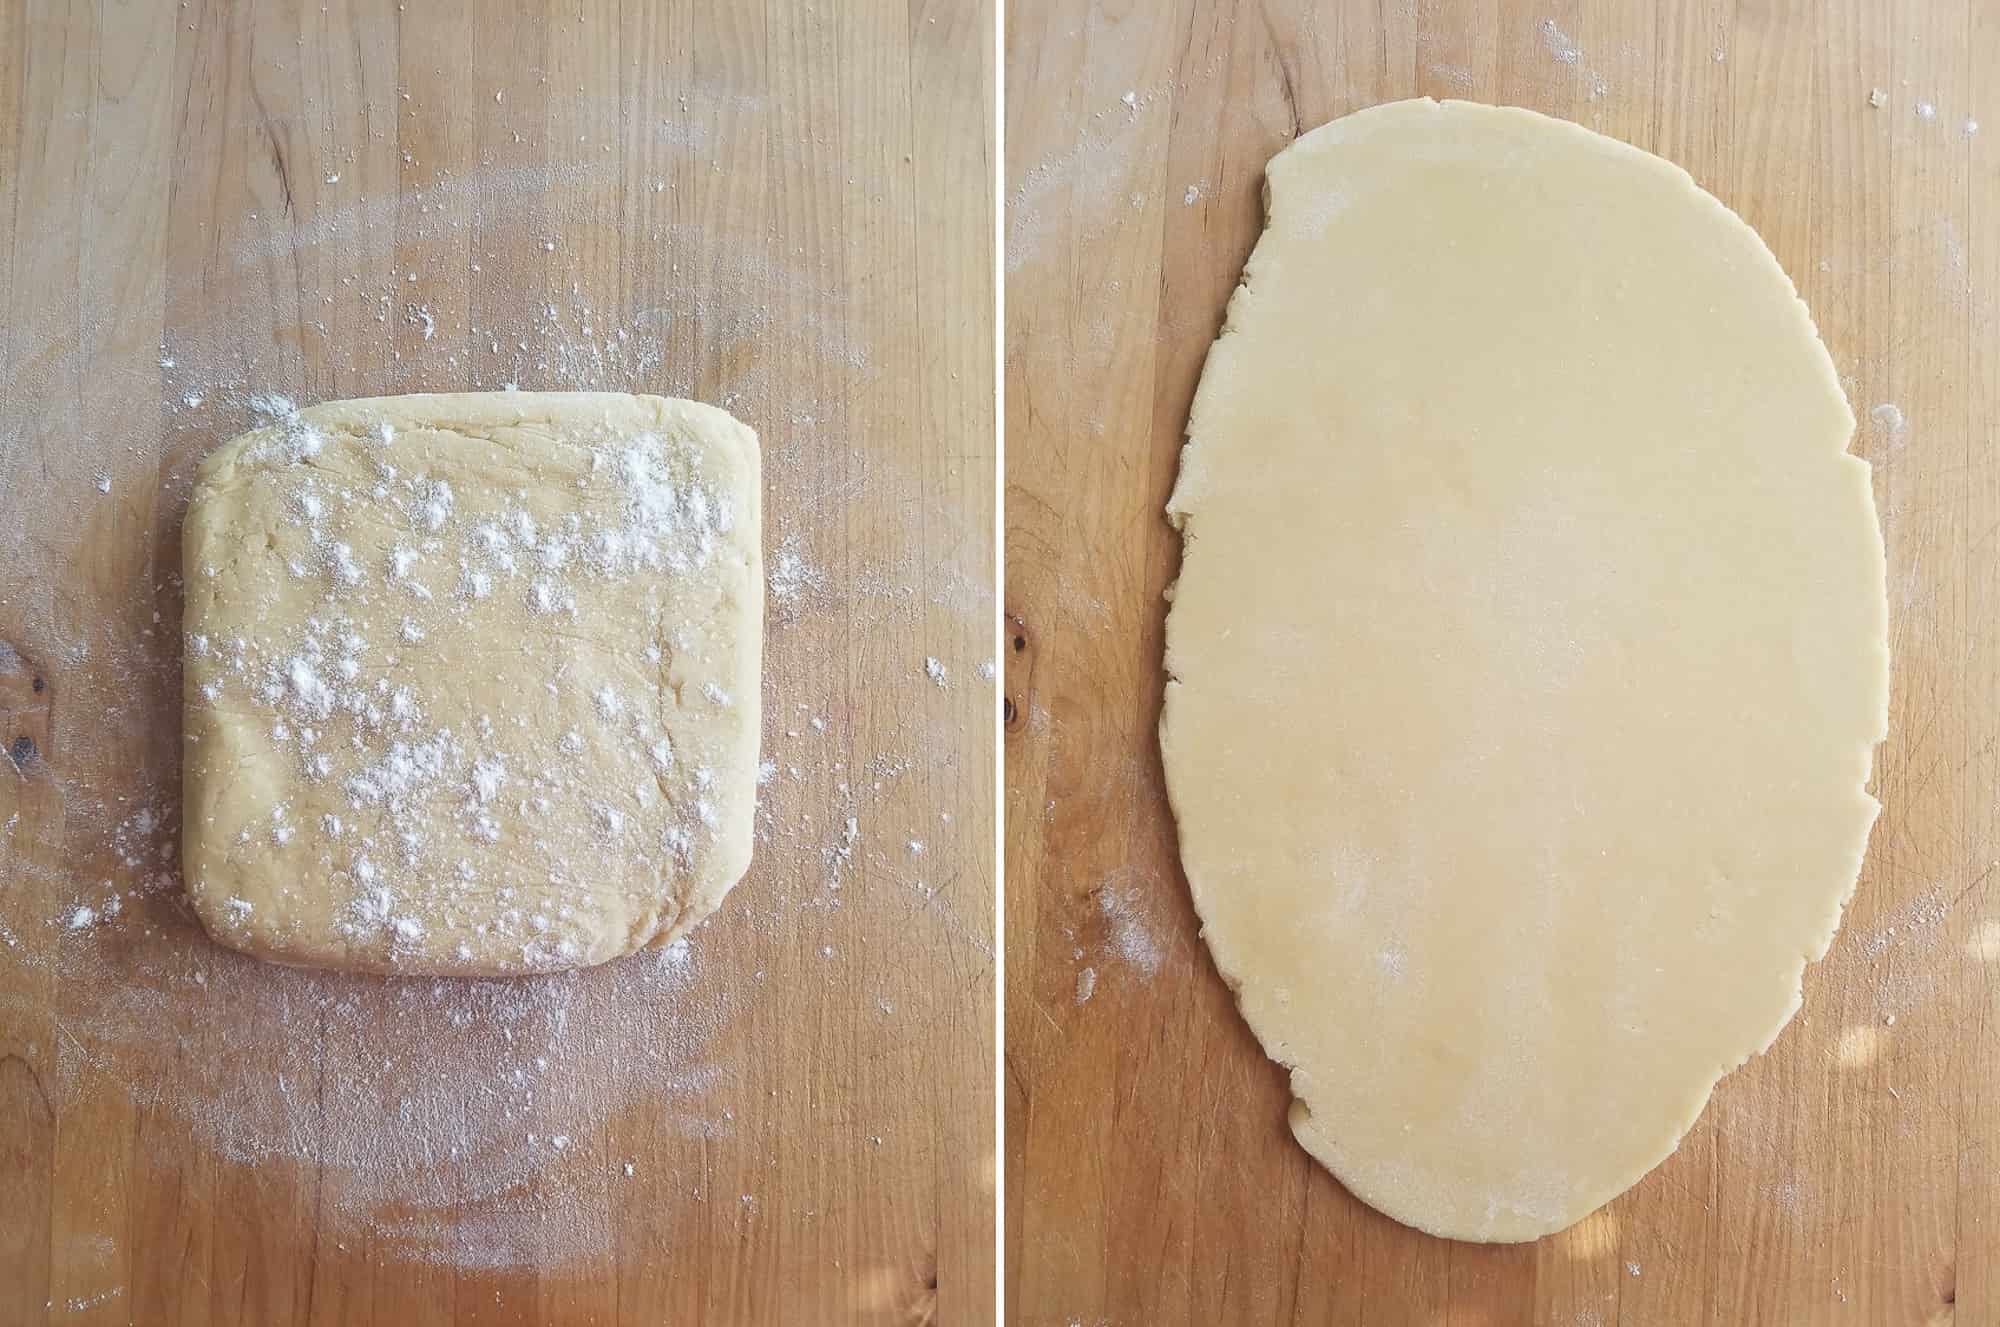
To me, a stress free day is usually about how easily the roll out process goes, so I like to work in an assembly line. Once my dough has had its hour rest in the fridge, I roll the dough out on a floured surface, cut the shapes, and place them on a parchment lined baking sheet that fits in my fridge so the shapes can chill. I work in smaller batches and try not to reuse the scraps too many times because dough that has been rolled over and over will eventually lead to a tougher cookie.
I always make sure to have at least two baking sheets in rotation. This allows me to alternate trays so I am always placing my chilled cookie shapes onto a room temperature tray. You never want to put cold dough directly onto a hot tray from the oven, as it will ruin the shape before the baking even starts.
While the assembly line works most of the time, I’ve learned to be flexible. If my kitchen is warm or the dough seems sticky and frustrating, I change my tactic. I’ll roll the dough out directly onto a piece of parchment paper and chill the entire sheet of dough before cutting anything. Once it’s cold, the shapes pop off the parchment paper much easier. Having these two methods to choose from when rolling keeps the process moving.
From the Mixer to the Oven
The actual mixing of this dough is very straightforward, but there are a few moments where you need to trust the process. I like to start by whisking my flour, baking soda, and salt together in a separate bowl. Getting the dry ingredients ready first is a small step that makes the rest of the mixing feel much faster. Once that’s set aside, I cream the room temperature butter and sugar together in a stand mixer until the mixture is light and fluffy.
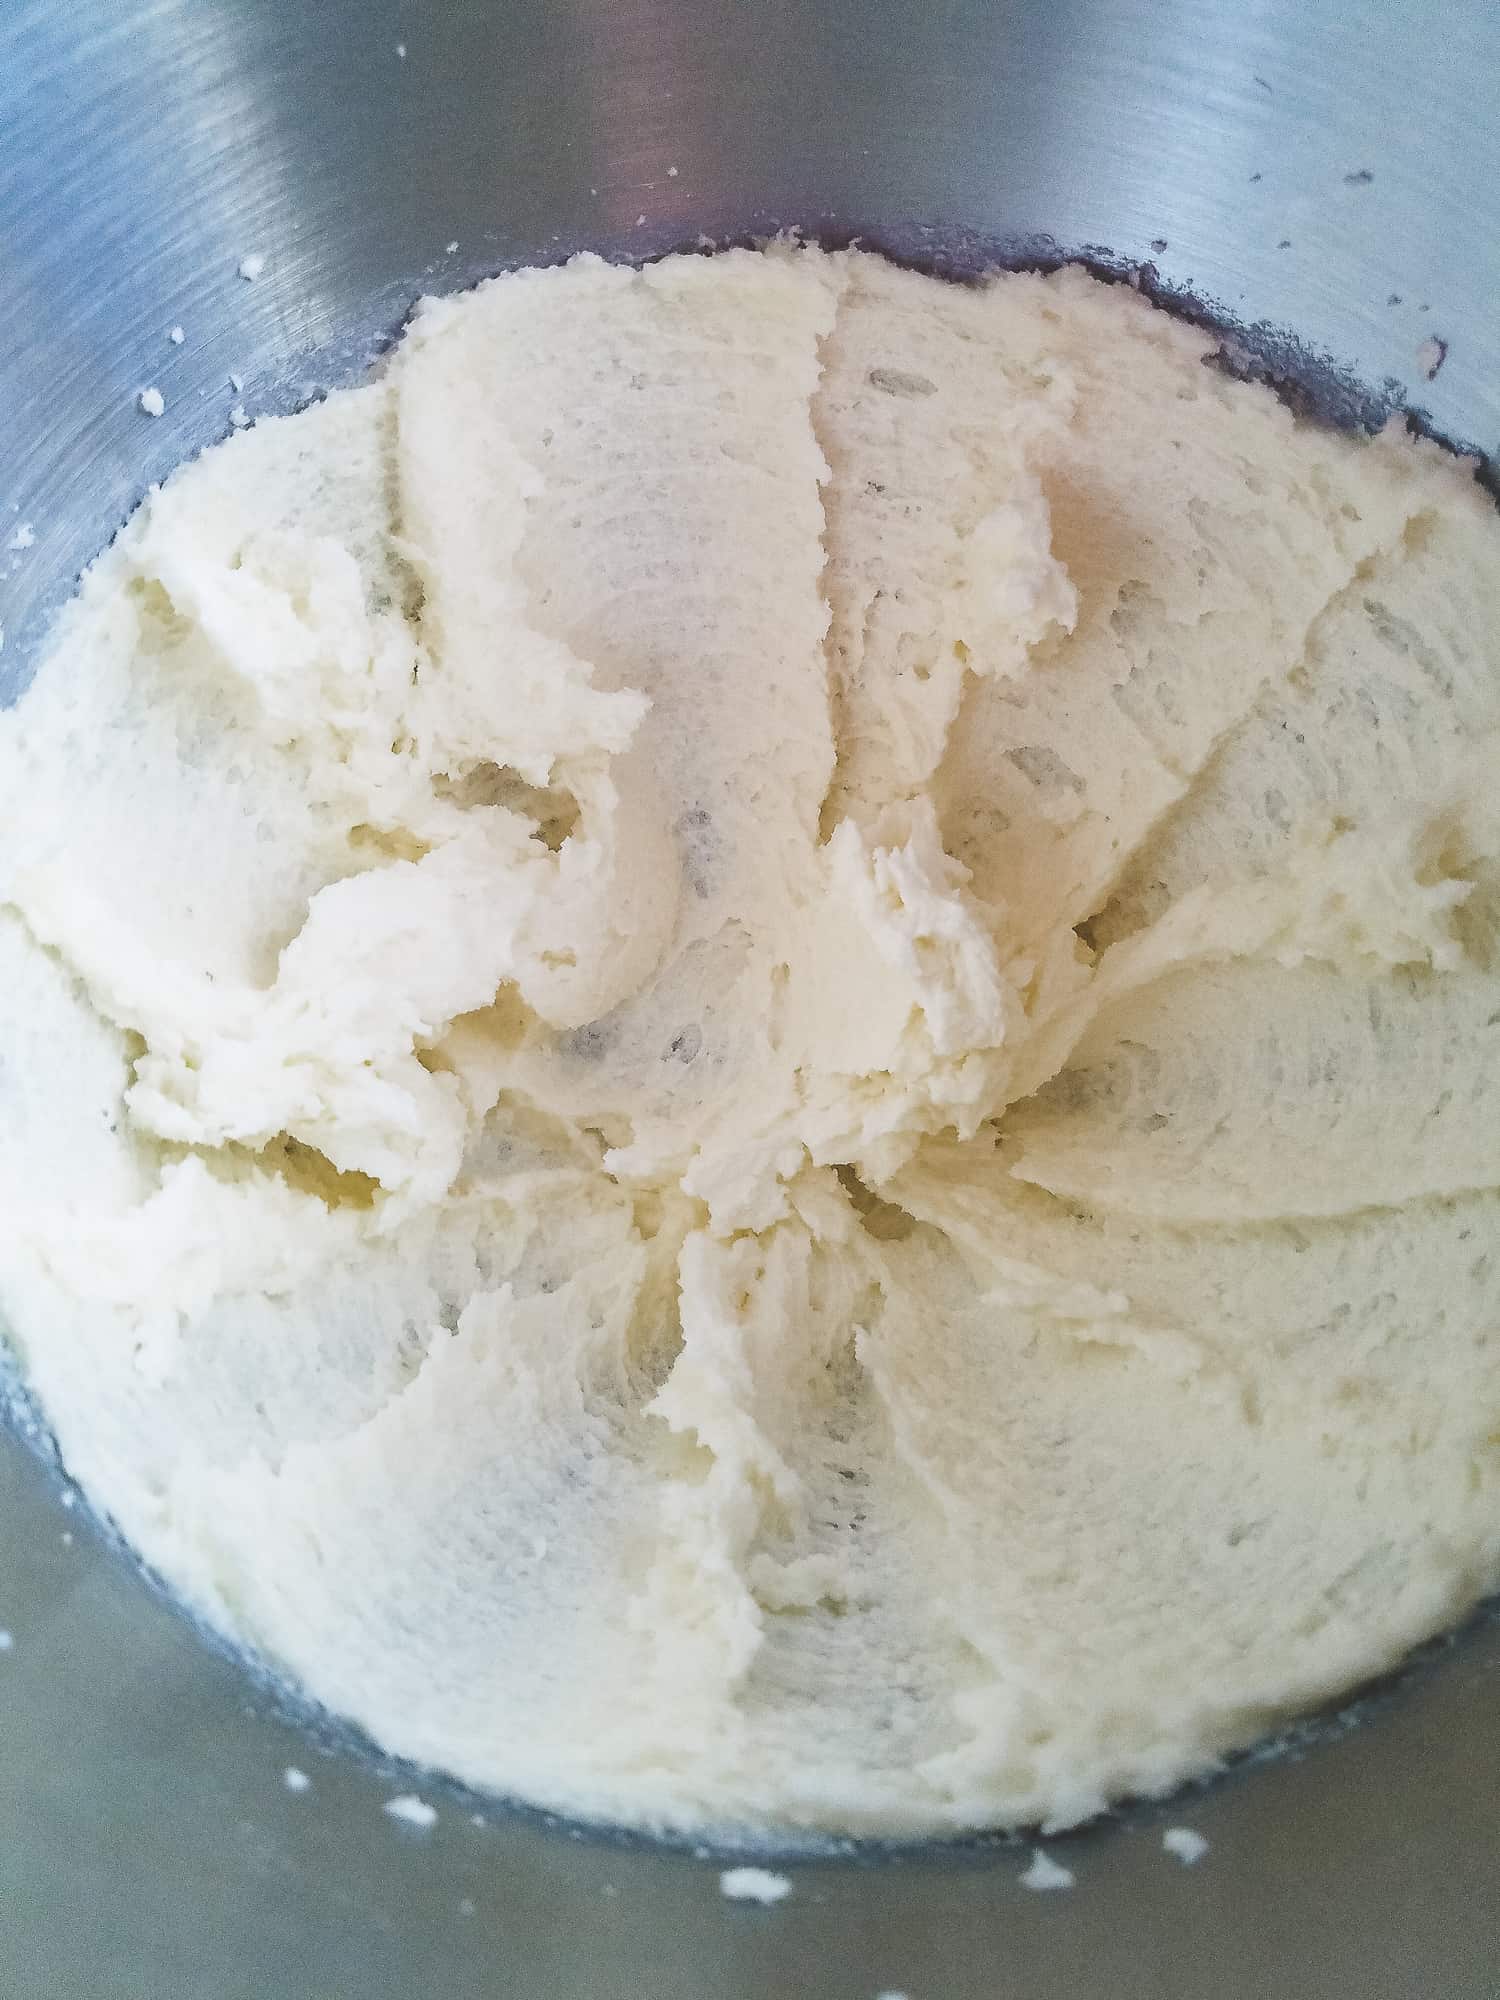
Next, I add in my room-temperature eggs and vanilla. At this stage, I’ve noticed the mixture can suddenly look a bit “broken” or curdled. It is just a common reaction when the fats and liquids haven’t fully emulsified, but I know it isn’t ruined!
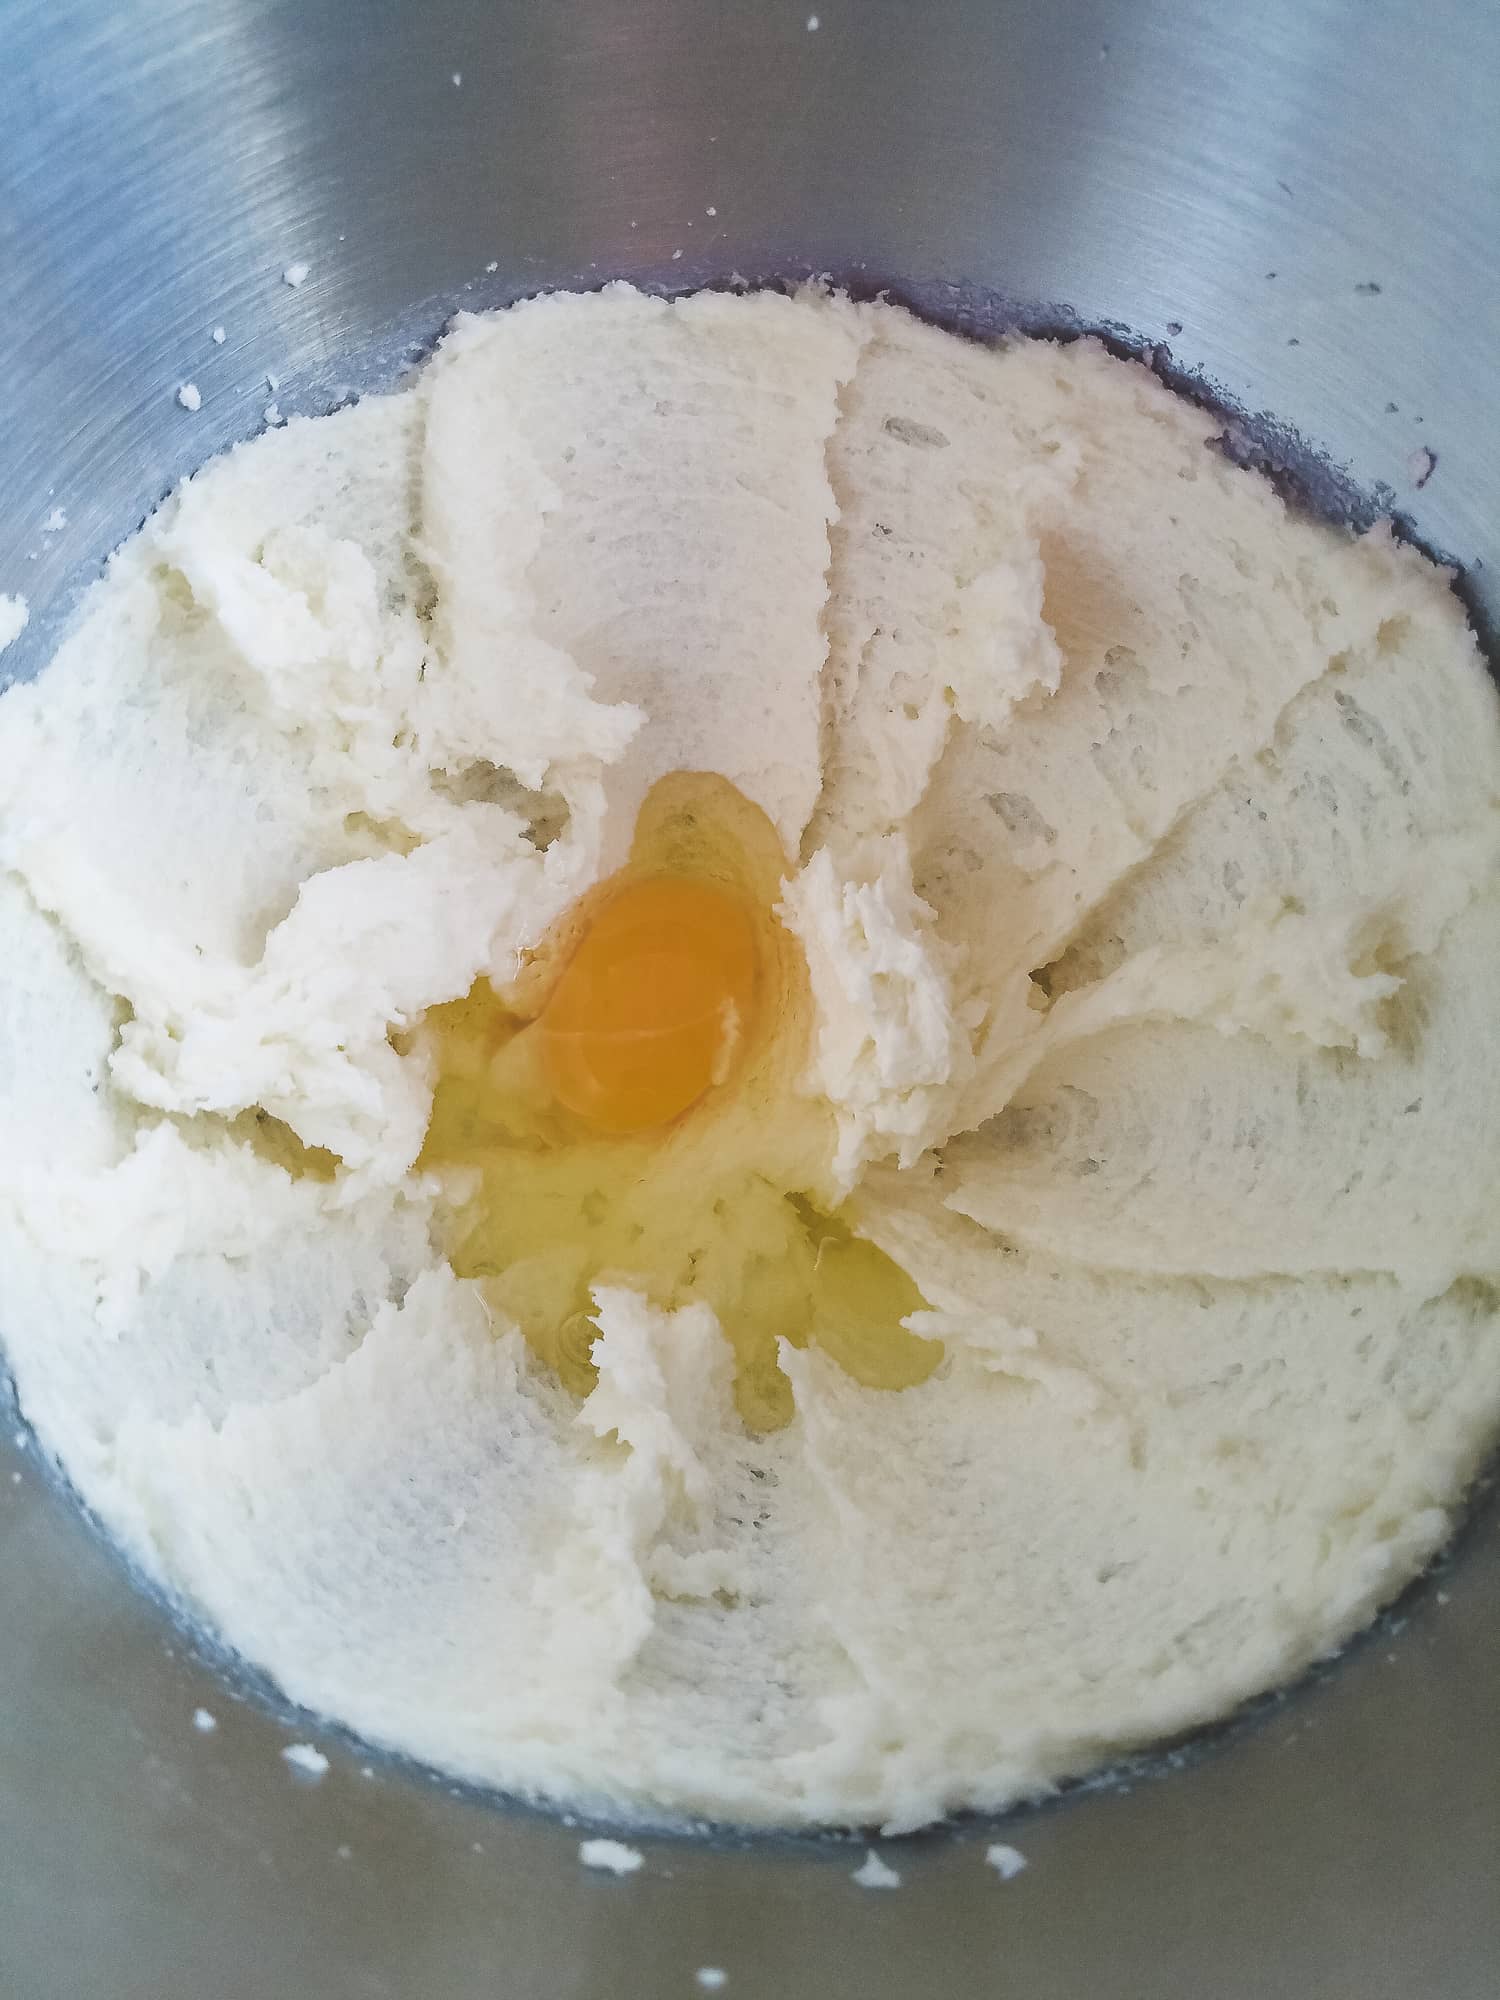
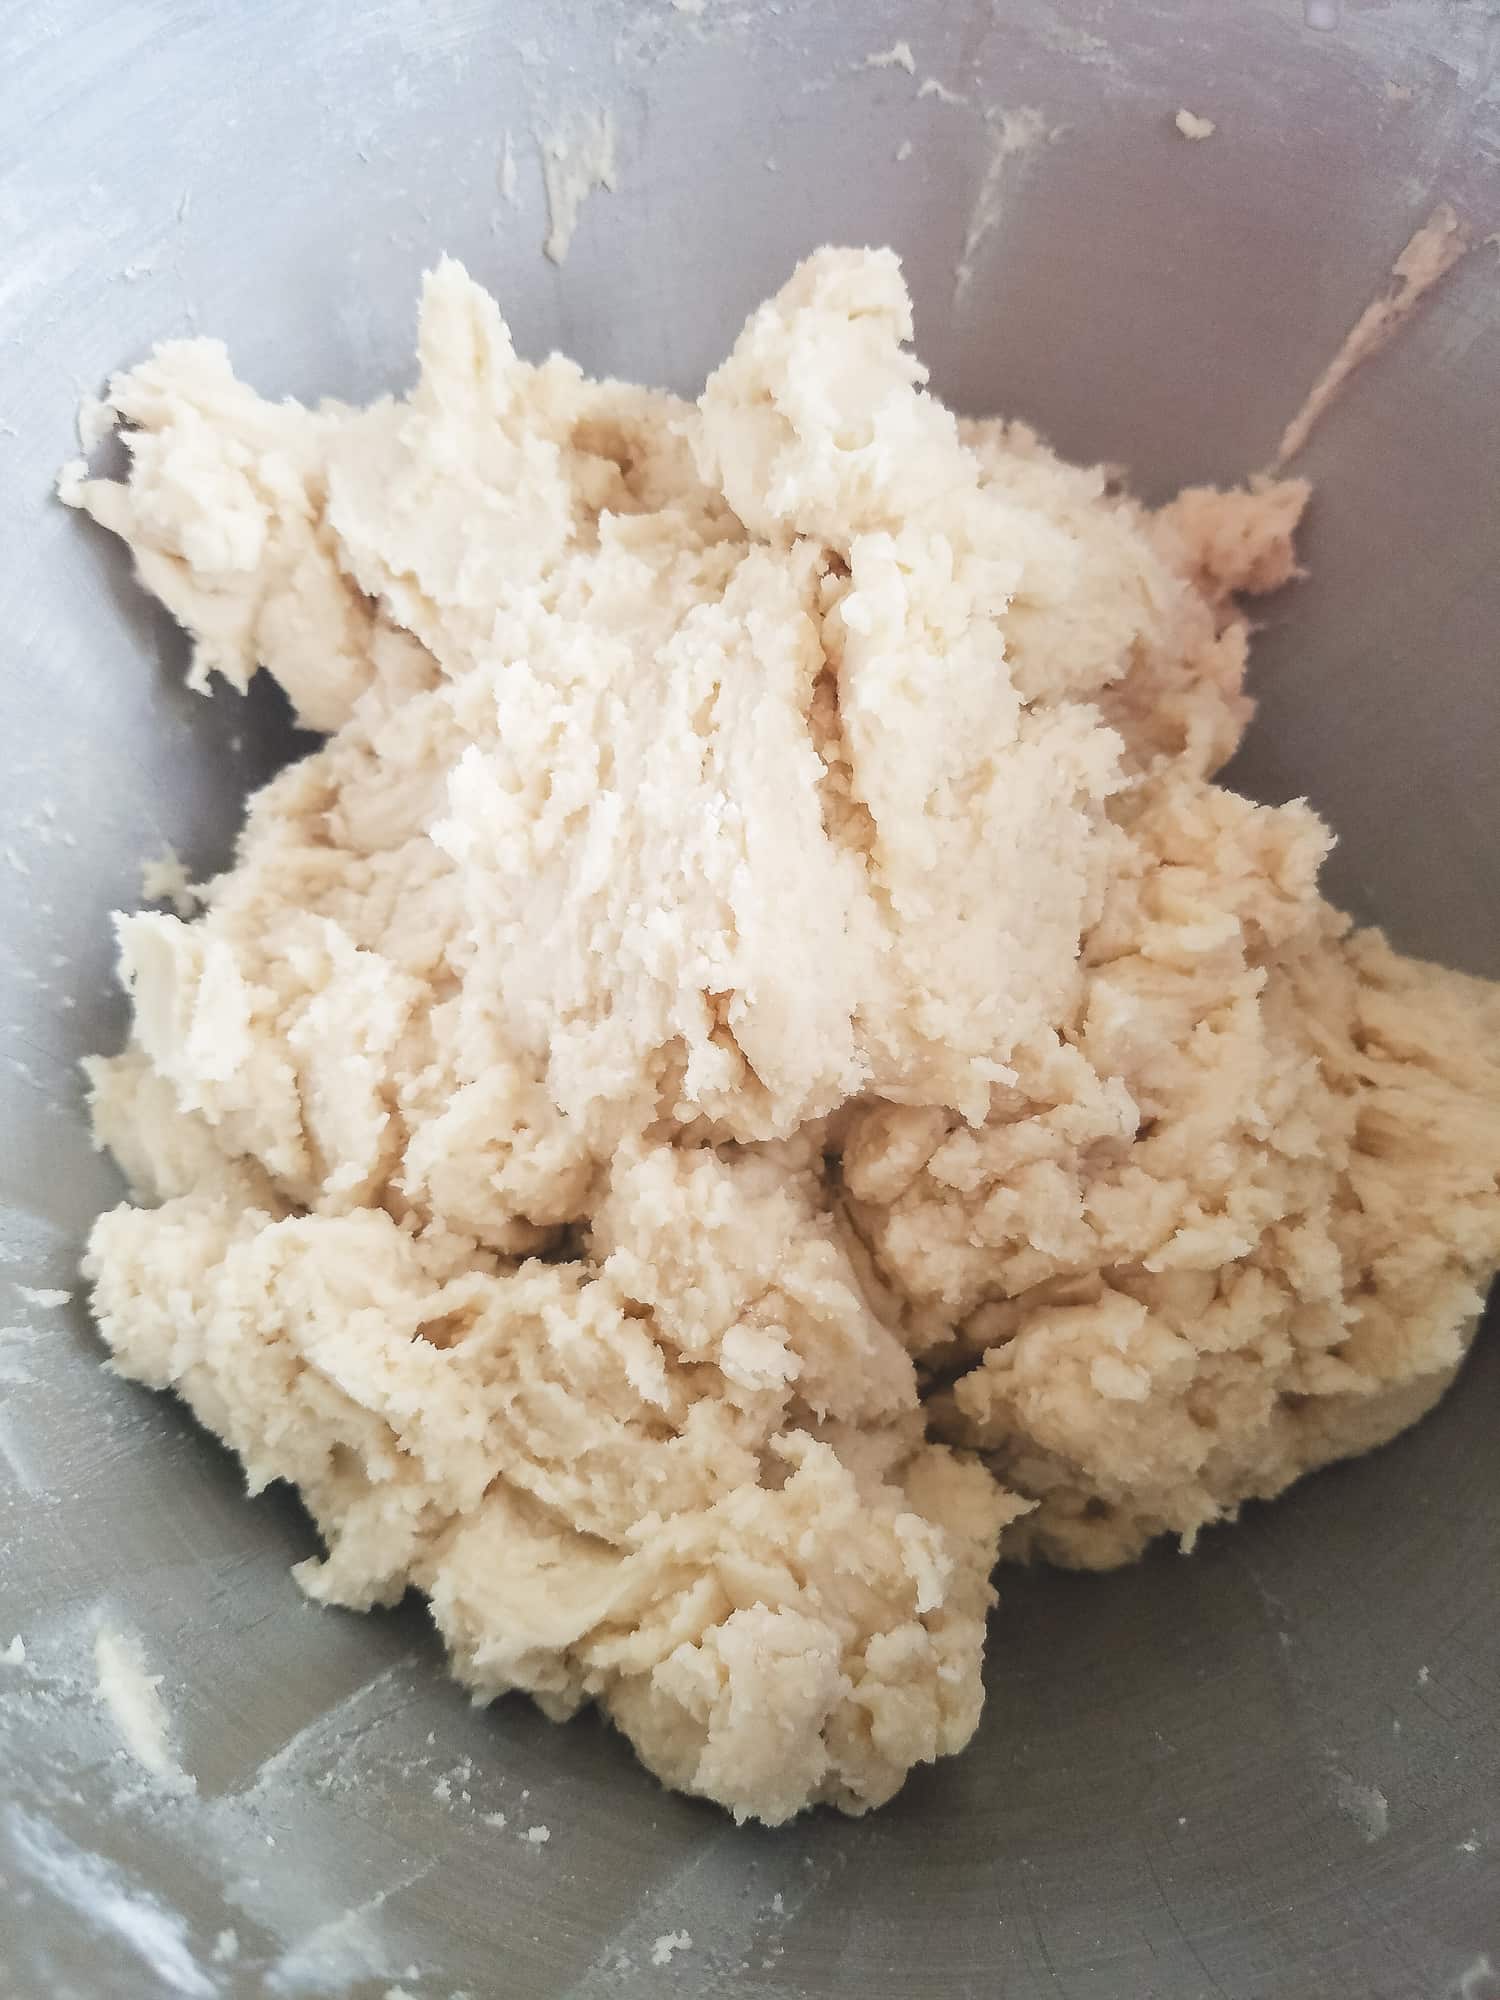
This is where I trust the “magic” moment: as I slowly incorporate the dry ingredients into the wet, I watch that curdled texture disappear and transform into a beautiful, smooth, and workable dough. I know the consistency is spot on when I can touch the dough and it doesn’t stick to my finger.
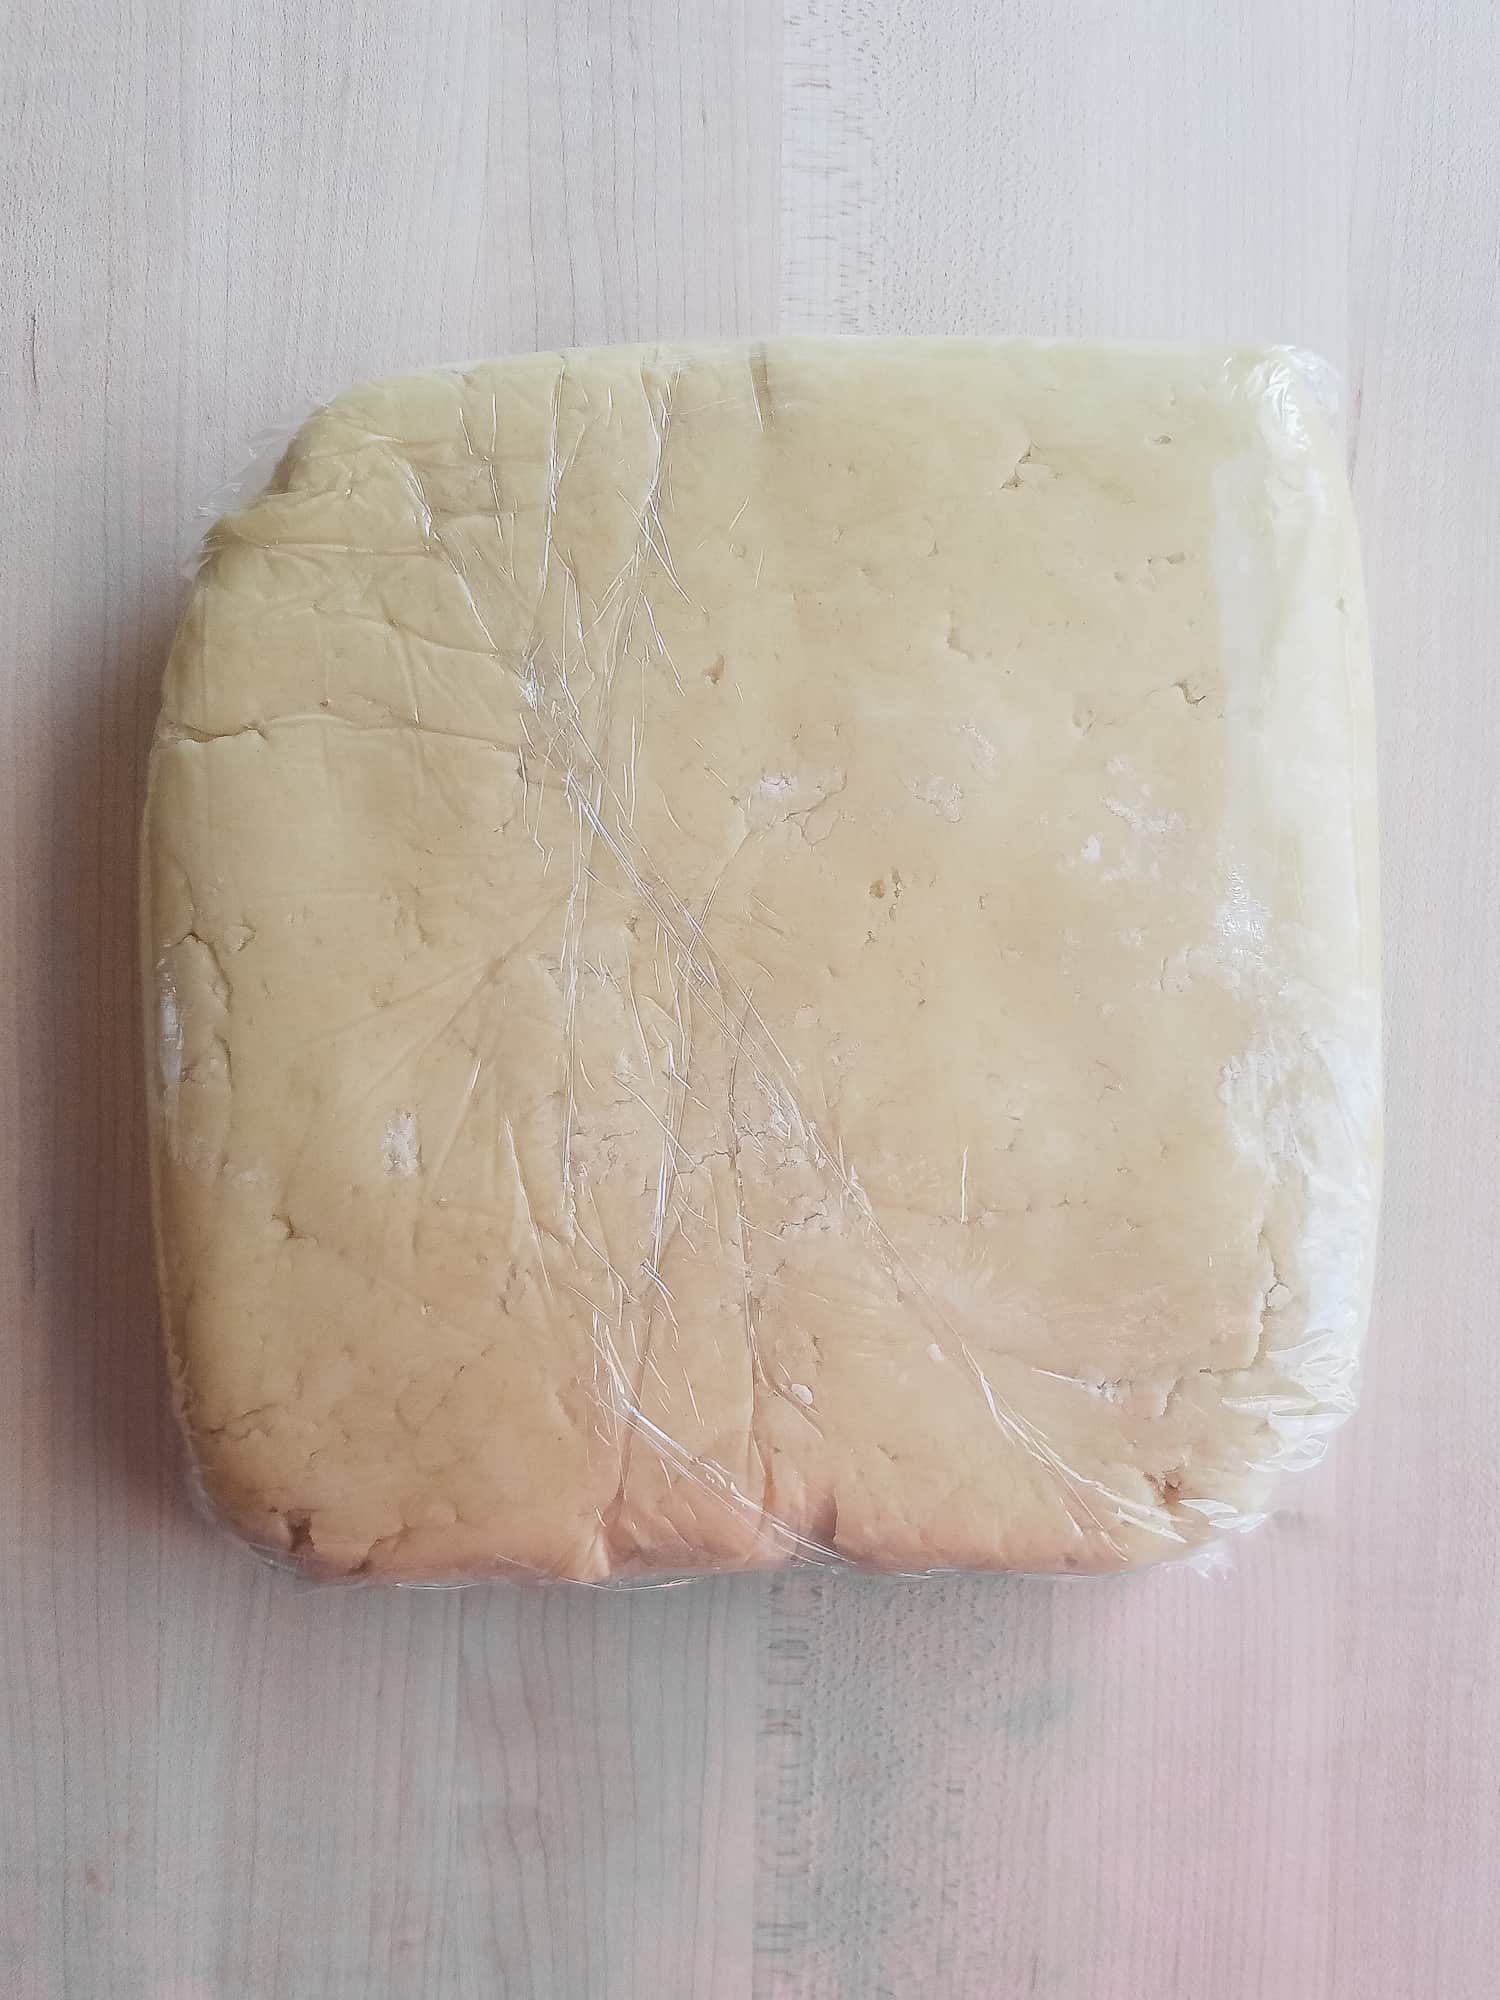
Once the dough comes together, it’s time for what I consider the most important step: the chill. I wrap the dough tightly in plastic wrap and let it rest in the fridge for at least one hour. This rest is what allows the flavors to meld and makes the dough so much easier for me to handle. I often make this ahead of time and will chill it overnight or even freeze well wrapped dough to bake cookies whenever I need them in the future.
When I’m ready to bake, I follow the assembly line method I mentioned earlier. I place my chilled dough shapes on a room temperature baking sheet about two inches apart and into the oven they go. Because every cookie cutter is a different size, I always bake a “test tray” of just two or three cookies first. This helps me dial in the exact timing for that specific shape before I commit the whole batch to the oven.
I keep a close eye on my oven and make sure to pull them out just as they are set. If they start to turn brown around the edges, I know they have gone a bit too long. A light golden brown edge or bottom is exactly what I am looking for. It is perfectly okay if the cookies have barely any color at all.

I also look for that slight puff and make sure the center of the cookie doesn’t look sunken in. That is what guarantees me that soft, homemade bite once they cool. I always let them rest on the baking sheet for a few minutes before moving them to a wire rack so they can cool completely.
The Finishing Touch
These cookies aren’t overly sweet, making them the perfect canvas for decorating. I usually go for either royal icing or buttercream, depending on the look I’m after. If you choose royal icing, I recommend rolling your cookies at least 1/4 inch thick, or even 3/8 inch thick at the maximum. That specific icing to cookie ratio ensures the sweetness of the icing isn’t overpowering and allows the soft, buttery flavor of the cookie to really shine through.
To keep things easy, I often separate baking day from decorating day. You can store plain cookies in an airtight container or even freeze the baked cookies for a future decorating party. They thaw quickly on the counter, which is a lifesaver when you want to host friends without spending the whole day in the kitchen.

Make it Your Own
While these are classic vanilla sugar cookies, I love how easily they can be adapted for different seasons or cravings. One of my favorite tricks is to substitute half the extract for different flavors like lemon, orange, or almond. I especially love using almond extract around Christmas time for that extra layer of cozy, bakery style flavor. If you want those beautiful, professional-looking bean speckles in your dough, you can swap the liquid vanilla for vanilla bean paste.
Depending on the season, I sometimes mix fresh lemon, lime, or orange zest into the butter and sugar before creaming to release those natural oils, or I’ll even substitute the milk in the recipe for a fruit juice like orange juice or apple cider for a bright, tangy twist. You can even whisk in dry spices like cinnamon or pumpkin pie spice with your flour for a warm, autumnal version.

If you aren’t in the mood for frosting, you can simply press coarse sanding sugar or colorful sprinkles into the dough shapes right before they hit the oven for a simple, “sparkly” finish that looks just as lovely.
Keep it Fresh
To keep that signature soft texture, I always store these in an airtight container at room temperature for up to 3 days. If you’ve used a crusting buttercream or royal icing, make sure the frosting is completely set before stacking them!
Freezer Friendly
To freeze decorated cookies without color bleeding, ensure icing is 100% dry. Layer with parchment in a container, wrap the outside in plastic, and let it thaw unopened on the counter for 2 hours to prevent condensation.
As I mentioned, these are a dream for the freezer as you can freeze the baked, unfrosted cookies for up to two months. When you’re ready for a treat or a decorating party, just pull them out and let them sit at room temperature for about 20 minutes, and they’ll taste just as fresh as the day you baked them.
The Best Soft Cut-Out Sugar Cookies
Ingredients
- 3.5 cups all purpose flour | 485g
- 1/4 teaspoon baking soda
- 1/4 teaspoon salt
- 1 1/2 sticks unsalted butter, room temperature |170g
- 1 cup granulated white sugar | 200g
- 2 eggs, room temperature
- 2 teaspoon vanilla extract
- 1/4 cup milk | 2 ounces
Instructions
- Combine dry ingredients: In a medium bowl, whisk together the flour, baking soda, and salt. Set aside.3.5 cups all purpose flour | 485g1/4 teaspoon baking soda1/4 teaspoon salt
- Cream butter and sugar: In a stand mixer fitted with the paddle attachment, beat the butter and sugar until light and creamy.1 1/2 sticks unsalted butter, room temperature |170g1 cup granulated white sugar | 200g
- Add eggs: Add the eggs one at a time, mixing well after each addition and scraping down the sides of the bowl as needed.2 eggs, room temperature
- Mix in extract: Add the extract and mix just until combined.2 teaspoon vanilla extract
- Add dry ingredients and milk: With the mixer on low speed, add the dry ingredients in batches, alternating with the milk. Mix just until the dough comes together. Do not overmix.1/4 cup milk | 2 ounces
- Chill the dough: Wrap the dough in plastic wrap and refrigerate for at least 1 hour.
- Roll and cut: Roll the chilled dough to 1/4-inch thickness on a lightly floured surface. Cut into desired shapes using cookie cutters.
- Preheat oven: Preheat the oven to 350°F.
- Bake: Bake for 10 to 12 minutes, or until the bottoms are lightly golden. Larger cookies may require additional baking time.
- Cool: Transfer cookies to a wire rack and cool completely before decorating or storing.
- Store: Store in an airtight container at room temperature.
- Yield: The number of cookies will vary depending on the size of your cookie cutters.
Did you try this recipe?
Share your experience in the comments below!
I’d love to hear how it turned out
Let’s see your creations!
Share your photos
Tag me @flourtinbakes on social media