Easy Royal Icing Recipe
I used to be completely intimidated by royal icing. It felt like one of those professional only ingredients that required a degree in pastry arts and a lot of patience I didn’t have. For years I stuck to canned icing because the idea of raw egg whites or getting the perfect “flood” consistency felt way too complicated.
Once I finally gave royal icing with meringue powder a try, everything changed. I realized that you really only need one basic recipe to do everything from fine detail work to smooth cookie surfaces. This version is my absolute favorite because it dries firm enough that you can stack your cookies in a gift box, but it still has a soft bite when you actually eat it.

There are no raw eggs to worry about here and only three simple ingredients are required. If you are new to decorating sugar cookies, this is the exact place I recommend starting. It is predictable and consistent which is exactly what you want when you are sitting down to get creative with a batch of cookies.
What You Need to Know About the Ingredients
When it comes to royal icing, the ingredients are simple, but how you handle them makes all the difference in getting that professional finish.
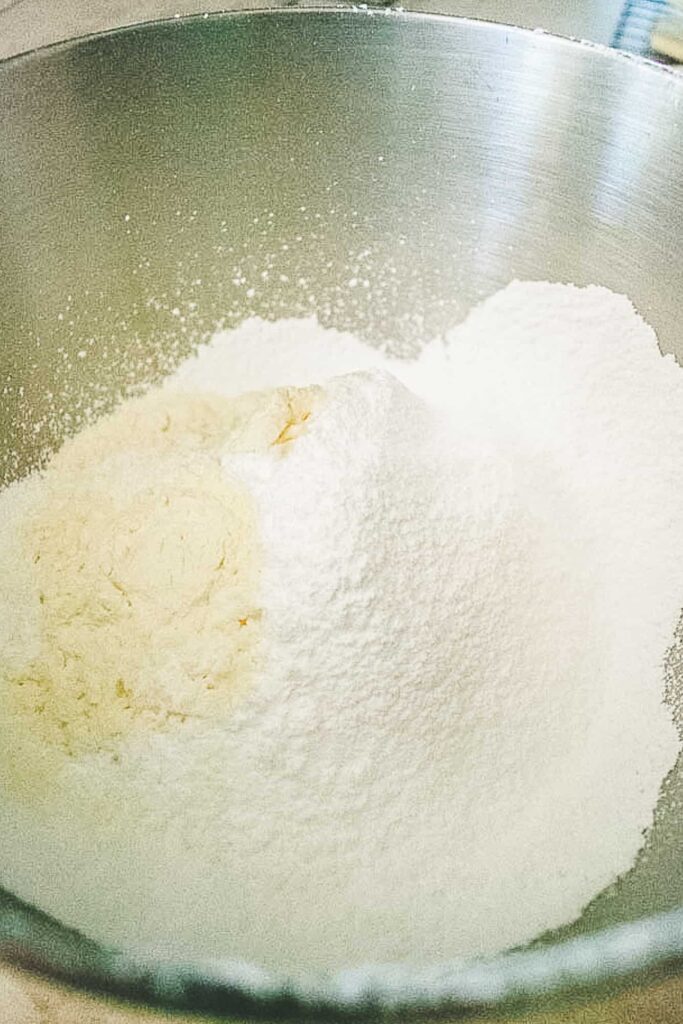
The most important step you can take is sifting your powdered sugar. I know it feels like an extra chore, but even tiny clumps can clog your piping tips and ruin a design you’ve worked hard on. I usually measure out my 480 grams first and then sift it directly into my mixing bowl. If your sugar has been sitting in the pantry for a while, it might be extra lumpy, so don’t skip this part.
Why Meringue Powder is the Best Choice
Then there is the meringue powder. This is the real secret to making the process stress free because it completely removes the need for those raw egg whites I used to be so worried about. Since it’s a pasteurized powder, you can share your treats with neighbors or friends without a single thought about food safety. It acts as a stabilizer that helps the icing dry smoothly without those frustrating cracks. You can find this at most craft stores or online, and it stays fresh in the pantry for a long time.
I always suggest using room temperature water when you start mixing. It helps the meringue powder and sugar incorporate more evenly than cold water does.
If you want to add a little flavor, this is also the stage where you can think about extracts. If you want to add color, I always suggest using gel food coloring. Unlike the liquid drops from the grocery store, gel is concentrated enough that it won’t thin out your icing or ruin the consistency you worked so hard to achieve.
Keep it White
If you want your icing to stay a crisp white, make sure to use clear vanilla or almond extract. Traditional dark extracts are delicious but they can add a slight ivory tint to your final batch.
Getting Your Kitchen Ready
Before I even think about turning on the mixer, I like to have my station completely set up. I always recommend using a stand mixer if you have one. This icing needs a good amount of mixing time to reach the right consistency, and while a hand mixer works, it takes a lot more effort to get the texture where it needs to be.
Having the Right Tools on Hand
I always reach for the whisk attachment for the machine, but I keep a hand whisk nearby too. I use the hand whisk for the very first step before I use the mixer. I also make sure my measuring spoons and a sturdy rubber spatula are clean and dry. It is a small step, but it ensures the meringue powder can do its job perfectly without any stray moisture or grease getting in the way.
I actually like to give my mixing bowl and whisk a quick wipe with a little lemon juice or white vinegar before I start. Any trace of grease or oil, even just a tiny bit leftover from a previous bake, can keep your royal icing from whipping up into those beautiful stiff peaks. Taking thirty seconds to ensure everything is grease free saves a lot of potential heartbreak later.
One little thing I always do is have a few damp paper towels ready to go. This icing starts to crust over the second it sits out in the open, so keeping your bowls or piping tips covered while you work is a total lifesaver.
The Mixing Process
Combining by Hand
The very first thing I do is sift the sugar into the bowl and add the meringue powder. Before the mixer ever gets plugged in, I pour in the water and use my hand whisk to combine everything.
I whisk it by hand until the sugar, meringue powder, and water are mostly incorporated. This is the best way to make sure there are no dry clumps hiding at the bottom of the mixing bowl and more importantly it means the powdered sugar won’t poof all over the kitchen the second the mixer starts. It should look like a thick, smooth paste before the machine takes over.
Mixing to Stiff Peaks
Once that is combined, I attach the whisk attachment and turn the mixer to medium speed. I usually let it go for about four minutes and then stop the mixer to scrape down the sides and the very bottom of the bowl with my rubber spatula. You want to make sure every bit of that sugar is moving so the icing stays uniform and you don’t end up with any grainy surprises when you start piping.
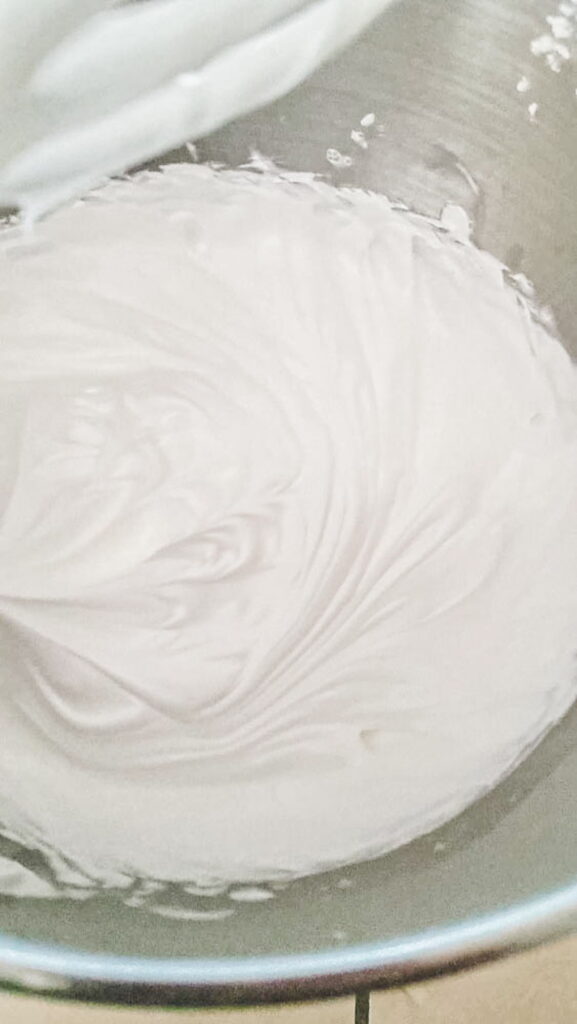
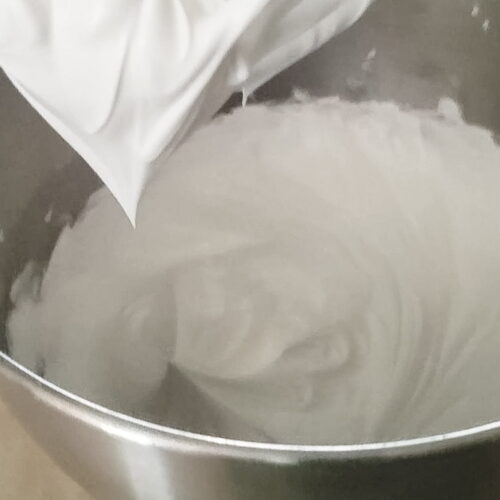
After that quick scrape, I let it mix for another five minutes. You are looking for stiff peaks that really hold their shape. When you lift the whisk, the icing should stand up straight without flopping over at all. It will look bright white and glossy which is exactly what you want. I always aim for this thick base because it is much easier to thin it down later with a little water than it is to try and thicken it back up once you have already started the decorating process.

Store Until Ready to Use
Once I have reached those stiff peaks, the mixing process is done. I don’t worry about adding colors or thinning it out just yet. Instead, I transfer this thick base to an airtight container and let it sit until I am actually ready to decorate. This is the stage where the icing is at its most stable.
I always put my icing into a container right away. If I’m not using it immediately, I make sure it is covered and put it in the fridge. If I know I am going to be using it very soon, I still put the lid on or use the damp paper towel trick I mentioned earlier to keep the air away from the icing. Royal icing starts to dry the second it hits the air, so keeping it protected is the only way to make sure it stays smooth and ready for those specific colors and designs later on.
How to Use Royal Icing
Once your base batch is ready, the real trick to successful decorating is getting the consistency just right. If you are new to this, a common way to measure thickness is the “seconds” rule. You simply drag a knife through the icing and count how long it takes for the line to disappear and become smooth again.
Finding Your Sweet Spot
I personally prefer a 10 to 15 second icing for most of my decorating. It should have the texture of thick pancake batter where it is thin enough to move but doesn’t just run off the spoon. While some bakers make separate versions for outlining and flooding, I usually keep things simple. When I am ready to decorate, I divide the icing into small bowls and use that one medium consistency for almost everything:
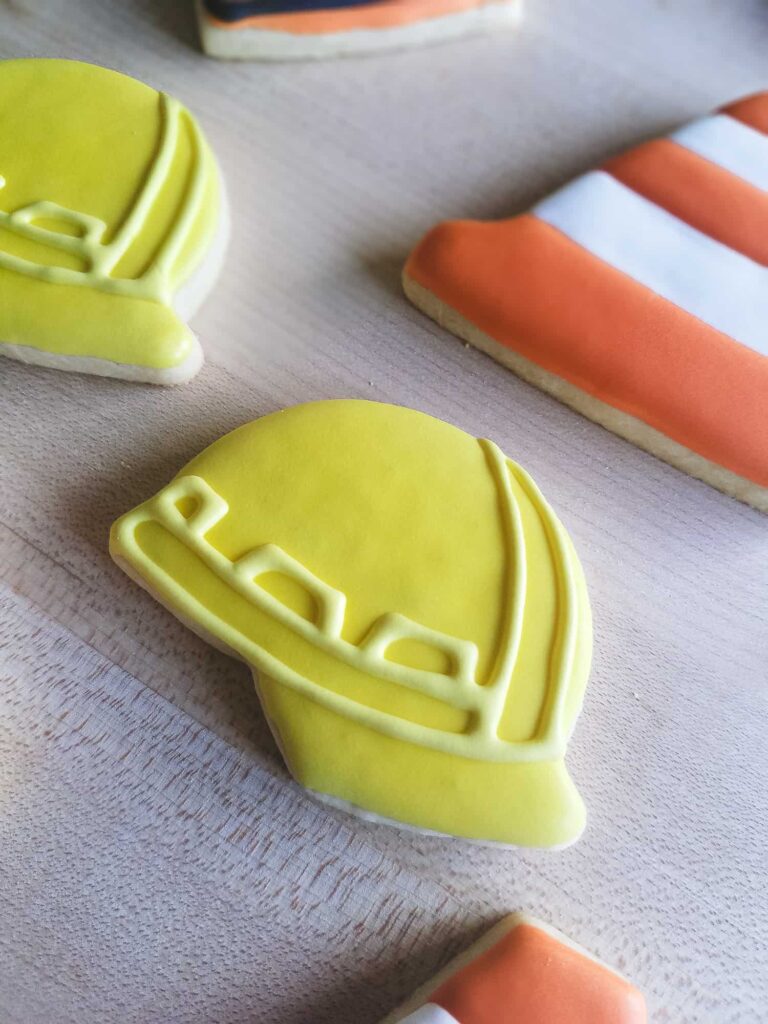
- Outlining: Even with a 15 second icing, you can pipe a steady border around your cookie. It should stay right where you put it without sliding off the edges.
- Flooding: Once your outline is set, you can use the same icing to fill in the center. Because it is supple enough, it will still level out into a smooth surface.
- Details and Writing: I will use my refrigerated icing which is usually a little thicker or I will whisk a spoon of powdered sugar into my 15 second icing to thicken it up as it will help details and letters from spreading.
If your icing feels a little too stiff, just add water a few drops at a time. It is amazing how quickly just a tiny bit of liquid can change the texture, so go slow. If you accidentally go too far and it becomes too runny, you can always whisk in a little more sifted powdered sugar to bring it back. The goal is to find a consistency that feels comfortable for you to work with that day.
Once your cookies are decorated, the drying time really depends on the humidity in your kitchen. A smooth base layer usually needs at least 6 to 8 hours to dry completely. I typically let mine sit out overnight before I even think about stacking them in a gift box just to be safe.

Make it Your Own
Once you are comfortable with the base recipe, you can start to have a little fun with the flavor profile. While clear vanilla is what I usually use, there are so many other ways to change things up
Flavor Variations
You can easily swap or add extracts to suit the season. Peppermint is a classic for the holidays, but I also love using almond, orange, or lemon. I usually start with about 1/2 teaspoon and then adjust it to my taste.
If you don’t mind a little bit of color change or tiny specks in your icing, spices are a wonderful addition. Cinnamon, vanilla bean paste, and even pumpkin pie spice are some of my favorites to mix in. Just remember to add a tiny bit at a time until the flavor is exactly where you want it.
Keep it Fresh
The great thing about this icing is that it actually keeps quite well if you store it properly. If you find yourself with leftovers after a decorating session, or if you want to prep your base batch well in advance, you don’t have to worry about it losing its quality.
Long Term Storage
I always recommend storing your royal icing in the refrigerator for any long term use. This is a huge help when you want to get the heavy lifting of the mixing out of the way on a weekend so you can focus entirely on decorating later in the week.
While it stays fresh in the fridge for up to a week, always trust your nose. If the icing smells off or the texture seems unusually gummy even after a good stir, it is best to play it safe and whip up a fresh batch.
Reusing Your Leftovers
The most important thing is to make sure your container is airtight so the icing doesn’t develop a crust. When you are ready to use it again, you might notice that the icing has separated slightly in the container. This is completely normal and doesn’t mean the icing has gone bad.
Just give it a good stir with a spoon or a small whisk to bring it back to its original smooth consistency. If the icing has been in the fridge, I find it is much easier to stir if you let it sit on the counter for a few minutes first to take the chill off. Once it is smooth again, you can adjust the consistency with a few drops of water if it feels a little stiffer than when you first mixed it.
Extra Protection
If you are worried your container isn’t 100% airtight, you can press a piece of plastic wrap directly onto the surface of the icing before closing the lid. This adds an extra layer of protection to keep that stubborn crust from forming.
Decorating Sugar Cookies: My Step-by-Step Timeline
Here’s the routine I follow when decorating sugar cookies. Adjust it to your pace and design style:
- Day 1 – Bake the cookies: Make the dough and bake. You can also bake in batches or freeze dough for later. I always use my favorite sugar cookie recipe because the cookies hold their shape and provide a flat surface for decorating.
- Day 2 – Make royal icing and base layer: Mix the icing and tint with gel food coloring. Make slightly more than you think you’ll need so all cookies match. Flood cookies with the base layer and let dry overnight.
- Day 3 – Add details: Pipe designs, lettering, or additional colors. Let each layer dry before adding the next. Depending on detail, this can take a day or two.
- Day 4 – Package: Ensure cookies are completely dry, then package for gifts, trays, or freeze cookies in airtight containers with parchment between layers.
I usually decorate one or two designs at a time. Keeping colors and styles limited helps me stay organized and enjoy the process. Then I repeat for the next batch.


Royal Icing with Meringue Powder
Ingredients
- 4 cups powdered sugar | 480g
- 3 tablespoons meringue powder | 7g
- 7 tablespoons water
Instructions
- Sift the powdered sugar: Sift the powdered sugar into the bowl of your stand mixer.4 cups powdered sugar | 480g
- Add the meringue powder: Add the meringue powder and whisk by hand until evenly combined with the powdered sugar.3 tablespoons meringue powder | 7g
- Add water: Pour in the water.7 tablespoons water
- Mix by hand first: Whisk until the sugar, meringue powder, and water are combined. This helps prevent dry clumps at the bottom of the bowl and keeps powdered sugar from flying when the mixer starts. Shake off any excess from the whisk.
- Mix on medium speed: Attach the whisk attachment and mix on medium speed (about 6 on a KitchenAid) for 4 minutes.
- Scrape the bowl: Stop the mixer and scrape down the sides and bottom of the bowl with a spatula.
- Finish mixing: Continue mixing on medium speed for another 5 minutes, until stiff peaks form and the icing leaves defined lines in the bowl.
- Store or use: Transfer the icing to an airtight container. Use as a base to color or adjust consistency, or refrigerate until ready to decorate.
Did you try this recipe?
Share your experience in the comments below!
I’d love to hear how it turned out
Let’s see your creations!
Share your photos
Tag me @flourtinbakes on social media