Lemon Icebox Pie with Vanilla Wafer Crust
I love a dessert that feels like a classic from a vintage bakery, and this lemon icebox pie is exactly that. It is one of those reliable favorites in my kitchen. It has all that nostalgic, creamy charm you probably remember from childhood, but I have made a few small tweaks to make sure the texture is silky and consistent every single time.
I know there is always a bit of a debate about whether an “icebox” pie should ever see the inside of an oven. While some old-school versions rely strictly on the citrus acid to thicken the filling, I prefer a very quick trip to the heat. That brief bake ensures the filling is stable and perfectly set without losing that signature cool, refreshing bite. It really is the ultimate make-ahead treat as it only gets better after a night in the fridge.
The Vanilla Wafer Difference
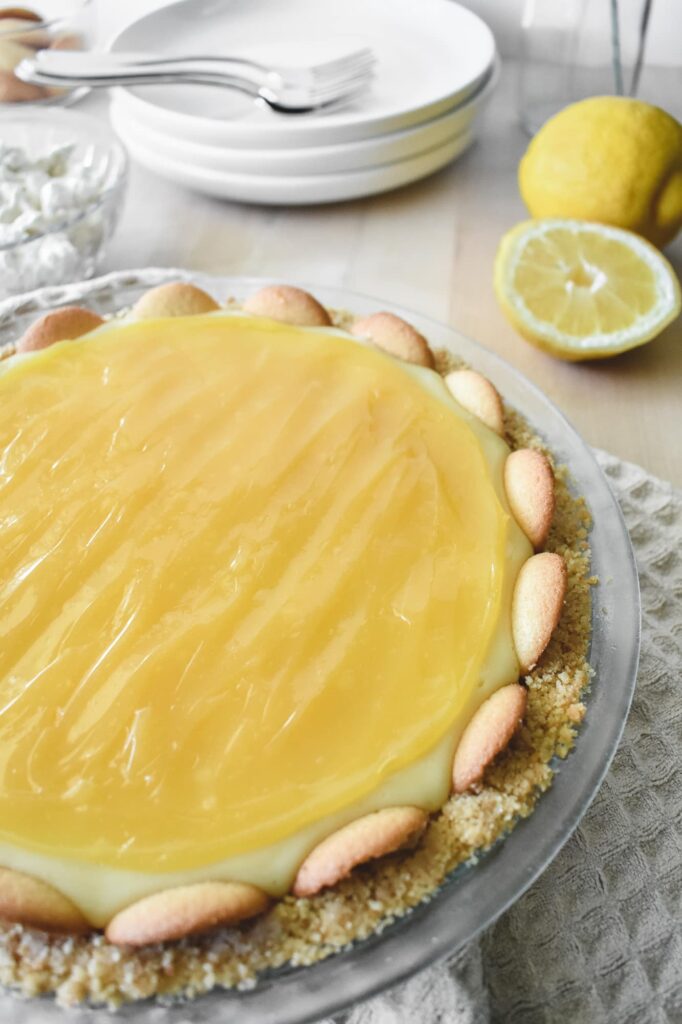
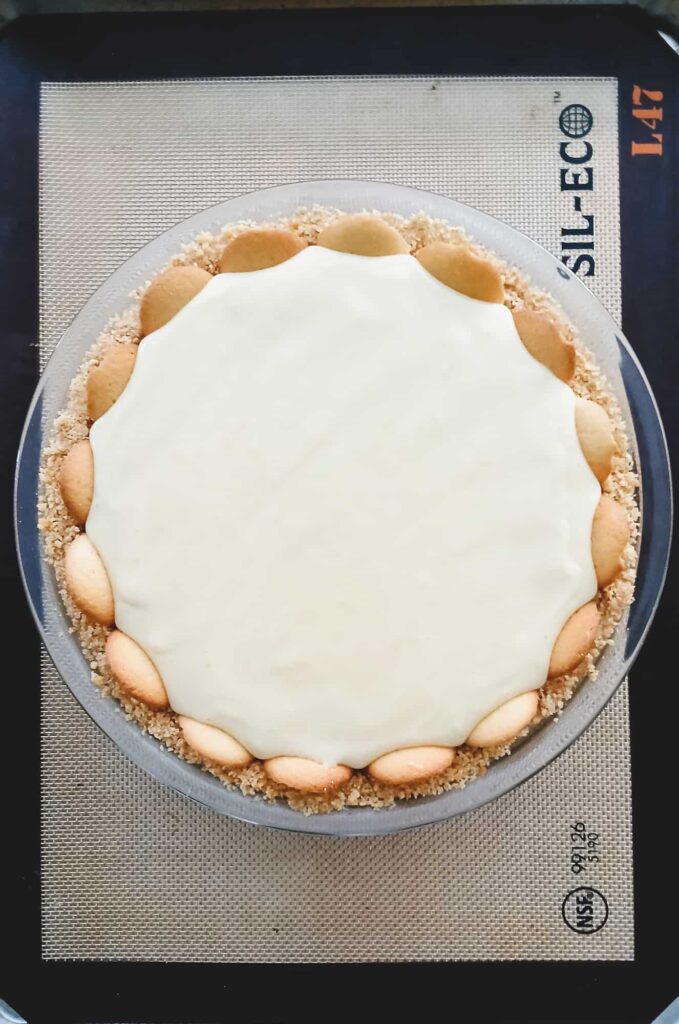
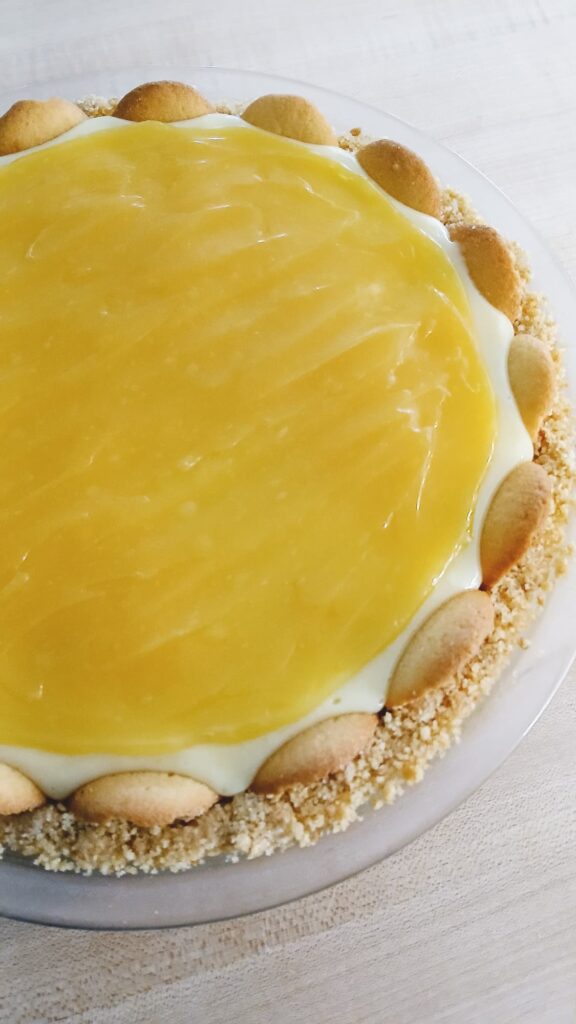
Most recipes call for a graham cracker crust, but I much prefer the toasted, buttery flavor of vanilla wafers here. They have a softer sweetness that balances the tart lemon perfectly. I wanted to recreate the look of those classic diner pies, so I added a border of whole cookies around the edge. It gives the pie a beautiful, structured look that makes it feel much more high-effort than it actually is.
Balancing the Tart Citrus and Creamy Base
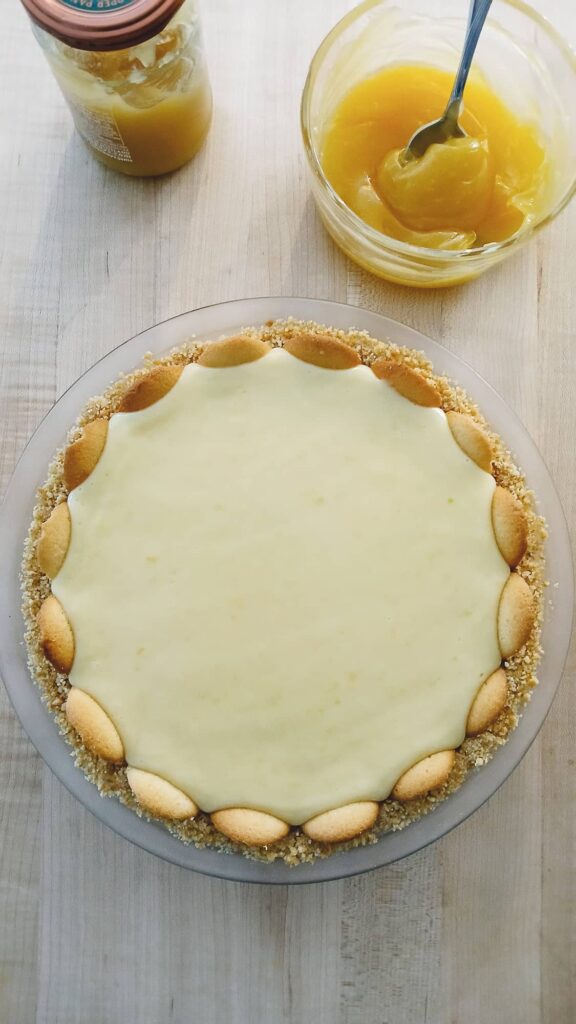
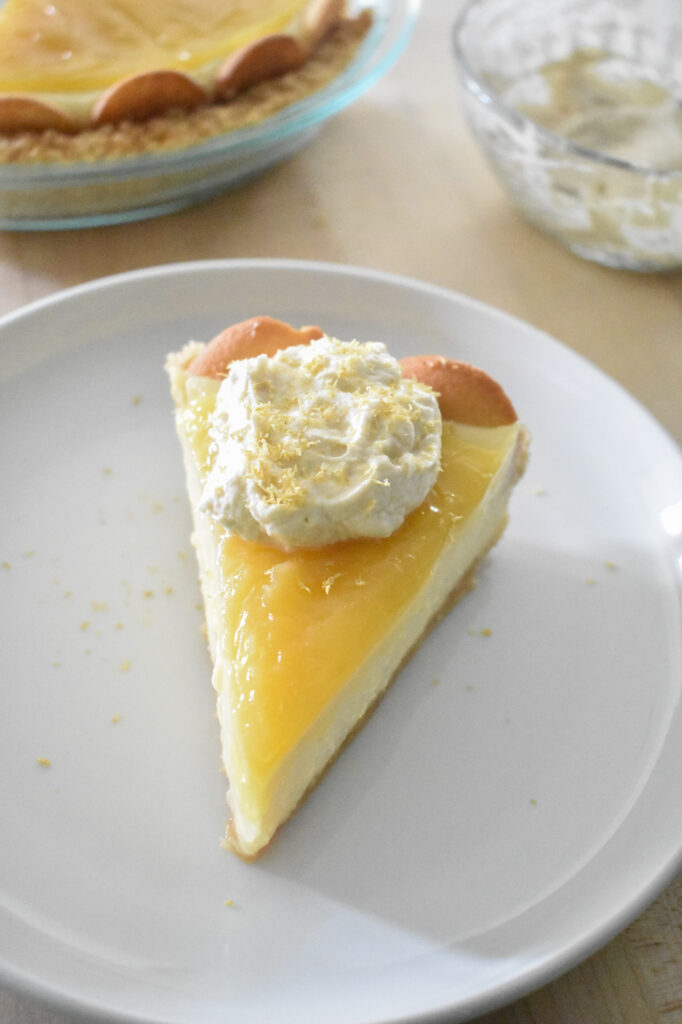
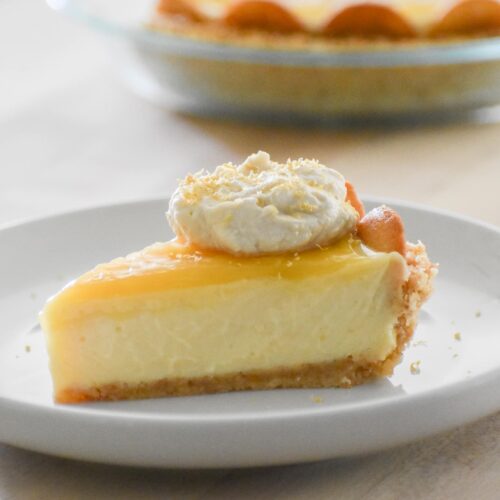
When a recipe only has a handful of ingredients, you really notice the quality of each one. I spent a lot of time testing this filling because I wanted something that felt more like a smooth, mellow custard than an aggressive, mouth-puckering citrus punch. The base is intentionally sweet and creamy, which is why I love the option of adding a layer of lemon curd on top. It provides that sharp, bright finish if you really want a bold lemon flavor, but the pie is just as delicious without it if you prefer a softer, more mellow dessert.
Why I Always Reach for Fresh Lemons


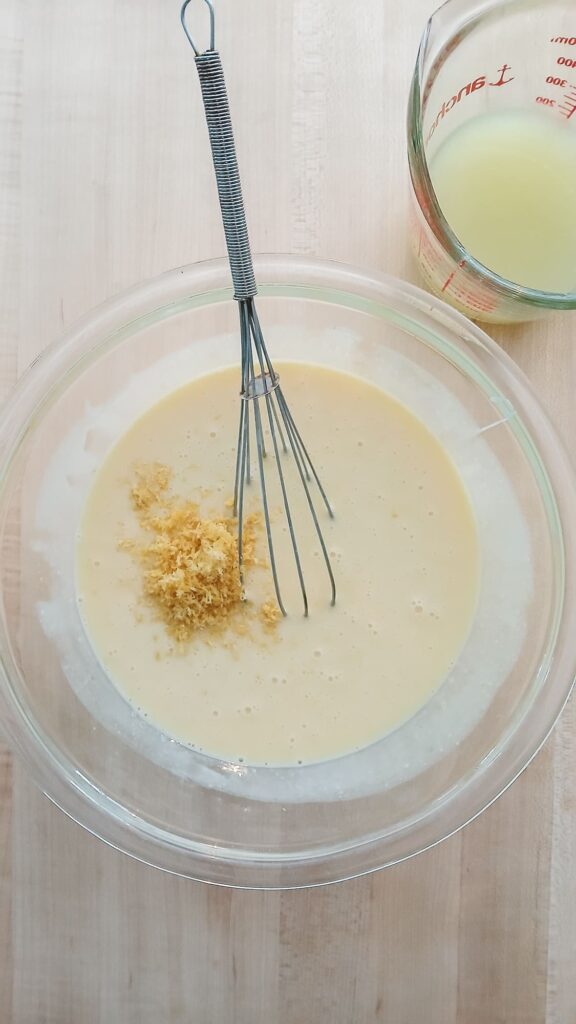
Even though the filling is more on the sweet side, I still think fresh lemons are a must. You will usually need about four to six medium lemons to get a full cup of juice and that tablespoon of zest. That zest is where all the aromatic oils live, and it gives the pie a beautiful lemon scent without making it overly sour.
Perfect Zesting
When zesting your lemons, only remove the bright yellow outer layer of the skin. Stop as soon as you see the white pith underneath, as that part is very bitter and can ruin the flavor of your sweet custard filling.
I always strain my juice through a fine-mesh sieve because finding a stray seed in a creamy pie is never a good surprise. If you happen to be a tiny bit short on fresh juice, you can top it off with the bottled stuff in a pinch, but you will definitely notice a difference in how bright the flavor tastes.
Using Your Extra Lemons
If you find yourself with an abundance of extra fruit, you could certainly use them to make a batch of homemade lemon curd for the topping. I usually reach for a store-bought jar to save a bit of time.
The Honey Whipped Cream
Most icebox pies use a basic vanilla whipped cream, but I started swapping the sugar for a bit of honey. It adds a little floral note that works so well with the lemon, whether you use the curd or not. A nice bonus is that honey actually helps the cream hold its shape a little better, which is a lifesaver if the pie is sitting out on a dessert table for a while.
Don’t Swap the Milk
It is so easy to grab evaporated milk by mistake since the cans look identical, but they are completely different. Sweetened condensed milk is thick, syrupy, and full of sugar, which is exactly what creates that creamy, decadent texture when it reacts with the lemon juice. Using the wrong one will leave you with a soupy mess instead of a sliceable pie.
Setting the Stage for a Perfect Slice
The preparation for this pie is quick, but there are a couple of small details that make a huge difference in the final look. I always start by getting my crust exactly right. While a food processor is the fastest way to get those fine, sandy crumbs, a rolling pin and a sturdy bag work just as well if you want to save on the dishes.
Building the Vanilla Wafer Border
The most important part of the prep is how you handle the whole cookies. I bake the crust for about ten minutes first to let it set. Once it comes out, I let it cool for just a few minutes before gently pressing the whole vanilla wafers upright against the sides. I usually use a standard 9-inch pie plate, but you can also use a springform pan if you want a more elegant, straight-sided look. If you go the springform route, I would skip the whole cookie border since those cookies won’t stay in place once you remove the outer ring.
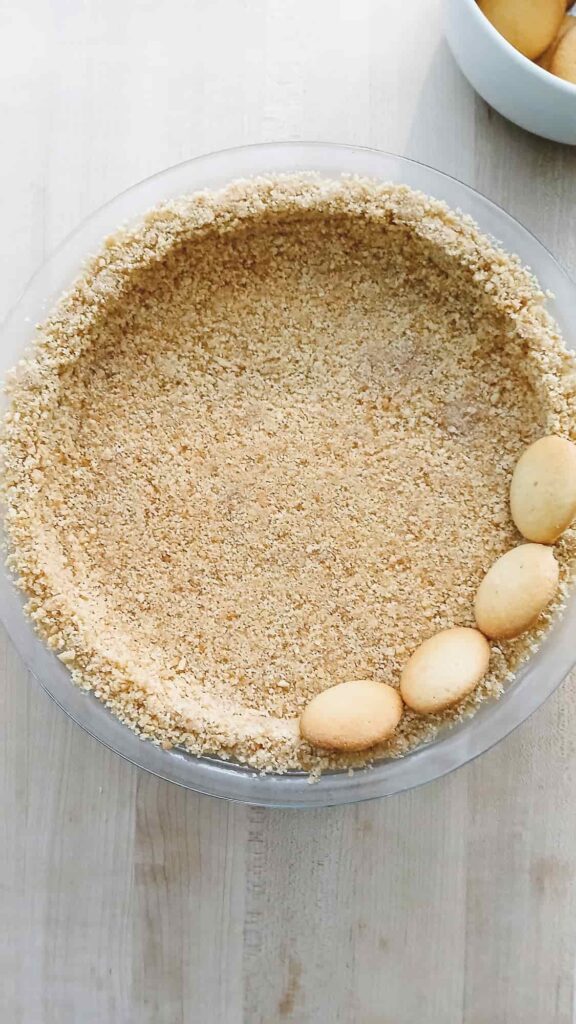
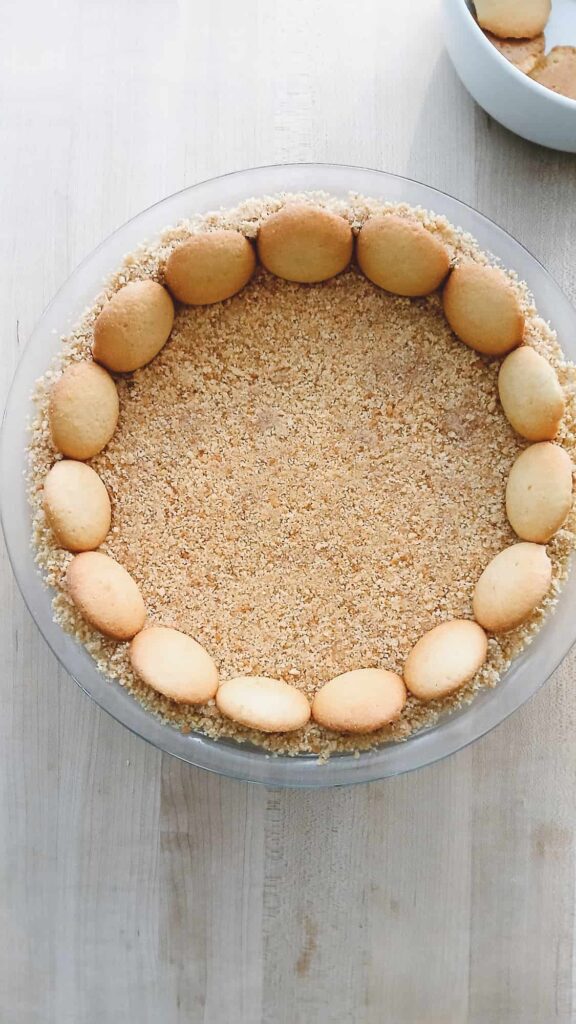
By waiting those few minutes, the crust is still soft enough to hold the cookies in place but firm enough that they won’t just slide around. I like to fit about sixteen cookies around a standard nine-inch pan. It gives the pie that bakery-style finish and ensures that every single slice gets two whole cookies on the edge.
Creating the Silky Lemon Filling
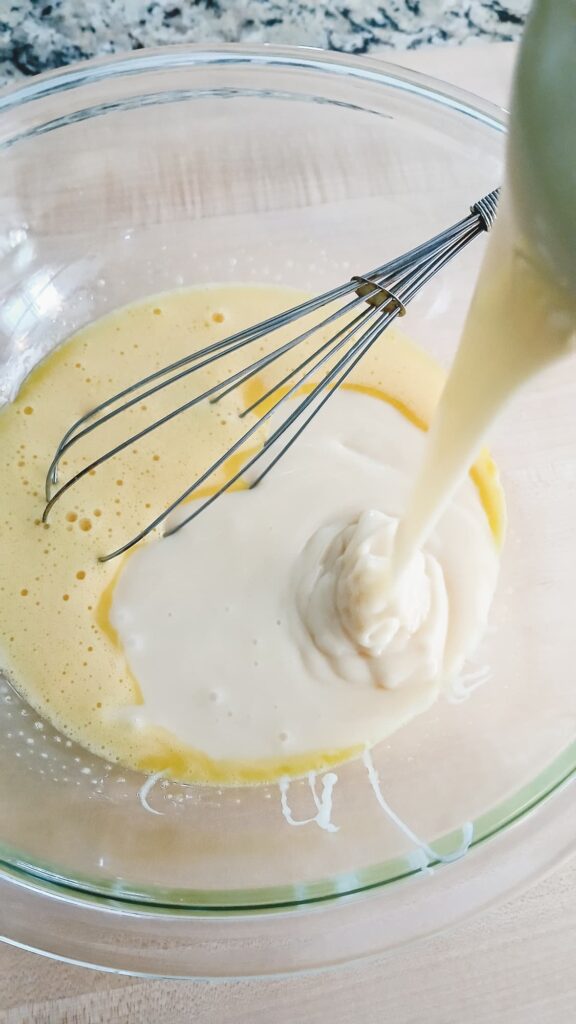
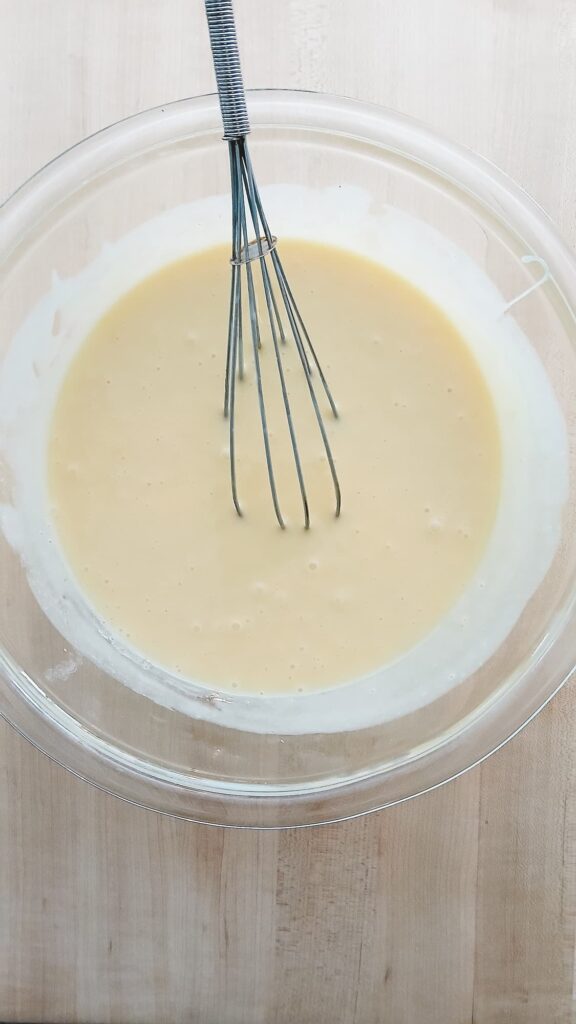
Once the crust is prepped, the filling comes together in just one bowl. This is where you see the magic of the ingredients interacting. The moment that lemon juice hits the sweetened condensed milk, you will actually see the mixture start to thicken up right before your eyes.
Getting the Right Set
I start by whisking my egg yolks for a minute or two until they look pale and a bit thickened. This simple step helps create a much lighter, more refined custard. After the milk and lemon juice go in, I pour it immediately into the prepared crust.
The bake time is short, usually only about thirteen to fifteen minutes. You are looking for the edges to be set while the center still has a slight, uniform jiggle. Overbaking can cause the top to crack, so I always keep a close eye on it during those last few minutes.
The Importance of a Long Chill
This is the hardest part of the entire process: the wait. I know it is tempting to slice into it early, but this pie really needs at least four hours in the refrigerator to fully set. If you can manage to leave it overnight, the flavors meld together and the texture becomes smooth and stable. It makes it so much easier to slice if give it plenty of time to get cold. I usually wait until right before serving to add the whipped cream so it stays as fresh and airy as possible.
Bringing it All Together
Once the pie has had plenty of time to chill, it is time for the final assembly. If you decided to go with the optional lemon curd, I like to warm it in the microwave for just a few seconds to loosen it up and make it more spreadable. I sometimes stir in the tiniest drop of yellow food coloring just to give the curd a bright, sunny pop that stands out against the pale yellow filling. It makes the whole pie look so much more vibrant.
Whipping the Honey Cream
The honey whipped cream is what really ties everything together. I whip the heavy cream, honey, and vanilla until I get soft, pillowy peaks. Instead of spreading it across the entire top, I prefer to add a generous dollop to each individual slice as I serve it. It keeps the presentation clean and lets that glossy lemon curd shine through. If you have a few extra vanilla wafers left over, a little sprinkle of crushed crumbs on top of the cream adds a nice bit of texture right at the end or some extra lemon zest.
Make It Your Own
You can easily adjust this recipe to fit your own taste. If you prefer a version that is even softer and more delicate, you can dial back the lemon juice to about 3/4 cup and use five egg yolks instead of six. It creates a slightly different consistency that is really lovely if you want a more subtle citrus flavor.
Swapping the Toppings
If honey isn’t your favorite, you can stick to a traditional vanilla cream by using a tablespoon of powdered sugar and a splash of vanilla extract instead. For those who really want to lean into the citrus theme, adding a little lemon extract to the whipped cream is a fantastic way to boost that flavor even further without changing the texture of the pie itself.
Quick Substitutions
There are days when I just don’t have the time to make every single component from scratch. If you are in a rush, a store-bought graham cracker crust works perfectly fine, though you will definitely miss that signature vanilla wafer border. You can also swap out the homemade whipped cream for a frozen topping if that is what you have in the freezer. It still makes for a fantastic, cooling dessert that everyone will enjoy.
Keep It Fresh
This pie stays great in the refrigerator for up to a week, though the crust will start to soften slightly after the third or fourth day. I always recommend keeping it covered so the filling doesn’t pick up any other scents from the fridge.
The Toothpick Trick
To cover your pie without ruining the top, place a few toothpicks around the edges to tent the plastic wrap. When you’re ready to serve, simply hide the tiny holes with a dollop of whipped cream.
Freezing for Later
If you want to make this way ahead of time, it actually freezes quite well. Some people even prefer to eat it partially frozen for a firmer, almost ice-cream-like texture. Just wrap the pie tightly in plastic wrap and then a layer of foil to keep it fresh. When you are ready for a slice, let it thaw in the fridge for an hour or two before serving.
Lemon Icebox Pie with Vanilla Wafer Crust
Ingredients
For the Crust
- 1 3/4 cups vanilla wafer crumbs | 195g
- 2 tablespoons granulated sugar | 25g
- 1/4 teaspoon salt
- 6 tablespoons unsalted butter melted | 85g
- 16 whole vanilla wafer cookies for the decorative border
For the Filling
- 6 large egg yolks | 112g
- 2 cans sweetened condensed milk | 14 ounces each
- 1 cup fresh lemon juice strained | 8 ounces
- 1 tablespoon fresh lemon zest | 6g
For the Topping
- Optional: 1/2 cup lemon curd for topping
- 1/2 cup heavy whipping cream cold | 4 ounces
- 1 tablespoon honey | 20g
- 1/4 teaspoon vanilla extract or paste
Instructions
Prepare and Bake the Crust
- Preheat the oven: Set your oven to 350°F to ensure it is fully heated before the crust goes in.
- Combine the crust ingredients: In a medium bowl, stir together the vanilla wafer crumbs, sugar, and salt. Add the melted butter and mix until the texture resembles wet sand.1 3/4 cups vanilla wafer crumbs | 195g2 tablespoons granulated sugar | 25g1/4 teaspoon salt6 tablespoons unsalted butter melted | 85g
- Form the base: Press the mixture firmly into the bottom and up the sides of a 9-inch pie plate. Use the bottom of a measuring cup to compact the crumbs evenly so the crust holds its shape.
- Bake the crust: Bake for 8 to 10 minutes until the edges are lightly golden brown.
- Add the cookie border: Let the crust cool for about 10 minutes. Gently press the 16 whole vanilla wafers upright along the inner edge of the crust to create a decorative border. Set aside.16 whole vanilla wafer cookies
Make the Lemon Filling
- Whisk the egg yolks: In a large bowl, whisk the yolks for 1 to 2 minutes until they are pale and slightly thickened.6 large egg yolks | 112g
- Incorporate the milk: Whisk in the sweetened condensed milk until the mixture is completely smooth and combined with the yolks.2 cans sweetened condensed milk | 14 ounces each
- Add the citrus and zest: Stir in the fresh lemon juice and zest. You will notice the filling start to thicken almost immediately as the acid reacts with the milk.1 cup fresh lemon juice strained | 8 ounces1 tablespoon fresh lemon zest | 6g
- Bake the filling: Pour the mixture into the prepared crust and bake for 13 to 15 minutes. Look for set edges and a slight, uniform jiggle in the center. Avoid overbaking to prevent any cracking on the surface.
Cool, Chill, and Serve
- Cool at room temperature: Allow the pie to sit on a wire rack for 30 minutes before moving it to the refrigerator.
- Chill the pie: Refrigerate for at least 4 hours, though overnight is best.
- Loosen the lemon curd: If using the optional curd, place it in a small microwave-safe bowl and heat for 5 to 10 seconds. Stir it well until it is smooth and barely spreadable.Optional: 1/2 cup lemon curd for topping
- Enhance the color (optional): This is the best time to stir in a tiny drop of yellow food coloring into the curd if you want a bright sunny color. Add a small amount at a time until you reach your desired shade of yellow.
- Spread the topping: Spread a thin, even layer of the prepared curd over the chilled pie. Refrigerate for another 20 minutes to let the topping set before adding the whipped cream.
- Whip the honey cream: In a cold bowl, whip the heavy cream, honey, and vanilla until you reach soft, pillowy peaks.1/2 cup heavy whipping cream cold | 4 ounces1 tablespoon honey | 20g1/4 teaspoon vanilla extract or paste
- Serve the pie: Dollop the honey whipped cream onto individual slices just before serving. Garnish with extra lemon zest or a sprinkle of wafer crumbs for a bit of extra texture.
Did you try this recipe?
Share your experience in the comments below!
I’d love to hear how it turned out
Let’s see your creations!
Share your photos
Tag me @flourtinbakes on social media