Classic Carrot Cake
I’ll be the first to admit it that I wasn’t always a carrot cake person. As a kid, the idea of “vegetables in dessert” felt like a trick. But this specific recipe changed everything for me.
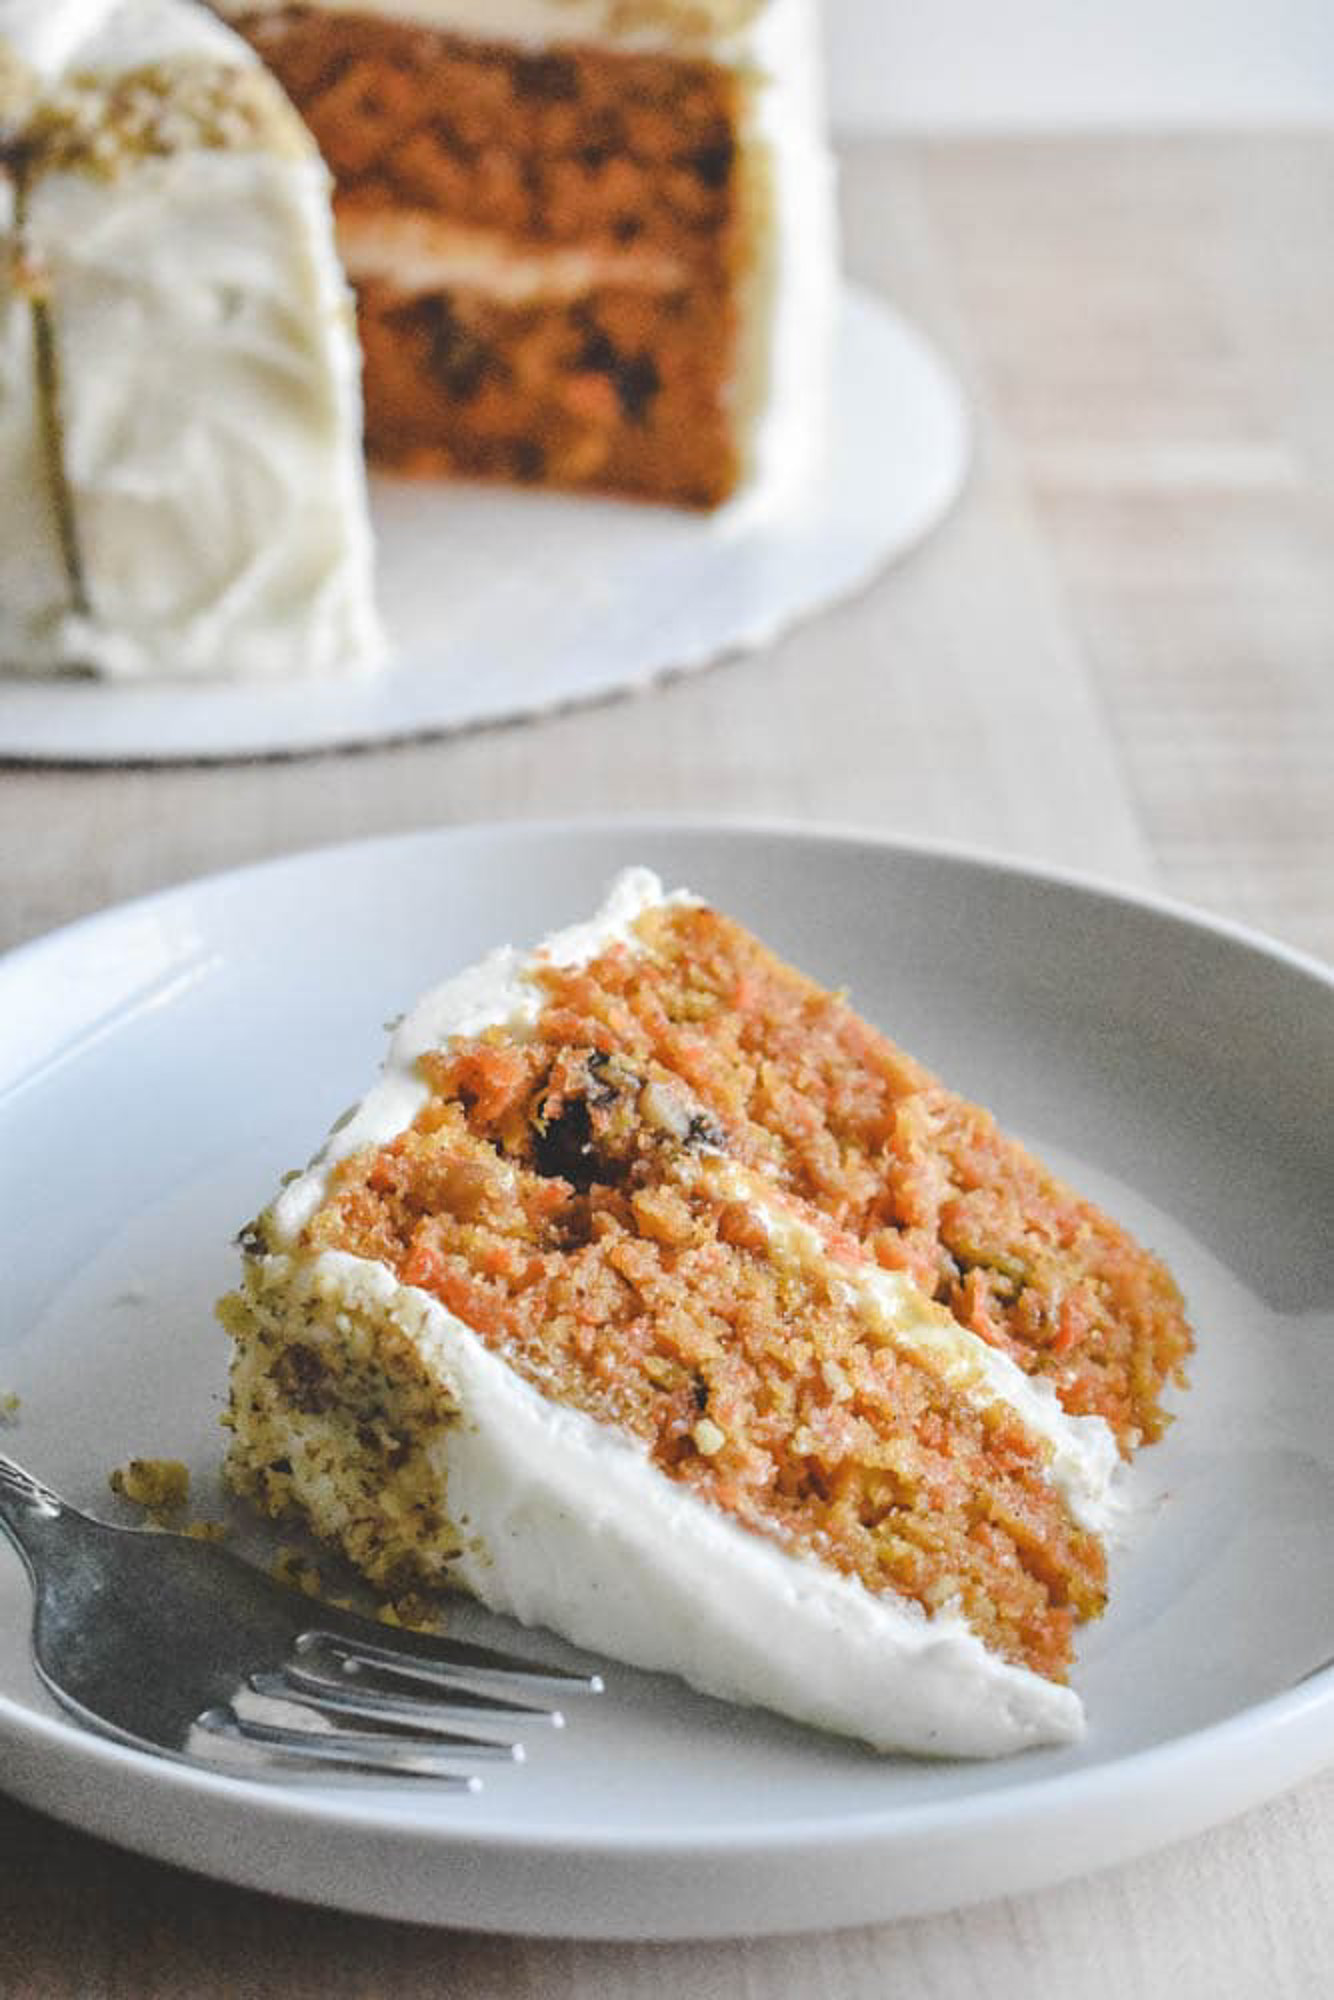
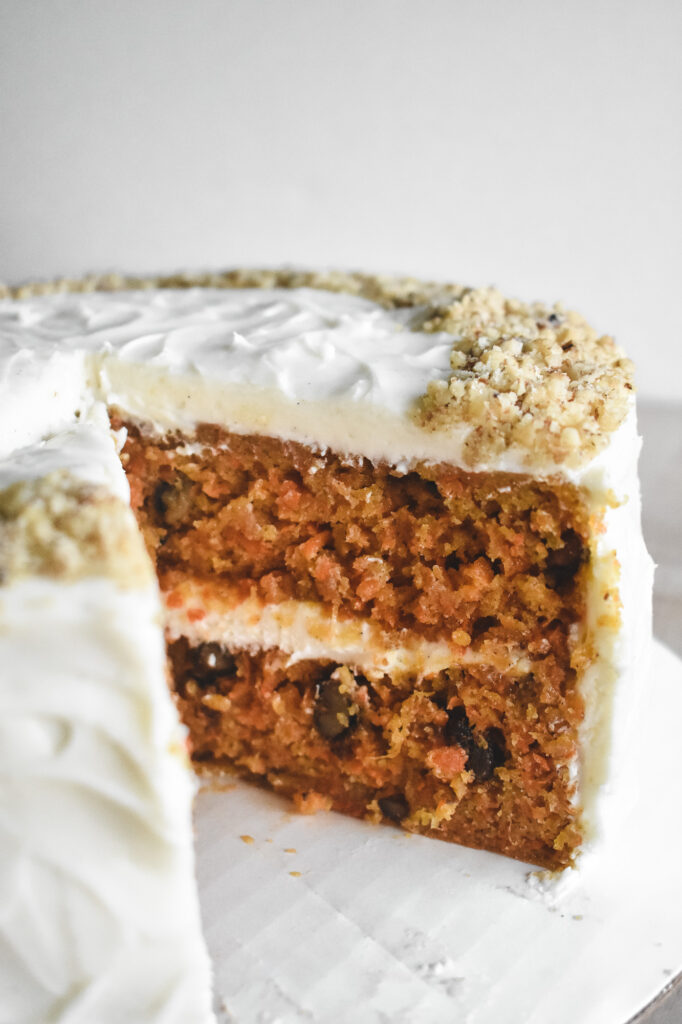
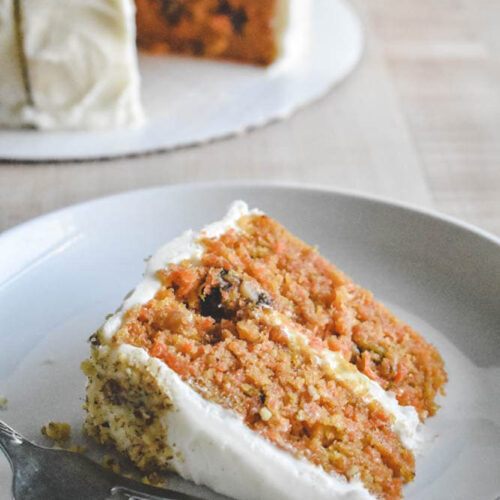
My mom didn’t bake often, but she had a handful of recipes she kept in her back pocket that always turned out perfectly. This carrot cake was the one she was known for. It’s the recipe that taught me what a carrot cake should be. It’s incredibly moist without being oily, spiced without being overwhelming, and topped with a cream cheese frosting so tangy and thick it’s practically its own food group.
What I love most about this cake is how straightforward it is. There are no fussy techniques, no mountain of dishes, and no complicated steps. It’s a simple, from scratch classic that bakes up delicious every time. Whether I’m making it for Easter or a family birthday, this is the one recipe I never have to second guess.
The Secret to a Truly Moist Carrot Cake
If you’ve ever had a carrot cake that was dry or bland or even crunchy in the wrong places, it usually comes down to the prep. This recipe is incredibly forgiving, but there are two specific ingredients where I never take shortcuts.
Fresh Carrots vs. Bagged
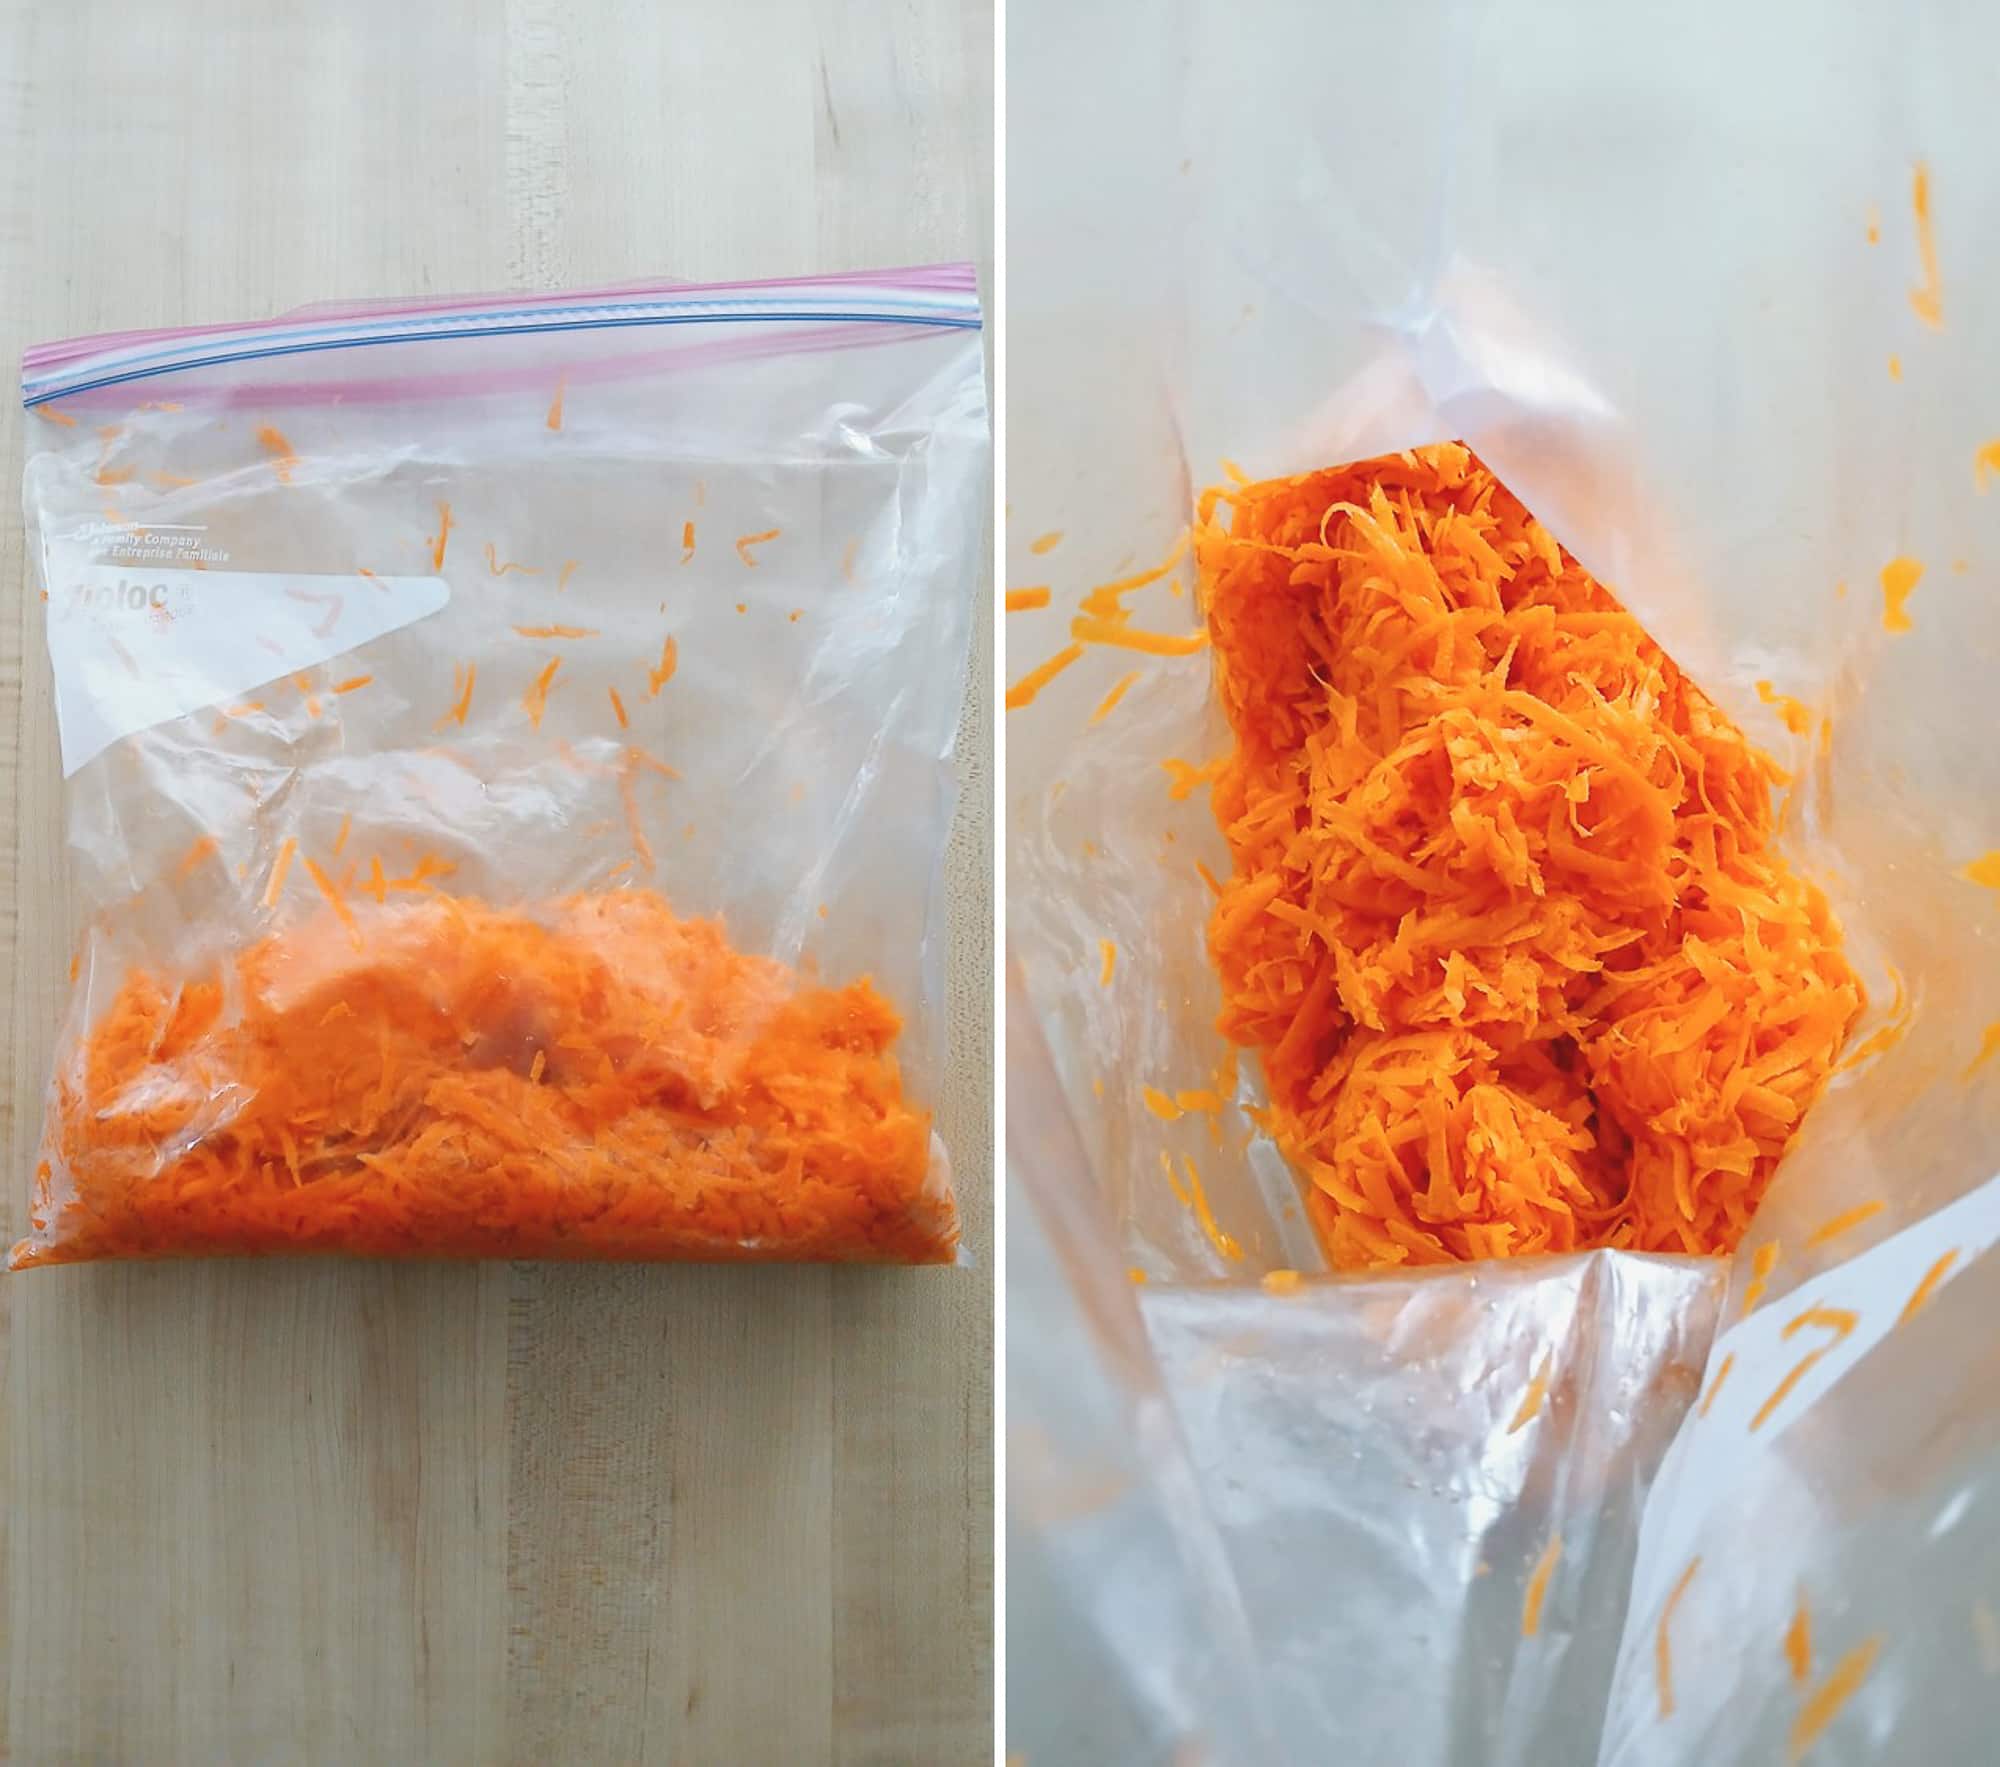
Skip the pre-shredded carrots in the bag. Those are great for salads, but they are processed to have a long shelf life, which makes them thick and dry. For this cake, I always grate my carrots fresh. I also make sure to peel them first as the outer skin can be slightly bitter, and peeling ensures the carrots melt perfectly into the batter for a soft crumb. I usually use the shredding blade on my food processor to get the job done in seconds, but the carrots can also be shredded by hand using a box grater.
Since shredding carrots takes a bit of effort, I often prep them a day ahead. You can store them in an airtight bag in the refrigerator so they are ready to go when you are.
Don’t Skip the Peel
Always peel your carrots before shredding. The skin can be bitter and tough. Removing it ensures the carrots melt perfectly into the batter for an ultra soft crumb.
The “Hidden” Moisture
The real secret to why this family recipe stays moist for days is the crushed pineapple. It does not make the cake taste like a tropical drink. Instead, it works behind the scenes to add a layer of sweetness and even more moisture. The trick here is to drain it well. I like to press the pineapple down with a spoon in a mesh strainer to get out as much juice as possible. We want the fruit and not the extra liquid, otherwise the batter will end up too wet.
Oil for Texture
While those two ingredients handle the moisture, I also rely on vegetable oil rather than butter. Oil based cakes stay moist much longer and allow the warm cinnamon and spices to really take center stage.
My Tips for Measuring Shredded Carrots
Carrots are the star of this recipe, but measuring them can be a little tricky. This recipe calls for three cups of shredded carrots, but that amount can vary depending on how tightly they are packed into the cup.
The Precision Method
For the most accuracy, I recommend using a food scale. I aim for about 120 to 130 grams per cup, which is roughly 360 to 390 grams total. This recipe is forgiving, so being slightly under is not a problem, but I avoid going over 400 grams to prevent excess moisture.
If you do not want to weigh them, the easiest option is to shred a one pound bag of carrots and use the whole thing. It is the perfect amount and keeps the cake moist without making it wet.
The Right Tools for the Job
To make the prep as easy as possible, I rely on a few specific kitchen tools. I use my food processor with the shredding blade to turn a pile of carrots into a mountain of shreds in seconds, though a box grater works just as well if you don’t mind the arm workout. For the batter, I prefer a hand mixer to ensure I don’t overwork the gluten, but for the frosting, a stand mixer is my favorite way to get that cream cheese and butter whipped into a light, airy consistency.
Making the Batter and Getting the Bake Right
Prepping the Pans and Oven
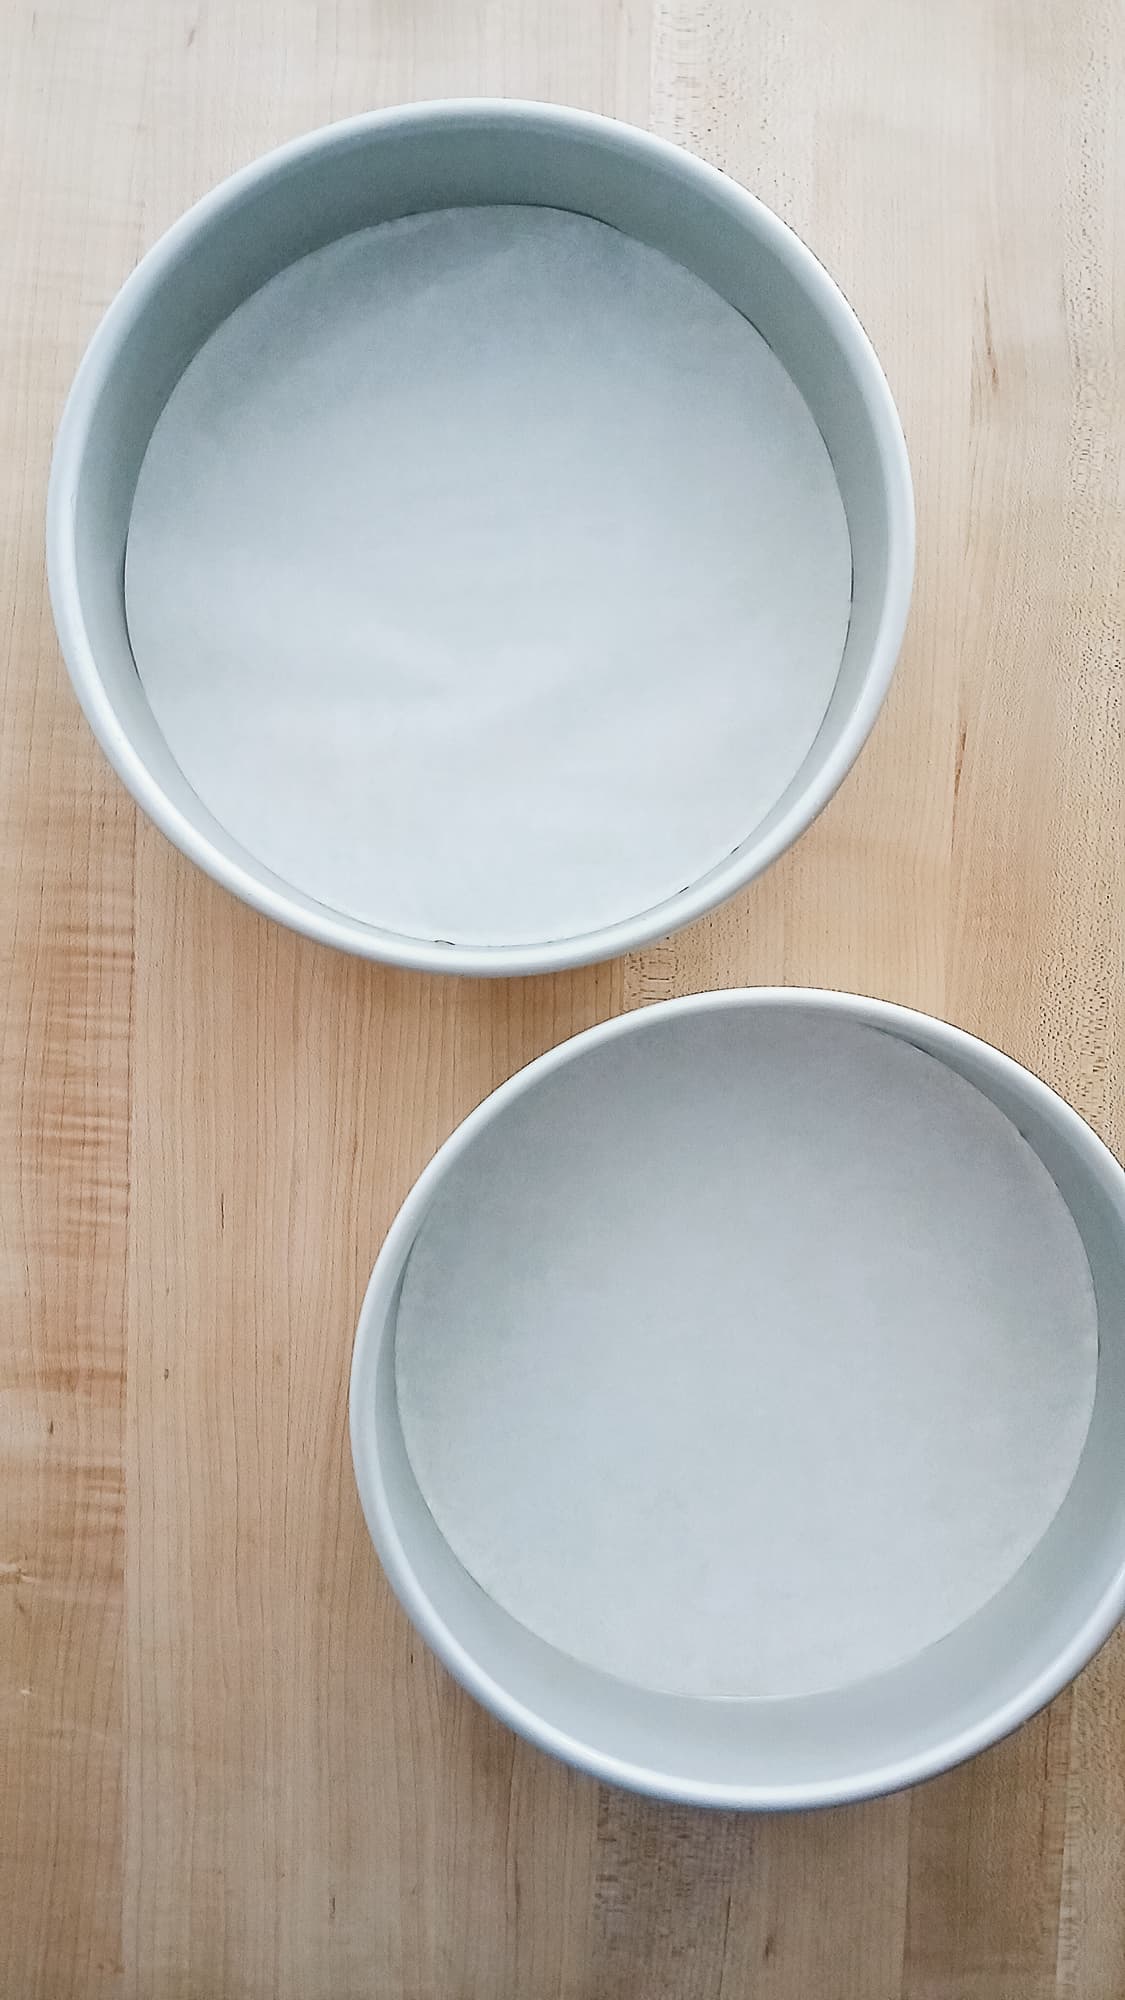
Before I start on the batter, I always preheat my oven to 325°F. While 350°F is standard for most bakes, this lower temperature is my trick for ensuring these moist heavy layers bake through evenly without the edges becoming too dark. I then prepare my cake pans by lining the bottoms with parchment paper and greasing the sides. Even with a good grease job, carrot cake is naturally tacky because of the sugar and fresh carrots, and parchment is the way I guarantee the layers pop out cleanly every time.
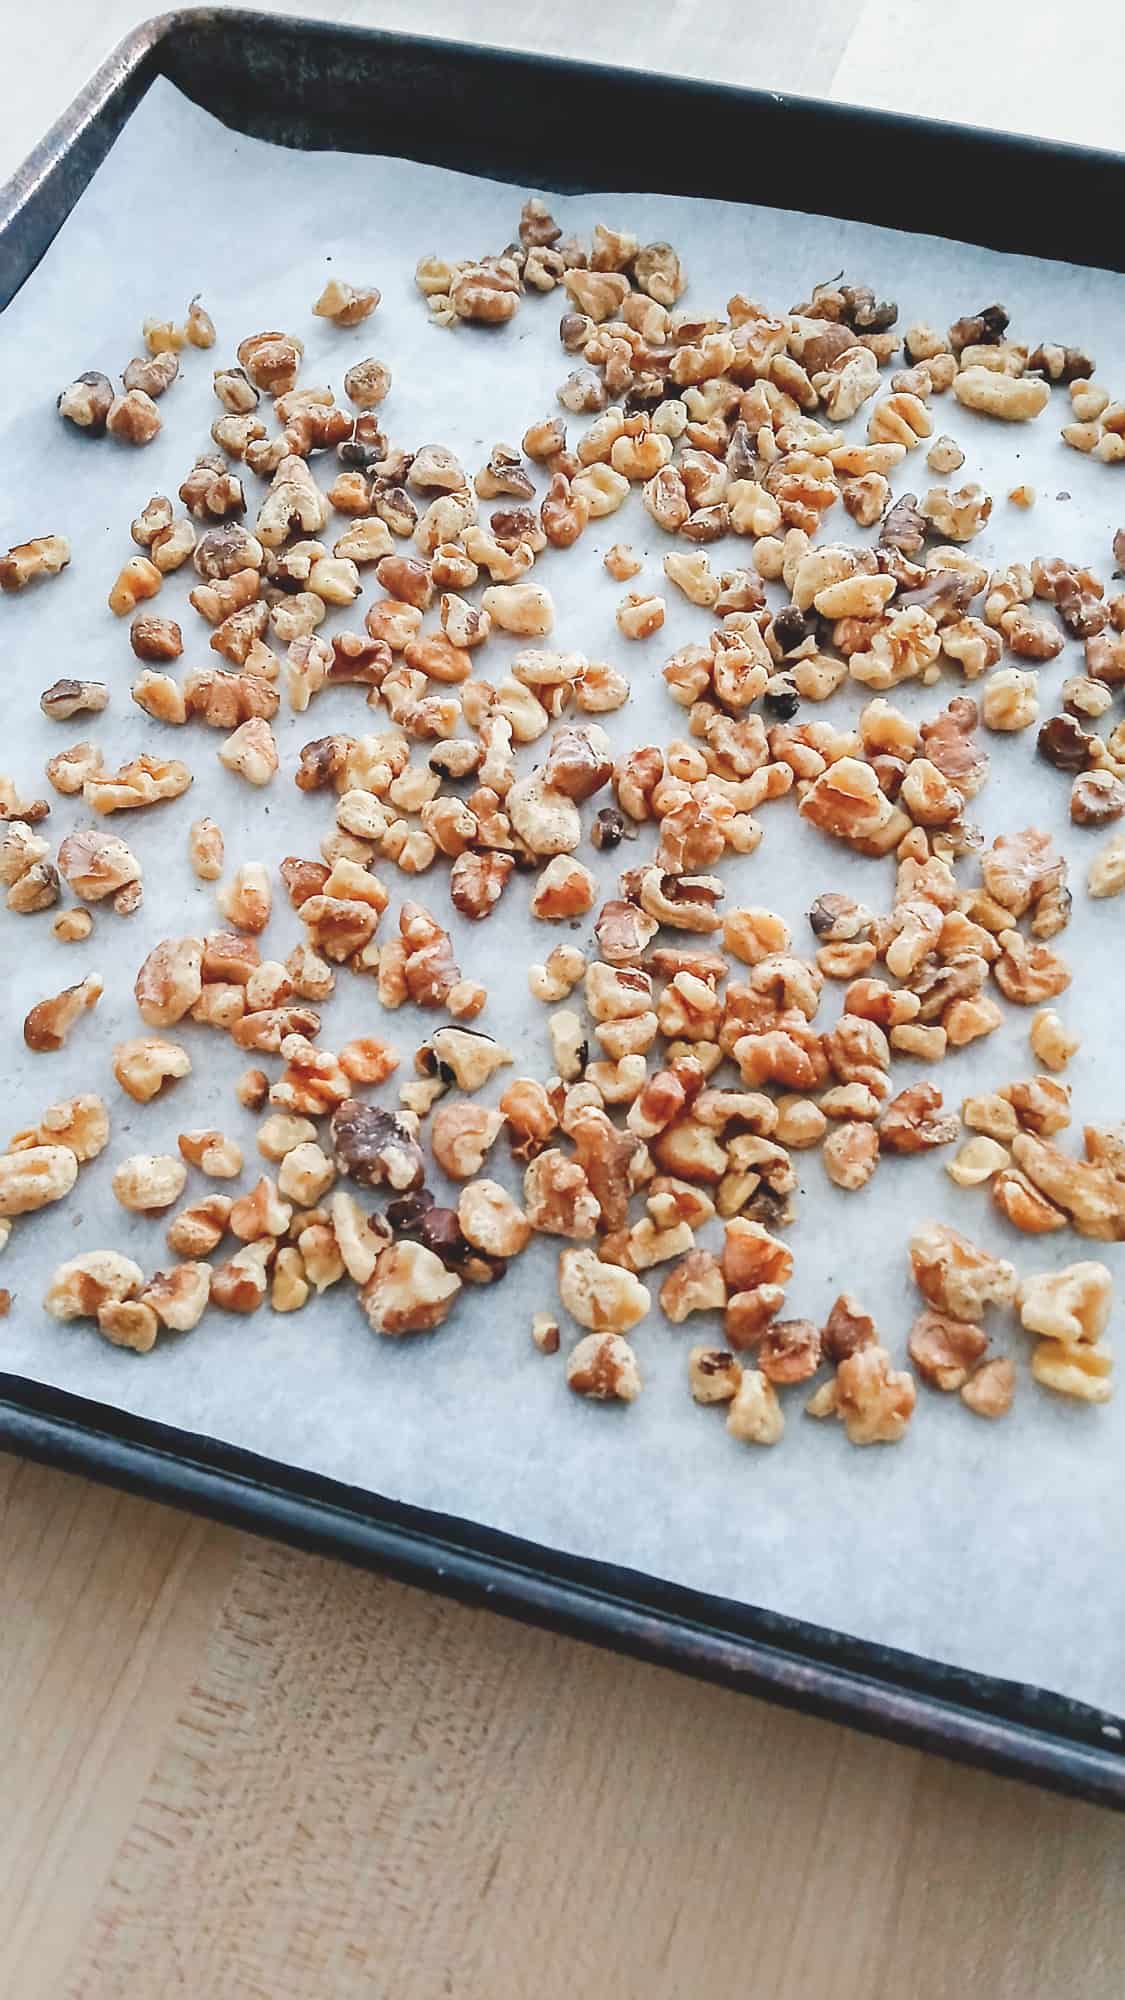
If you are using nuts, this is also the time to toast them. I never skip this step! I usually toast mine in the toaster oven for about 3 minutes. You have to watch them closely so they don’t burn, but that quick toast brings out a nutty aroma that makes the cake taste so much more professional. I let them cool before folding them into the batter later.
Whisking and Mixing
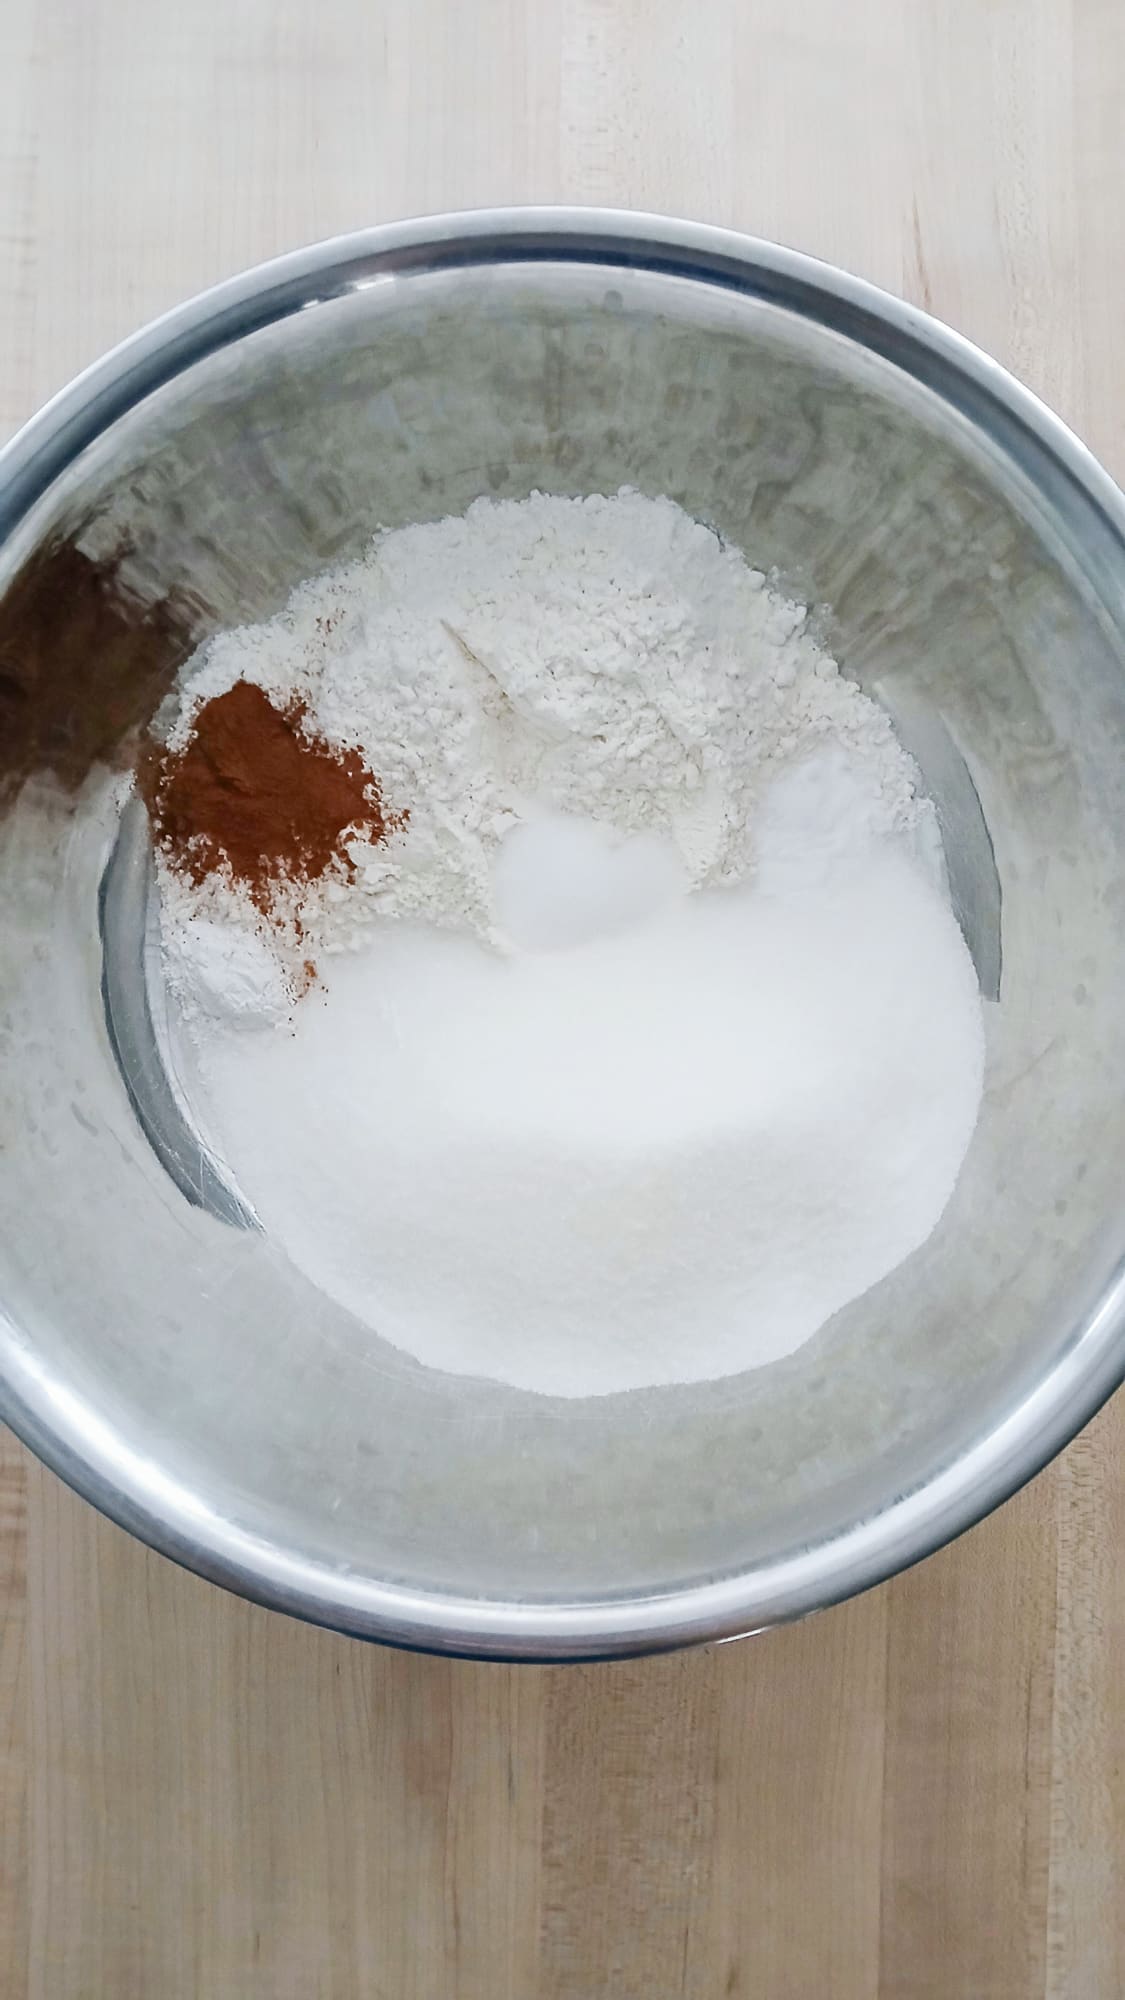
In a large mixing bowl, I whisk together the flour, sugar, baking powder, baking soda, salt, and cinnamon. You want to keep whisking until the mixture is a uniform, sandy color with no visible lumps of baking soda or cinnamon streaks. Taking a moment to do this properly ensures that the spices are evenly distributed, so you don’t end up with a “spice pocket” in one bite and nothing in the next.
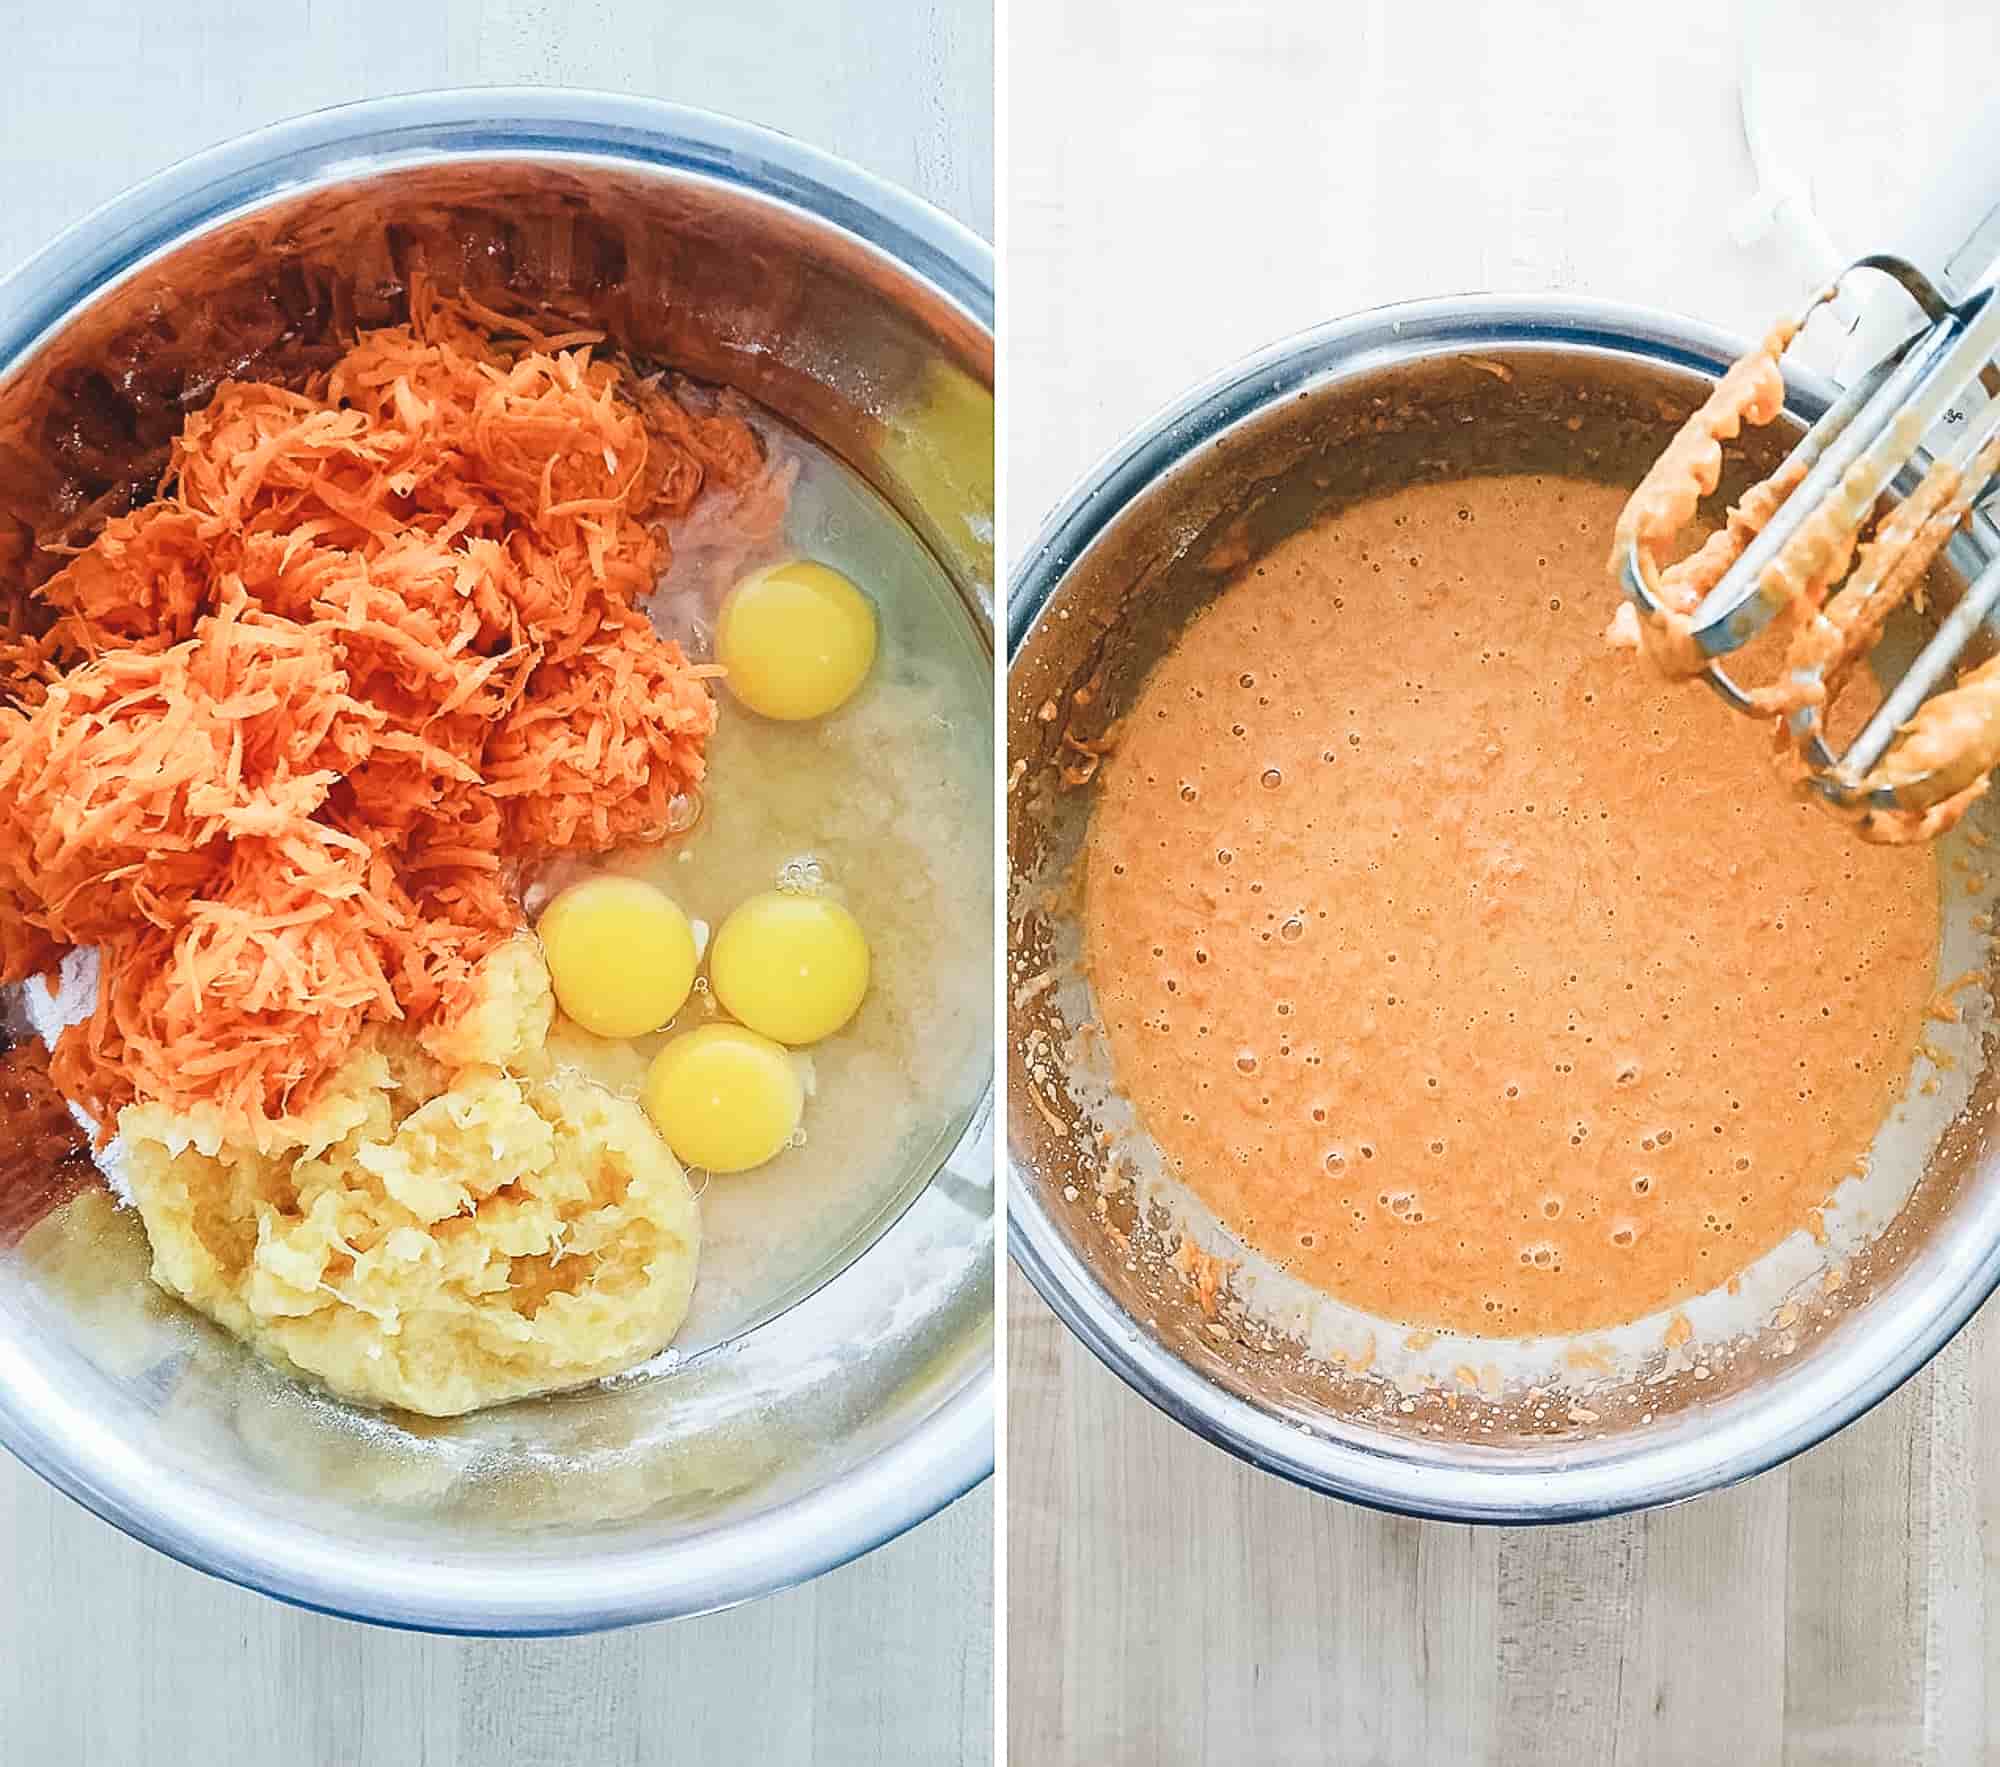
Once the dry ingredients are ready, I add the shredded carrots, vegetable oil, drained pineapple, and eggs. I use a hand mixer on medium speed for about two minutes. The goal is to stir only until everything is combined. Overmixing is the quickest way to end up with a dense, tough cake instead of a tender one. You are looking for the batter to become fully incorporated and slightly glossy.
If you are adding toasted walnuts or raisins, this is the moment to put down the mixer. These should always be the very last things added to the batter, and you want to fold them in gently by hand with a spatula. Using a mixer for this final step can overwork the batter and break up the nuts, so a light hand is key!
The Bake and the Bounce
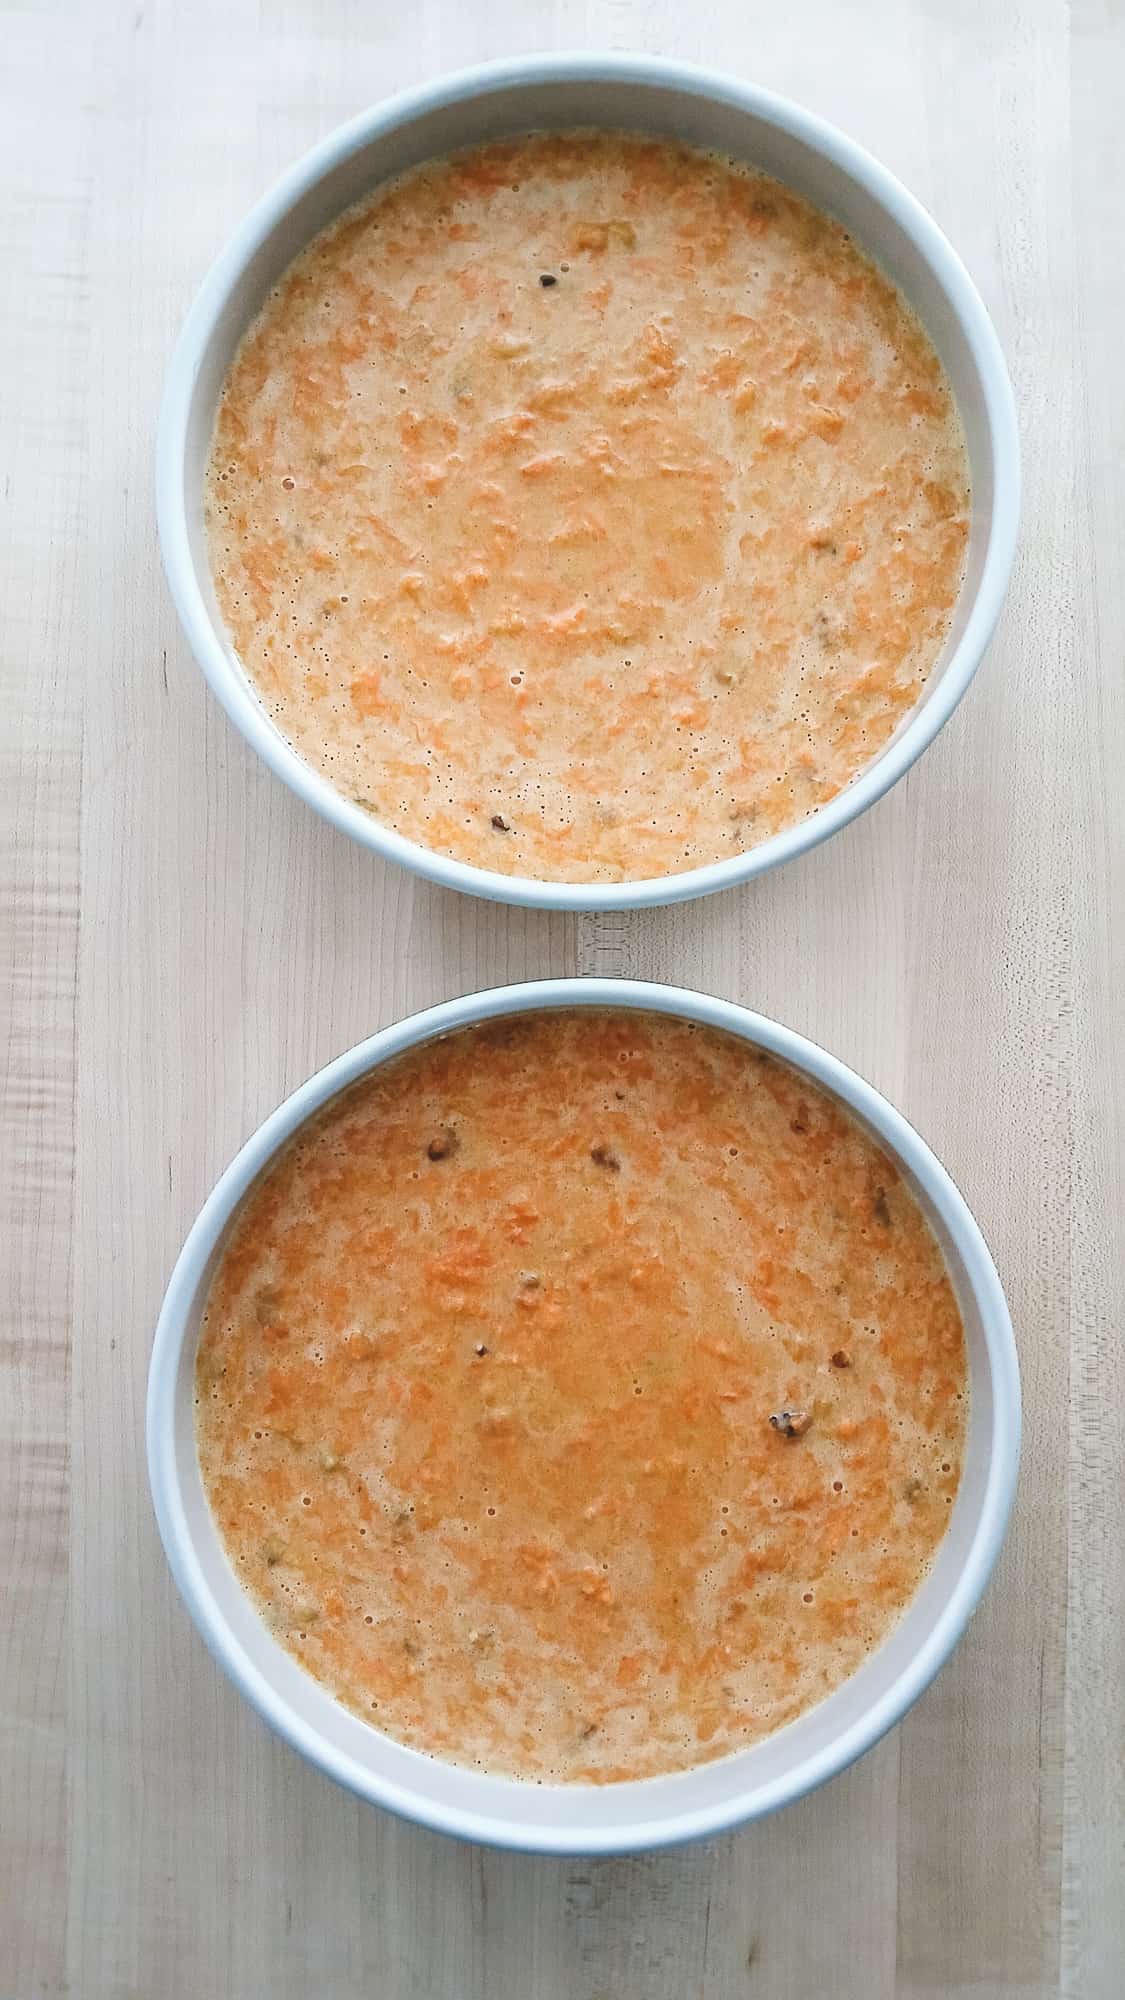
I divide the batter evenly between the prepared pans. Because I tend to fill my pans a bit more for thicker layers, they usually need about 55 to 60 minutes in the oven. You will know they are ready when the center no longer jiggles and the top bounces back slightly when touched. I always double check by inserting a toothpick into the center. If it comes out clean or with just a few moist crumbs, it is time to pull them out.
The Flat Top Secret
For perfectly level layers, I use Bake Even strips. You soak them in water and wrap them around your pans before baking. They prevent the cake from “doming” in the middle and keep the edges from over browning.
Cooling the Layers
This is the most important part for a successful assembly. I let the cakes cool in the pans for about 20 minutes, which allows the structure to set so they don’t break. You will see the sides start to pull away from the edges naturally. After that, I move them to a wire rack to reach room temperature. If there is even a hint of warmth left in the cake, it will melt the cream cheese frosting, so I make sure they are 100% cool before I start decorating.

The Finishing Touch: Cream Cheese Frosting
The Secret to Stable Frosting
For a frosting that is thick and stable enough for a layer cake, I always use full-fat cream cheese in the block form. I avoid the spreadable cream cheese in a tub because it has a higher water content and will make your frosting too runny to hold up the cake layers.
It is also vital to use room temperature butter and cream cheese. I always let them sit on the counter until they are completely soft to the touch. Cold ingredients are the main cause of clumpy or gritty frosting; softening them first is the only way to ensure the texture stays smooth and easy to spread.
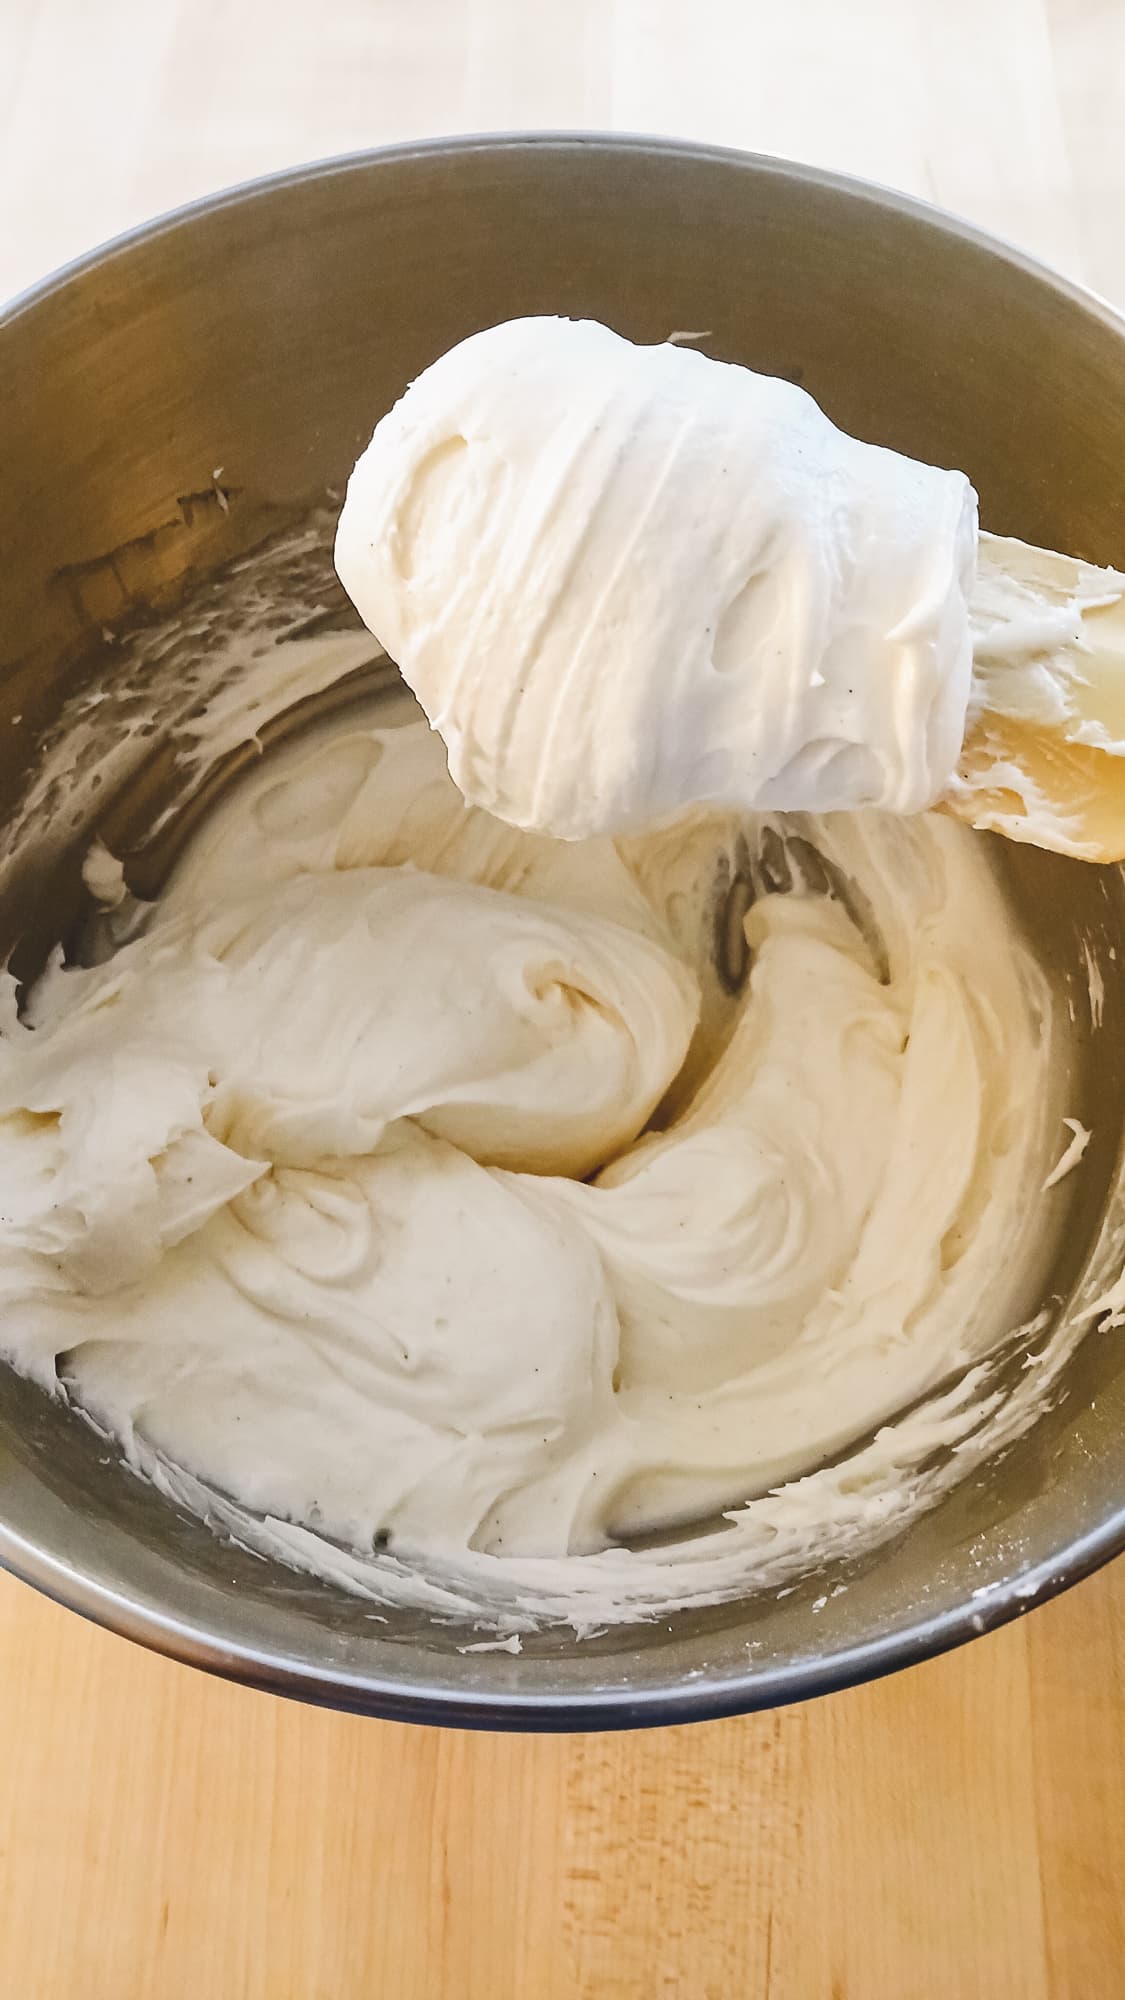
Whipping Up the Frosting
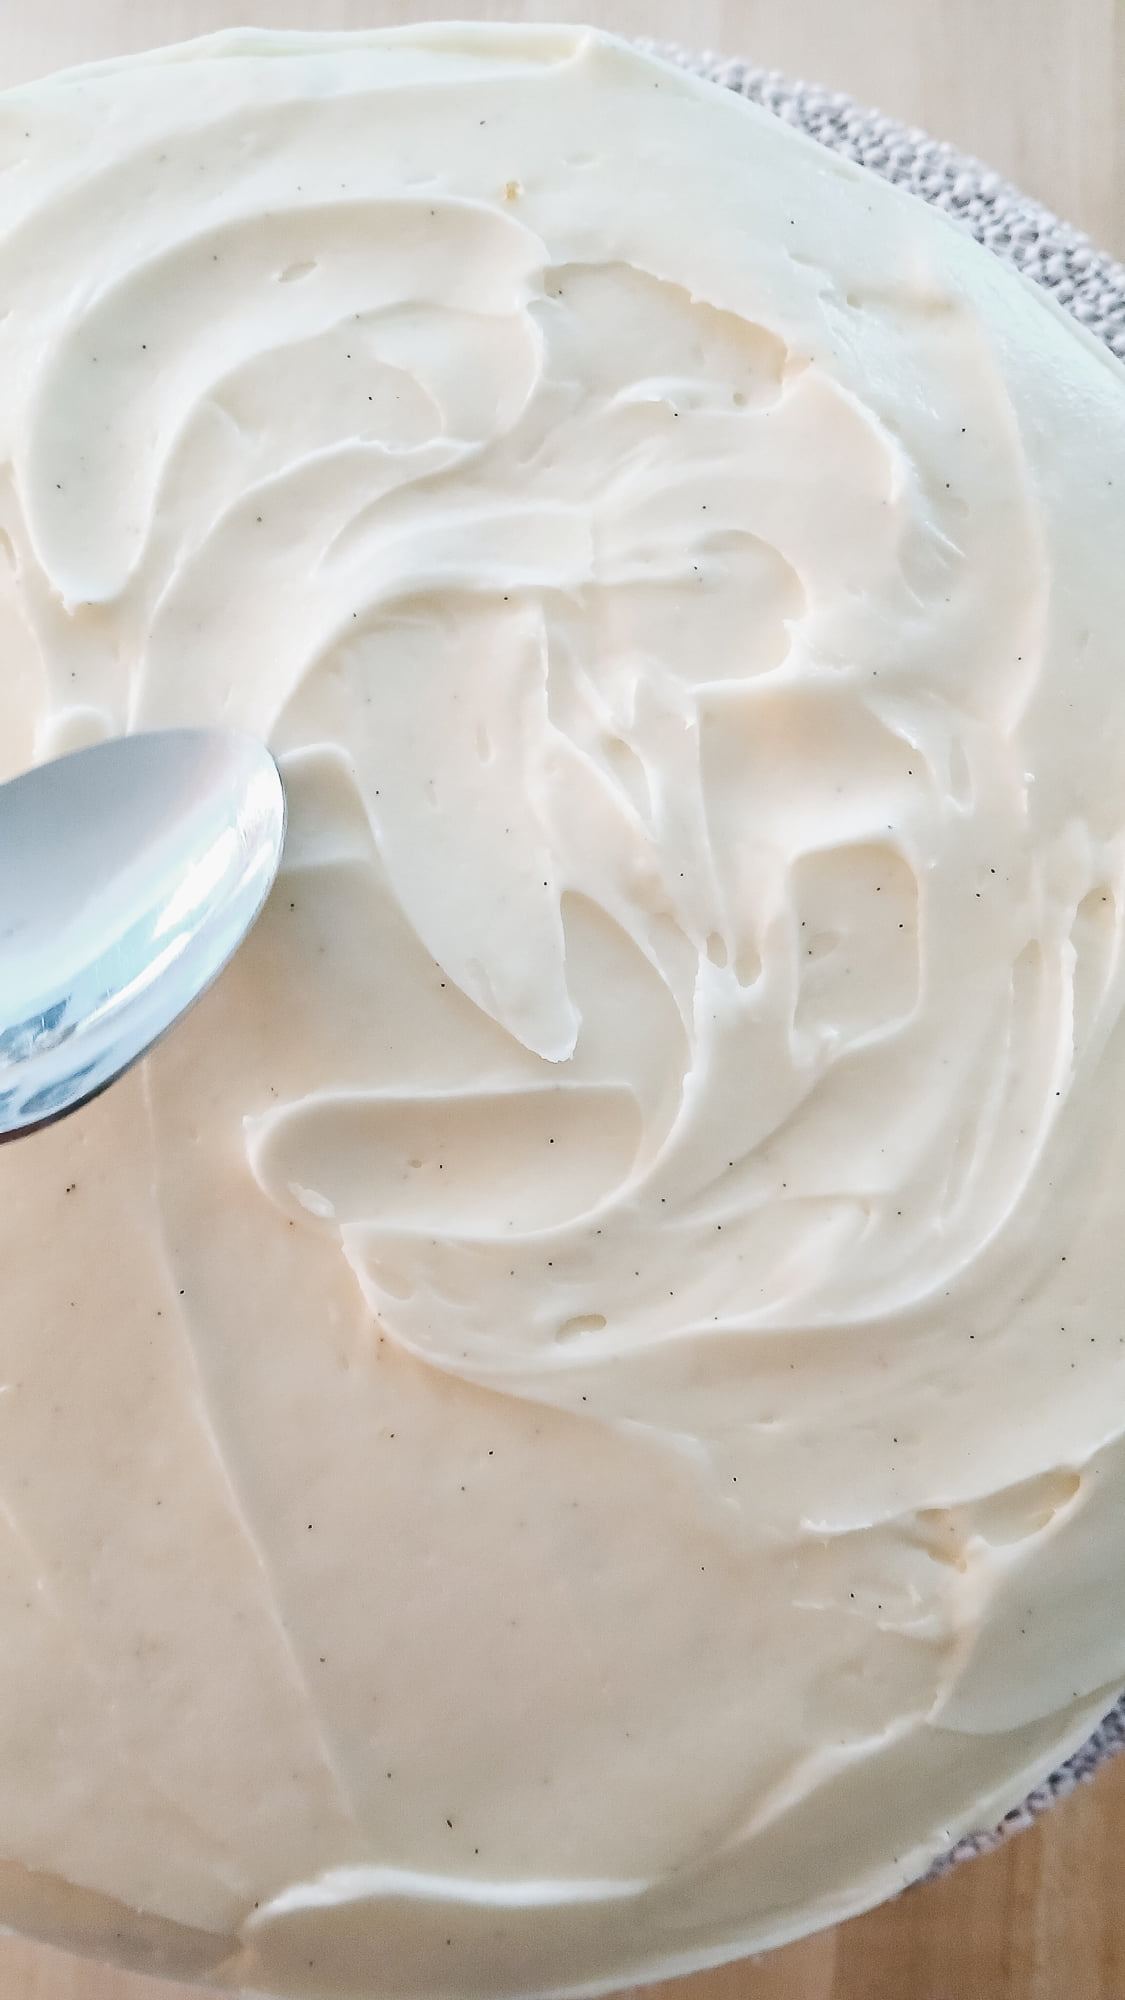
I beat the butter and cream cheese together first for about two minutes before adding any sugar. Once that is smooth, I add the vanilla and a pinch of salt. I usually use vanilla extract, but if you want those beautiful little black specks you see in my photos, you can swap it for an equal amount of vanilla bean paste. I use them interchangeably depending on my mood.
I never skip the salt in my frosting. It acts as a necessary counterpoint to the four cups of powdered sugar, making sure the flavor is tangy and rich rather than just sugary.
If the frosting feels too thick, I add a teaspoon of milk or cream at a time until it reaches a spreadable consistency. If it feels too thin, I simply beat in a little more powdered sugar until it holds a firm peak.
The Crumb Coat Technique
When I am ready to assemble, I start by placing a small dab of frosting in the center of the cake board or plate. This acts as glue to keep the cake in place. After stacking the layers with an even amount of frosting in between, I apply a thin “crumb coat” over the top and sides. This seals in any loose crumbs so they don’t migrate into your final decoration. I then pop the cake in the refrigerator for at least 30 minutes to let this base layer set.
Final Decorating and Storage
For the final layer of frosting, you can use a bench scraper for a clean finish, but I personally love a rustic look for carrot cake. I use the back of a large spoon or a small offset spatula to create a swirl design all over the cake. It’s a simple way to make the cake look beautiful without needing professional piping skills.
Once the cake is decorated, it should be stored in the refrigerator. After the first slice is cut, I recommend pressing a piece of plastic wrap directly against the exposed cake. This prevents the air from drying out the crumb, keeping it moist for days.
Make it Your Own
I will always choose the classic carrot cake recipe with nuts but no raisins. That is how I prefer my cake, but here are some of my favorite ways to mix things up if you want to get creative!
Tropical Twist
If you want something a bit more unique, try a pineapple coconut version. I like adding about 1/2 cup of shredded coconut to the batter along with the pineapple. The coconut adds a great texture and really complements the natural sweetness of the carrots. If you really want to lean into that tropical flavor, you could even try a coconut flavored cream cheese frosting.
Maple Cream Cheese Frosting
For a richer, autumnal feel, I love making a maple version. I mix 1/4 cup of pure maple syrup into the frosting in place of 1/4 cup of the powdered sugar. The subtle maple flavor pairs wonderfully with the warm spices in the cake. For an extra maple kick, I sometimes add 1/2 teaspoon of maple extract directly to the cake batter as well.
Adding a Little Zing
I like adding a little fresh or ground ginger when I want more of a spiced kick. Ginger adds a unique zing that works so well with the cinnamon. A little goes a long way, so I always start small and adjust to taste. I usually add 1/2 teaspoon of ground ginger or about 1 teaspoon of finely grated fresh ginger to the dry ingredients.
Nuts and Raisins
If you’re a fan of raisins, try soaking them in warm water for 10 minutes and patting them dry before adding them to the batter. This keeps them plump and juicy so they don’t pull moisture out of the cake while it bakes. If you’re adding walnuts or pecans, I highly recommend toasting them in a dry pan over medium heat for about 3 to 5 minutes first to deepen the flavor.

Keep it Fresh
Storing for the Week
Because of the cream cheese frosting, this cake needs to stay in the refrigerator. I actually find that it tastes even better on day two because the spices have more time to meld together, so I often bake it a day ahead of time. Just be sure to bring it to room temperature before serving for the best texture and flavor. To keep it from drying out, I always press a piece of plastic wrap directly against the cut side of the cake before putting it back in the fridge. This creates a seal that keeps the sponge tender for up to five days.
Freezing Instructions
This cake freezes beautifully if you want to prep for a holiday in advance. You can freeze the unfrosted layers by wrapping them tightly in plastic wrap and then foil; they will stay fresh for up to two months. One of my favorite time-saving tricks is frosting the layers while they are still frozen, though you can let them sit at room temperature for a few minutes first to make it a bit easier.
Individual Treats
I also like to freeze individual slices for when a sweet tooth strikes. I place the slices on a tray to freeze them individually until the frosting is firm, then wrap them well and store them in a container or freezer bag. That way, you can pull out a single slice whenever you want without having to thaw the whole cake!
Classic Carrot Cake
Ingredients
Cake
- 3 cups finely shredded carrots | 1 pound bag of carrots *see notes above on how to measure carrots
- 2 cups all purpose flour | 240g
- 2 cups granulated sugar | 400g
- 1 teaspoon baking powder
- 1 teaspoon baking soda
- 1 teaspoon salt
- 1 teaspoon cinnamon
- 1 cup vegetable oil | 215g
- 14 ounce can of crushed pineapple drained | ~205g
- 4 eggs
- 3/4 cup total nuts and/or raisins (optional)
Frosting
- 8 ounce cream cheese | softened to room temperature (1 block, 226g)
- 1/2 cup butter | softened to room temperature (1 stick, 113g)
- 2 teaspoons vanilla extract
- 4 cups powdered sugar | 480g
- Pinch of salt
Instructions
Shred Carrots
- Peel and shred carrots: Start by peeling the carrots, then shred them using a food processor with a shredding blade for quick and easy prep. If you don’t have a food processor, a box grater works just as well, although it takes a little more effort3 cups finely shredded carrots | 1 pound bag of carrots
Bake the Cake Layers
- Prepare the cake pans: Line the bottoms of three 8-inch or two 9-inch round cake pans with parchment paper and grease the sides. If you don’t have parchment paper, grease the entire pan with non-stick spray or butter to prevent sticking.
- Turn on the oven: Preheat the oven to 325°F.
- Toast your nuts (if using): If you plan on adding nuts to your cake, toast them first before making the batter. Allow the nuts to cool before incorporating them into the cake. Toasting brings out the flavor and enhances the texture.3/4 cup total nuts and/or raisins (optional)
- Mix the dry ingredients: In a large mixing bowl, whisk together the flour, sugar, baking powder, baking soda, salt, and cinnamon until well combined.2 cups all purpose flour | 240g2 cups granulated sugar | 400g1 teaspoon baking powder1 teaspoon baking soda1 teaspoon salt1 teaspoon cinnamon
- Add wet ingredients: Mix in the shredded carrots, oil, drained pineapple, and eggs. Use a hand mixer on medium speed for 2 minutes until fully incorporated.3 cups finely shredded carrots | 1 pound bag of carrots1 cup vegetable oil | 215g14 ounce can of crushed pineapple drained | ~205g4 eggs
- Fold in mix-ins (if using): Gently stir in chopped nuts and/or raisins if you’d like.3/4 cup total nuts and/or raisins (optional)
- Bake the cakes: Divide the batter evenly between the prepared cake pans. Bake for 55-60 minutes, or until the center is set, the cake is no longer jiggly, and it bounces back slightly when touched. The baking time can vary depending on the size of your pans, so keep an eye on your cake. I tend to fill my pans a bit more for thicker layers, which means longer baking time. If you’re using three pans, the baking time will be shorter, so start checking for doneness a little earlier. Since oven temperatures can vary, I recommend using a toothpick to check for doneness – insert it into the center of the cake, and if it comes out clean or with just a few moist crumbs, the cake is ready.
- Cool the cakes: Let the cakes cool in the pans for about 15-20 minutes, or until the sides of the cakes begin to pull away from the pans. Carefully remove the cakes from the pans and transfer them to a cooling rack. Be sure to let the cake layers cool completely before frosting them to ensure the frosting doesn’t melt.
Make the Frosting
- Beat the cream cheese and butter: In a large mixing bowl, beat the softened cream cheese and butter together at medium speed until smooth and creamy, for about 2 minutes.8 ounce cream cheese | softened to room temperature (1 block, 226g)1/2 cup butter | softened to room temperature (1 stick, 113g)
- Scrape down the bowl and add vanilla and salt: Use a spatula to scrape down the sides of the bowl, then add the vanilla extract and pinch of salt. Mix briefly until combined.2 teaspoons vanilla extractPinch of salt
- Gradually add powdered sugar: With the mixer on low speed, slowly add the powdered sugar, one cup at a time, to avoid a mess.4 cups powdered sugar | 480g
- Whip until fluffy: After adding all the powdered sugar, increase the mixer speed to medium-high and beat the frosting for 2–3 minutes until it’s light, fluffy, and fully combined. Be sure to pause at least once to scrape down the sides of the bowl for even mixing.
Assemble the Cake
- Prepare your base: Place a cake board or a large plate on your work surface. Add a small dab of frosting in the center. This acts as glue to keep the cake in place.
- Layer the cake: Place the first cake layer on top of the frosting. Spread an even layer of frosting over the top. This will be the filling between the layers, so aim for a balanced thickness – not too thin, but not overly thick.
- Add the next layer: Gently place the second cake layer on top. If making a two layer cake, place this layer upside down so the flat bottom creates a smooth, even top.
- Apply a crumb coat: Spread a thin layer of frosting over the top and sides of the cake. This seals in crumbs and helps fill any gaps between the layers. Focus on smoothing the frosting around the middle and edges to build up straight, even sides. It may not look perfect yet, but don’t worry—this is just the base layer. Save enough frosting for the final coat.
- Chill the cake: Place the cake in the refrigerator for at least 30 minutes to allow the crumb coat to set. This step helps prevent the layers from sliding when applying the final frosting.
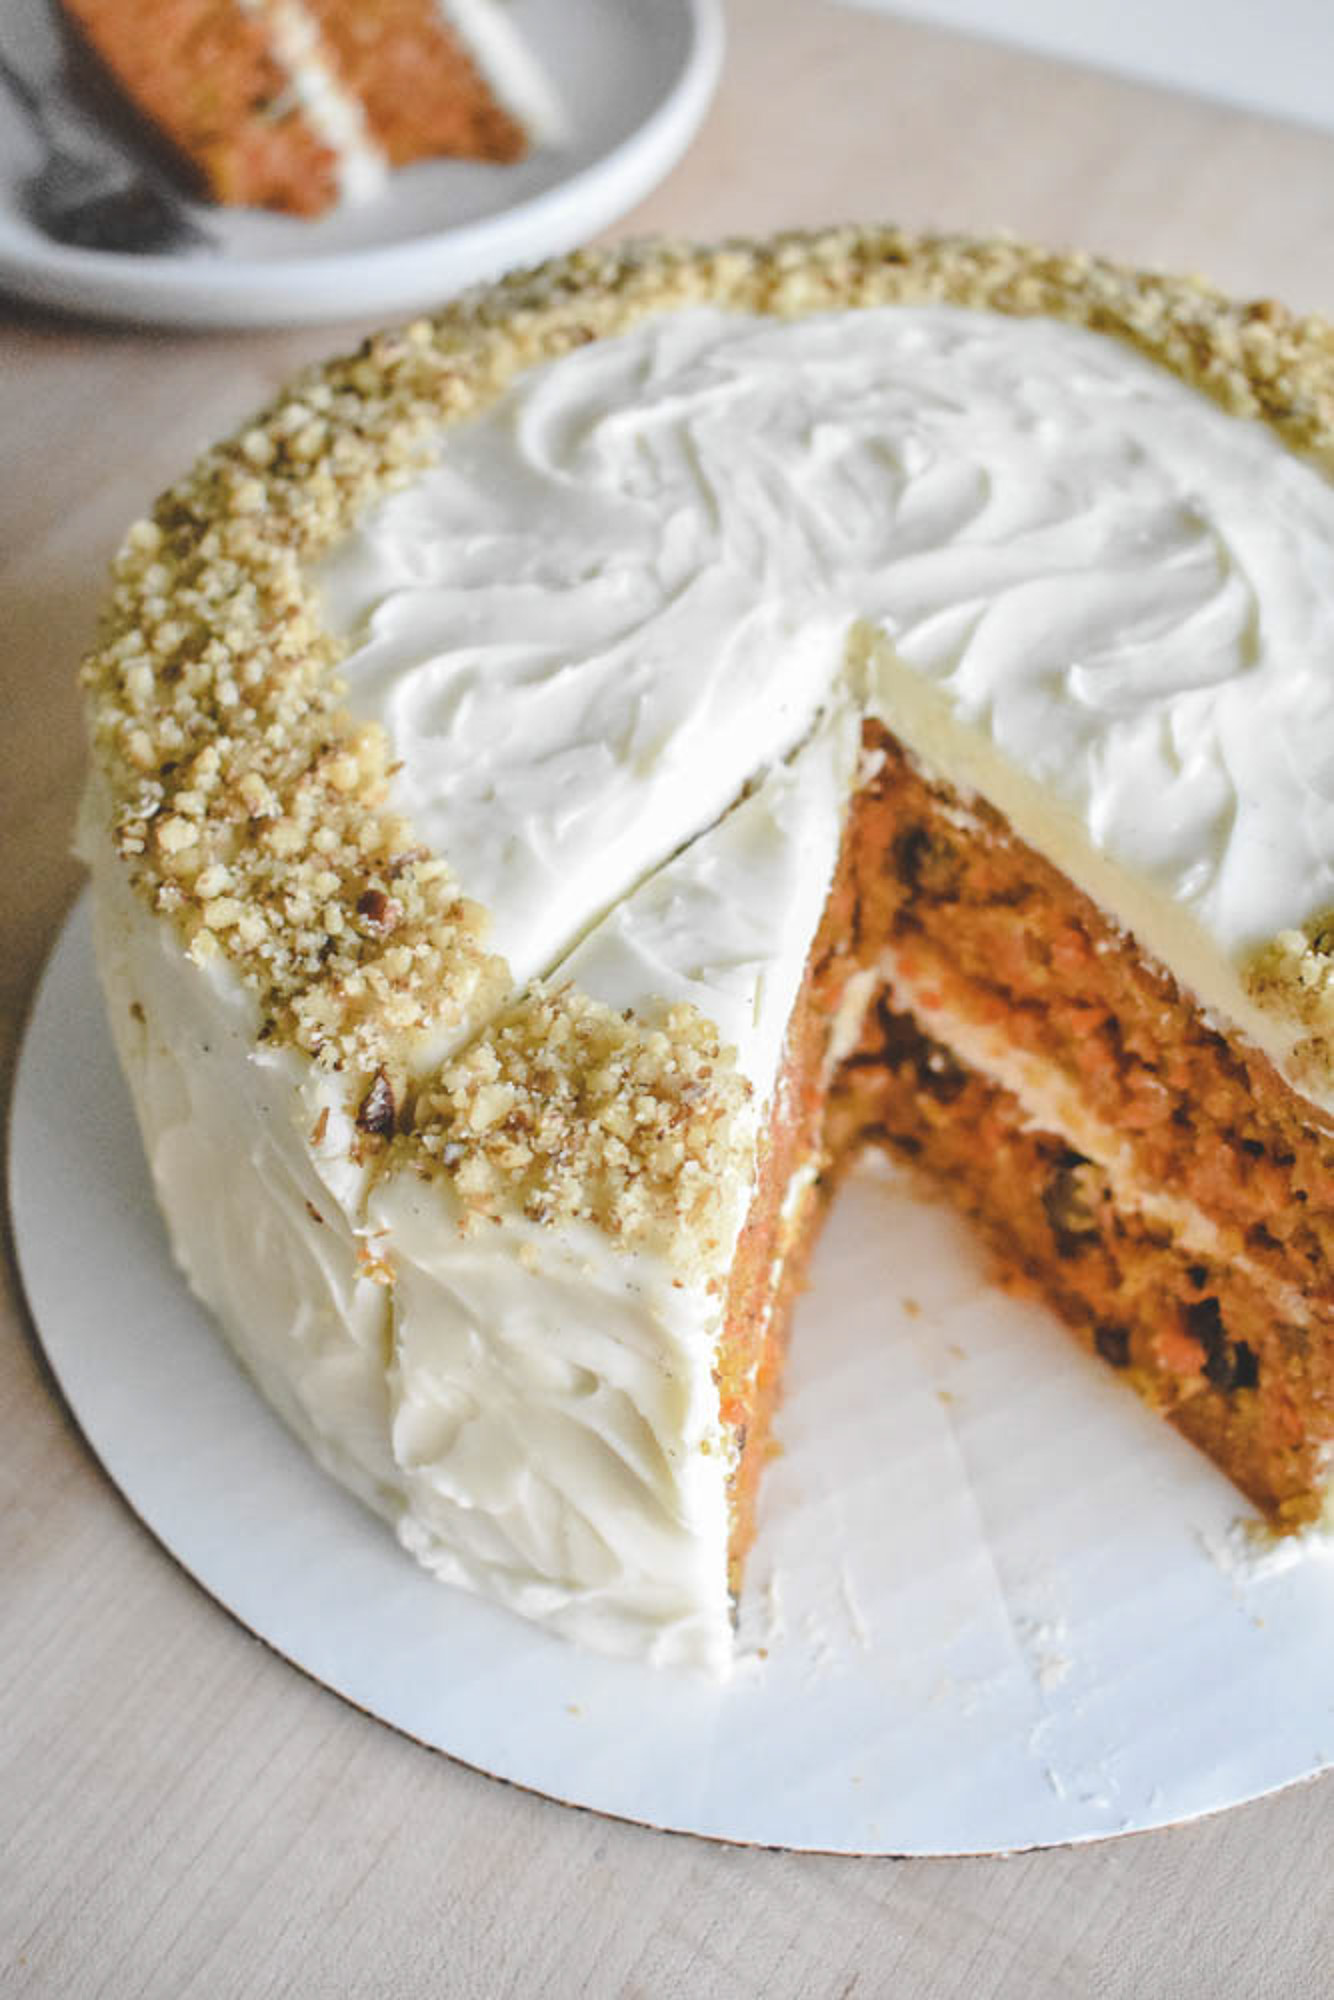
- Final frosting layer: Use the remaining frosting to coat the outside of the cake. Smooth it with a bench scraper for a clean finish, or use a knife or spoon to create texture. For this cake, I used a spoon to create a swirl design for a more rustic look.
- Decorate: Top the cake with a ring of chopped walnuts or your favorite garnish to add a finishing touch.
- Store the cake: Store the cake in the refrigerator. Once cut, cover the cake by pressing plastic wrap up against the cut and exposed portion of the cake. This will prevent it from drying out.
Did you try this recipe?
Share your experience in the comments below!
I’d love to hear how it turned out
Let’s see your creations!
Share your photos
Tag me @flourtinbakes on social media
The recipe looks amazing! Saving this to try soon !
I love carrot but was never a big fan of carrot cake myself, In my family of four two love it!!!
So maybe I could use this to change my mind =)
I love carrot cake. This looks so delicious!
This recipe looks delicious! Our eldest daughter loves carrot cake and it’s what I always made her for her birthday growing up. I’ve never tried putting pineapple in it. I’ll have to give that a try. 🙂