Homemade Chocolate Covered Cherries
Chocolate covered cherries have always been one of my favorite candies but they hold a specific kind of childhood magic for me. As a kid, I loved the store bought boxes, and I will admit I used to sneak cherries from the bottom layer of the box so my parents wouldn’t notice.
While I’ll always have a soft spot for the nostalgia of those boxes, the older I get, the more I find the store bought versions to be just a bit too syrupy and sweet. That is exactly why I love this homemade version so much. The fondant filling is smooth and because we use a chocolate mold, every candy comes out with a professional look. You get the perfect ratio of chocolate to cherry in every single bite.
If you are already a fan of cherry cordials, you are going to be obsessed with these. Even if you think you don’t like them, I truly believe this recipe could change your mind. They turn out so beautiful that your friends will assume they came from a specialty chocolate shop rather than your own kitchen.
What You Need for the Perfect Center
Making chocolate covered cherries at home doesn’t require a long list of ingredients, but you do need the right ones if you want that liquid center to work. I’ve experimented with different versions over the years, and these are the specifics I always come back to.
The Right Cherries for Success
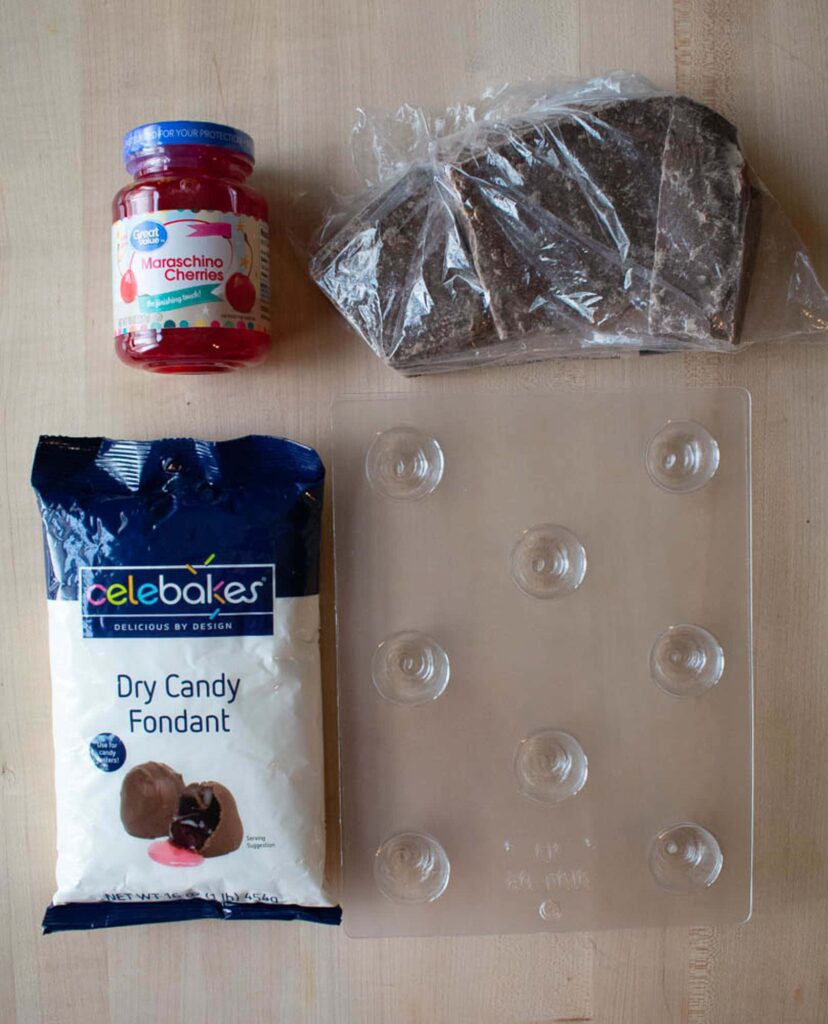
You really have to use jarred or canned maraschino cherries here. I’ve had people ask if fresh or frozen cherries would work, but they just don’t. Fresh cherries release too much moisture and will spoil inside the chocolate, and frozen ones get way too mushy once they thaw. Maraschino cherries are stable and already preserved, which is exactly what you need for a candy.
My Favorite Chocolate for Molding
I am a big fan of using almond bark for this recipe. It melts so smoothly and is much easier to work with when you are trying to coat the sides of a mold. I often mix it with a little bit of milk chocolate if I want a richer flavor, but honestly, almond bark on its own works beautifully. You can use high quality chocolate bars if you prefer, but don’t feel like you have to because the almond bark gives you a great finish every single time.
The Best Fondant for a Liquid Center
The real trick to that liquid center is dry powdered fondant. This is not the stuff you find draped over wedding cakes. This is a powder you can find at baking supply stores or online. When you mix it with a bit of the cherry juice from the jar, it creates a smooth liquid filling right away. One bag usually lasts me for several batches, and it stays fresh in the pantry for a long time as long as you keep it sealed.
Setting Up Your Candy Station
Before I even think about melting the chocolate, I like to have my entire station ready to go. Making chocolate covered cherries is a bit of a project, and having your tools organized makes the process so much more enjoyable. I have found that a little bit of preparation goes a long way in keeping things tidy and making sure the candies release perfectly from the molds.
Choosing the Right Mold
I always recommend using a hard plastic candy mold for these. While silicone is popular for many things, it can be tricky here because the candies are prone to breaking when you try to pop them out. I learned how to make these using the plastic molds, so those are my personal preference, and they help give the chocolate a much glossier finish.
My biggest rule is that your molds must be completely dry. Even a single drop of water can cause your chocolate to seize or create dull spots on your finished candies. I usually give mine a quick wipe with a clean, lint free cloth just to be safe.
The Benefit of a Baby Spoon
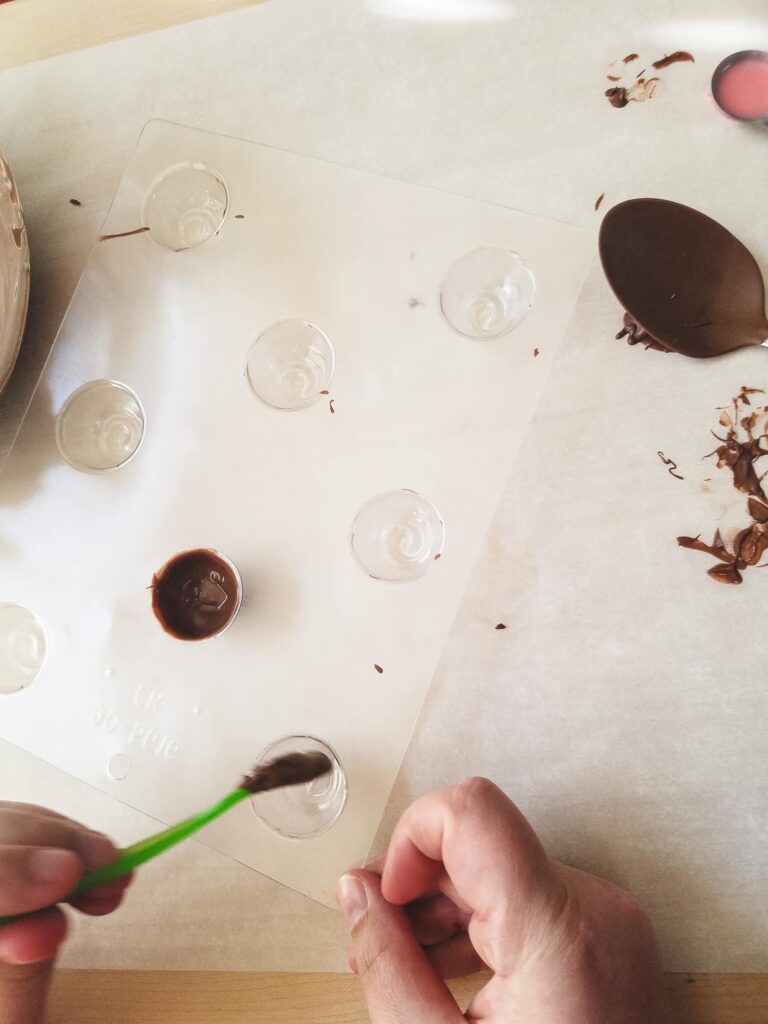
When it comes to spreading the chocolate into the mold, I have tried all sorts of brushes and spatulas, but I always go back to a small baby spoon. It is the perfect size for reaching into the cavities and pushing the chocolate up the sides to create a sturdy shell. It sounds simple, but it is a game changer for getting an even coating without making a mess of your chocolate covered cherries. I have also found that using a spoon is much better and wastes less chocolate than the traditional method of filling up the molds and trying to pour the excess back out.
Prep Your Workspace
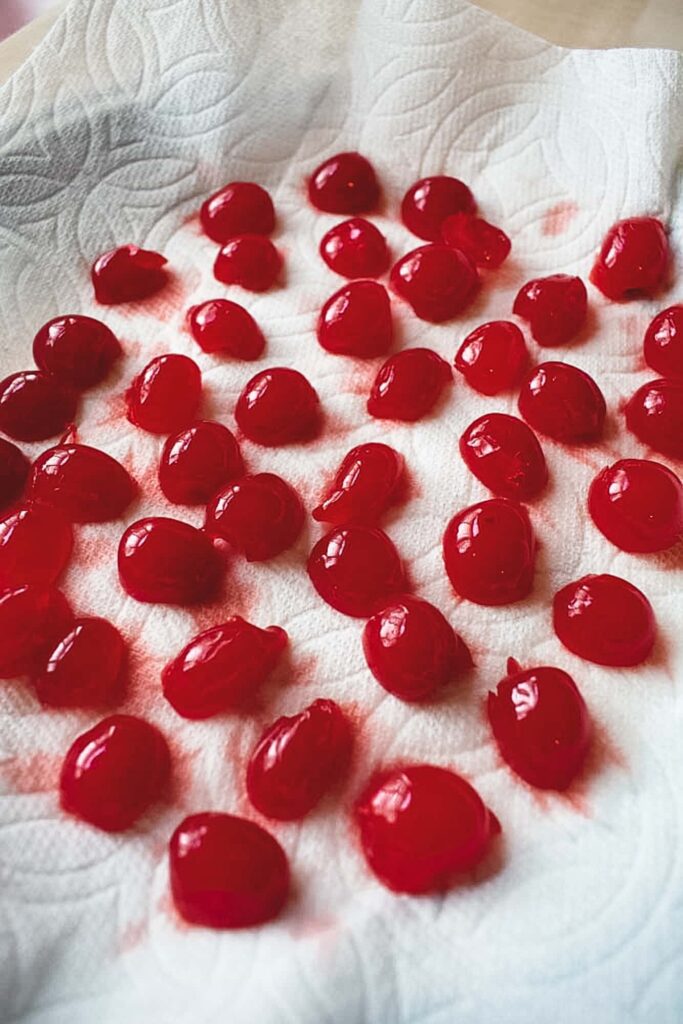
I also like to line my workspace with parchment paper before I start. This makes cleanup a breeze and gives me a safe place to set things down. Another little tip I have learned the hard way is to cut your cherries on a plate rather than a wooden cutting board to avoid any stubborn juice stains. Have a few paper towels nearby to drain those cherries thoroughly because you want them as dry as possible so they do not thin out your fondant too much.
Dry Your Cherries
Be sure to let your cherries sit on paper towels for at least twenty minutes before you start. Any leftover moisture can make the fondant slip or cause your chocolate to seize up. A dry cherry is the only way to get a perfect bond with the filling.
The Candy Making Process
Creating the Chocolate Shell
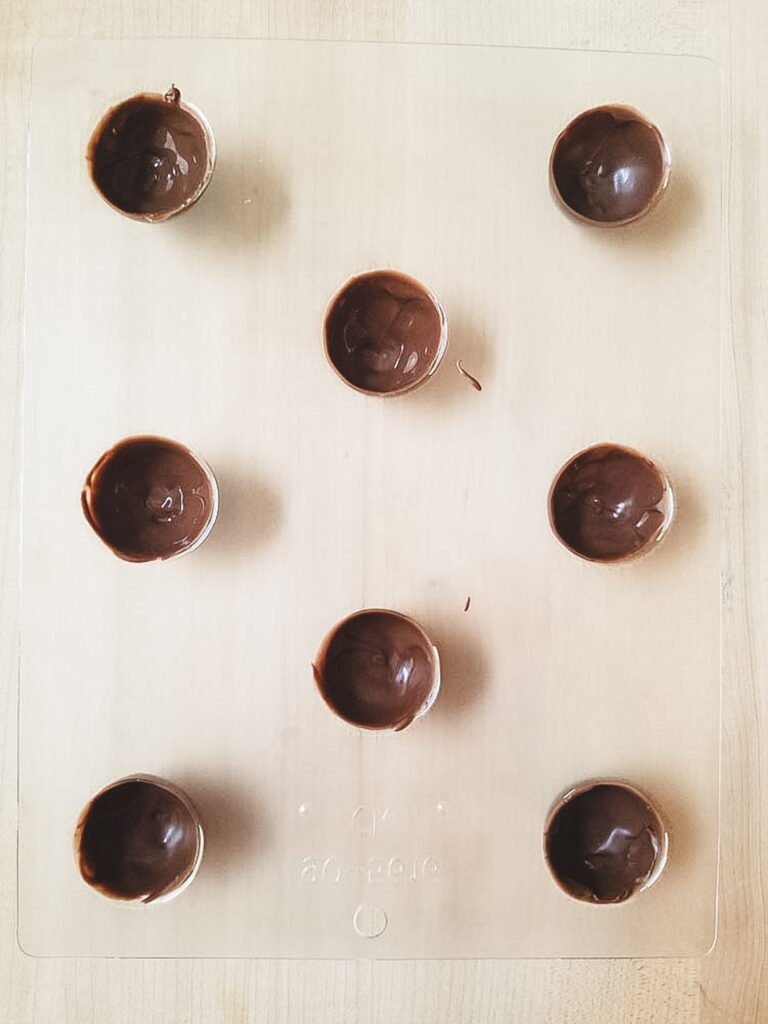
The key to a professional looking candy is working in layers and being patient with the chilling times. I start by melting my almond bark in a microwave safe bowl using short thirty second bursts and stirring well in between each one. Once the chocolate is smooth, I use my baby spoon to coat the inside of each mold cavity. You want to make sure the sides are well covered so the liquid filling does not leak out later. At the same time, try not to make the bottom layer so thick that there is no room for the cherry.
Maintain Your Melt
If your chocolate starts to thicken as you work, just pop it back in the microwave for five or ten seconds. Keeping the chocolate fluid is the easiest way to get those thin shells that have a professional look. Always stir well after reheating to keep the heat even.
I find it best to use at least two molds so I can leap frog between the steps. While one mold is in the freezer setting up, I can be busy filling or sealing the second one to keep the process moving. Before you put them in the freezer, hold the mold up and look at it from the bottom to check for any holes or light coming through. If you see light, then you know you missed a spot where the filling might leak out, and you can quickly patch it with a little more chocolate. I usually pop the mold into the freezer for about five minutes just to let that initial shell set up completely.
Mixing the Liquid Filling
While the shells are chilling, I mix the powdered fondant with a little bit of the reserved cherry juice. You are looking for a consistency that is fluid but not watery, so start with just a small amount of juice and add more as needed. Once the chocolate shells are firm, I place half of a drained cherry into each cavity and then carefully pour the liquid fondant over the top.
It is so important not to use too much fondant or a piece of cherry that is too large. You want the filling to sit lower than the edge of the mold so there is plenty of room for the final chocolate seal. If the cherry sits too high, it will create a bump on the bottom of your candy instead of a nice flat base that sits evenly on your serving tray.

Sealing the Bottoms
After the cherries and fondant are in place, I put the mold back into the freezer for at least ten to fifteen minutes. This step is vital because it firms up the liquid center enough that your final layer of warm chocolate will not just melt right into it. Once they are nice and cold, I spoon the remaining melted chocolate over the top of each cavity. The best method I have found is to give the mold a gentle shake back and forth so the chocolate can even itself out across the top. This creates a smooth finish without needing to mess with it too much. I let them sit in the refrigerator until they are completely firm and ready to be popped out of the mold.
The Final Reveal
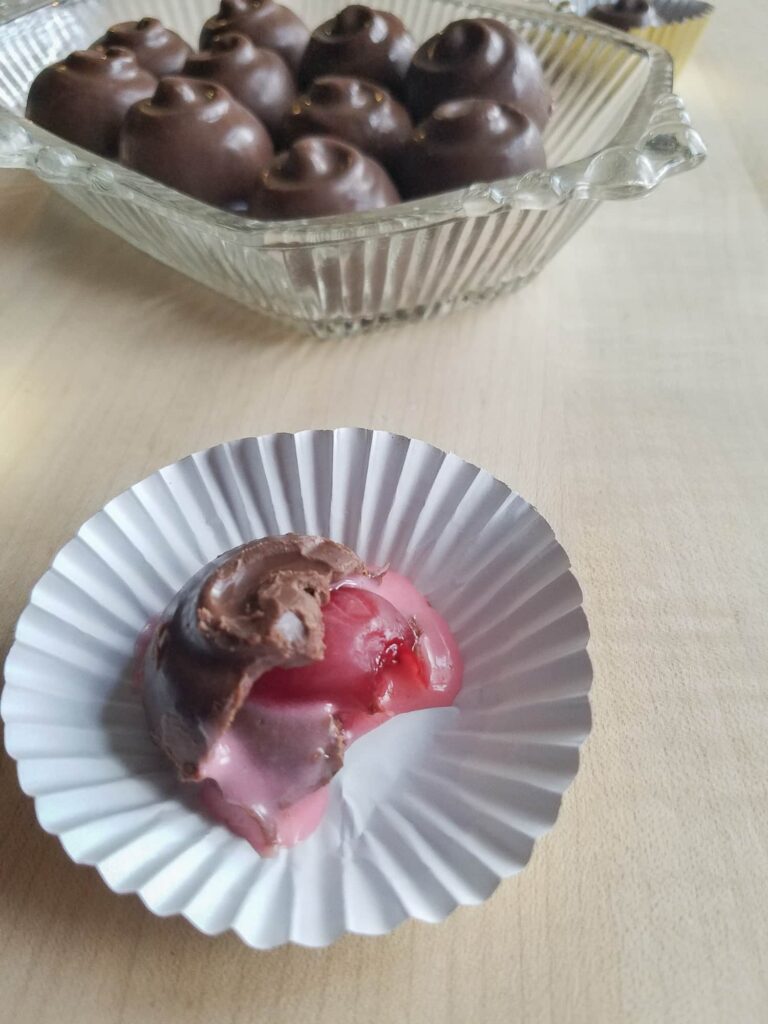
There is nothing quite like the feeling of flipping that mold over and seeing those shiny, perfect candies drop onto the counter. After all the layering and chilling, this is the moment where you get to see your hard work pay off. If you followed the steps and made sure your shells were thick enough, you should have a batch of beautiful chocolate covered cherries with no leaks in sight.
Releasing the Candies
When the chocolate is completely set, I gently tap the edge of the mold on a clean surface. If they are cold enough, they should pop right out without any struggle. I try to handle them as little as possible at first because the heat from your hands can easily smudge that glossy finish. If you have any little edges of chocolate hanging off the sides, you can carefully trim those away with a small paring knife or break them with your fingers to give them a cleaner look. If they are difficult to release, you can pop them back in the freezer for a few minutes, or sometimes you just need a more aggressive slap of the mold on the counter to release them.
Enjoying the Results
One of the best things about using this liquid fondant method is that you do not have to wait for weeks to enjoy them. While traditional cordials need time for the center to break down, these are ready to eat the moment they are firm. I like to store mine in a cool, dry place rather than the refrigerator once they are out of the mold, because it helps maintain that snap in the chocolate. Seeing them all lined up always makes me happy.
Make it Your Own
Once you have mastered the basic process, it is easy to start playing around with different flavors and looks. These candies are so classic on their own, but a few small changes can make them feel brand new for different times of the year.
I usually stick to the classic milk chocolate or almond bark but you can easily swap in dark chocolate or even white chocolate for a different look. If you want to get fancy for a holiday, you can drizzle a little bit of contrasting chocolate over the top once they are out of the mold. Some people even like to add a tiny drop of almond extract to the fondant mixture to give it an extra layer of flavor that pairs beautifully with the cherry.
Gifting and Serving
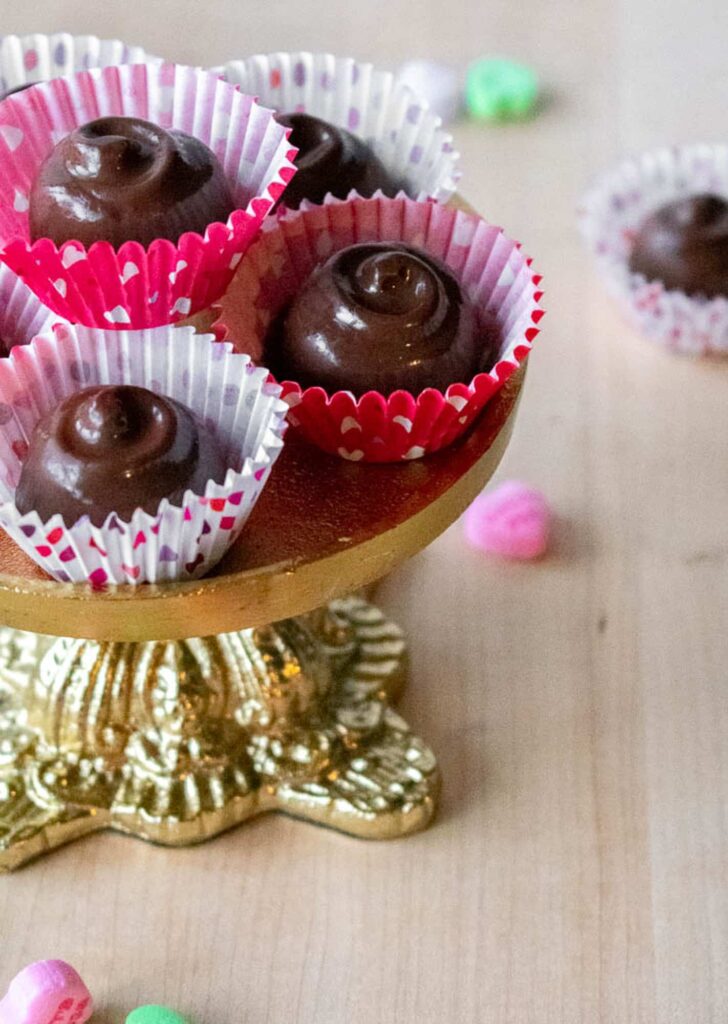
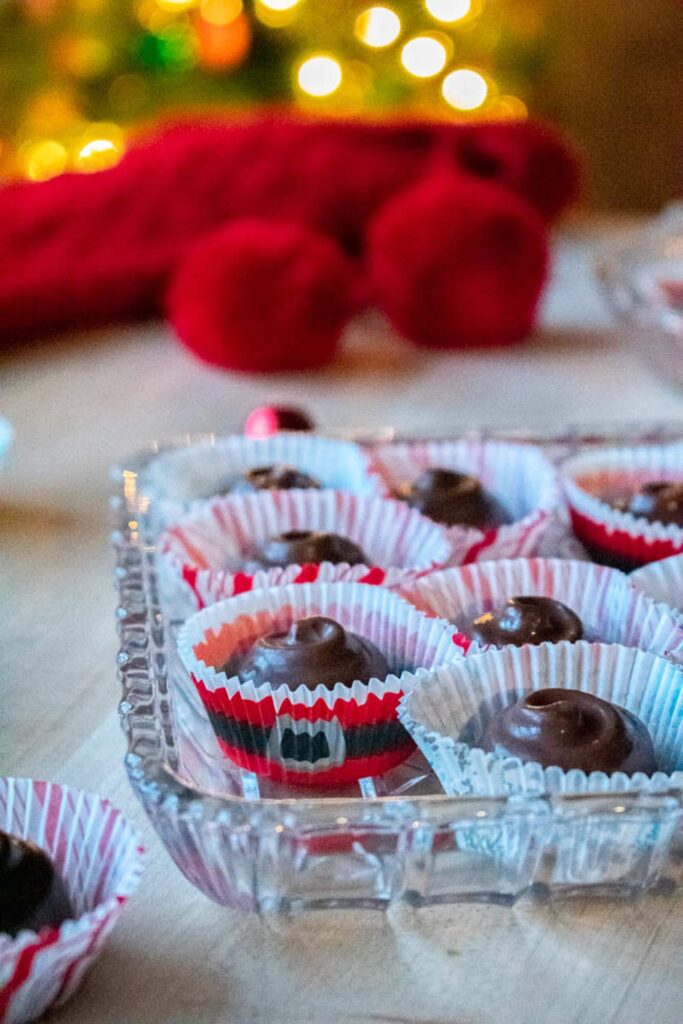
If you are planning to serve these at a party or give them away as a gift, I highly recommend placing each finished candy into a small paper candy cup. This simple addition makes them look like they came straight from a high end chocolate shop, and it is also an easier way to customize them for a holiday. There are so many cute paper cup designs to choose from that can match the theme of your event. Using the cups also makes it much easier for guests to grab one without touching the other candies in the box.
Keep it Fresh
Because these have a liquid center, they actually stay fresh for a long time. I recommend storing them in an airtight container in a cool and dry place like a pantry or a cupboard. You do not really need to keep them in the refrigerator because the cold can actually make the chocolate look dull or cause it to sweat when you bring it out to room temperature. They will easily stay delicious for two to three weeks, although they rarely last that long in my house before they are all eaten.

Homemade Chocolate Covered Cherries
Ingredients
- 10 ounce jar of maraschino cherry | 283g
- 3/4 cup powdered fondant | 120g
- 3 tablespoons cherry juice | 47g
- 12 ounces of chocolate | 340g
- plastic candy mold #90-5616 or similar ,two molds recommended
Instructions
Prepare Ingredients
- Clean and dry plastic candy molds. The molds must be completely dry. Set aside.
- Drain cherry juice from the maraschino cherry jar and set aside. Do not throw away the cherry juice. Reserve juice for later.
- Remove cherries from the jar. Remove stems and cut each cherry in half.10 ounce jar of maraschino cherry | 283g
- Place cherry pieces on a paper towel to drain. Set aside.
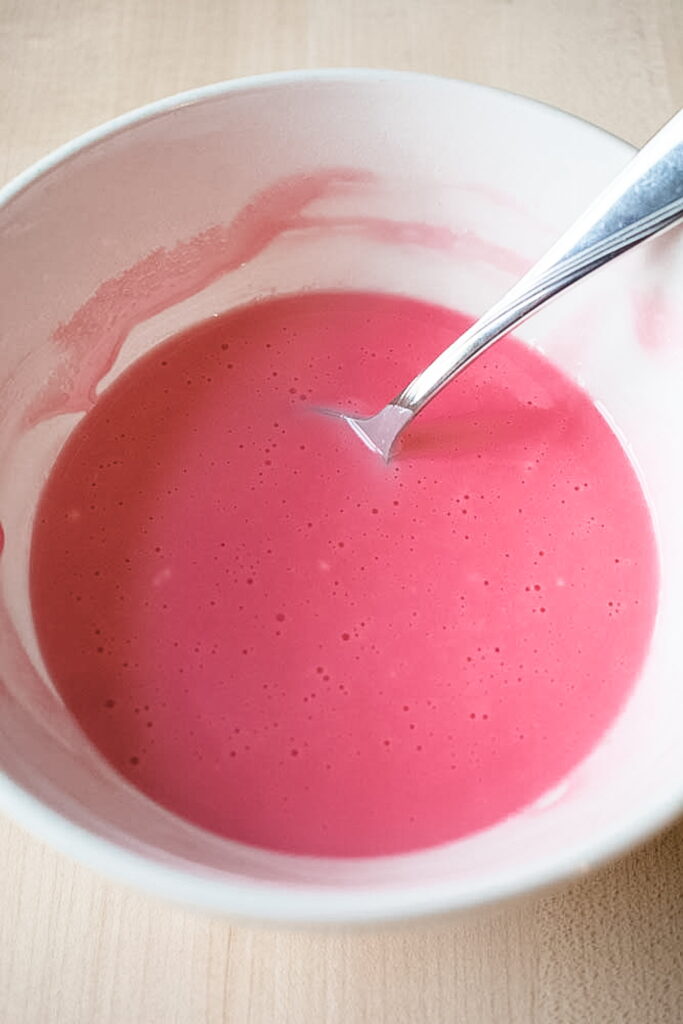
- Add powdered fondant to a small bowl. Add 2 tablespoons of cherry juice to the fondant and mix well until smooth. Stir vigorously to break up any large clumps. The consistency should slowly run off a spoon, similar to pancake batter. You don’t want it too thin or too thick. Adjust consistency, if needed, with the remaining cherry juice. Set aside.3/4 cup powdered fondant | 120g3 tablespoons cherry juice | 47g
- Cut chocolate into chunks with a serrated knife and add to a separate glass bowl. Make sure the bowl is clean and dry. Melt chocolate in the microwave (using short 30 second intervals) or with a double boiler, until smooth and shiny. Be careful not to overheat or burn.12 ounces of chocolate | 340g
Assembly
- Place a small amount of chocolate, ~ 1/2 teaspoon, into one cavity of the candy mold. Using the back of a small spoon, spread the chocolate up the side of the mold until the entire cavity is covered with chocolate. This will form the outside shell of the candy. Make sure there are no holes where the filling may escape. Continue making chocolate shells, one cavity at a time. You may need to reheat the chocolate, as you go, to keep the chocolate thin and easy to spread.plastic candy mold #90-5616 or similar
- Place the candy mold in the freezer for ~ 2 minutes to allow the chocolate shell to harden. This will prevent the sides of the shell from sliding down.
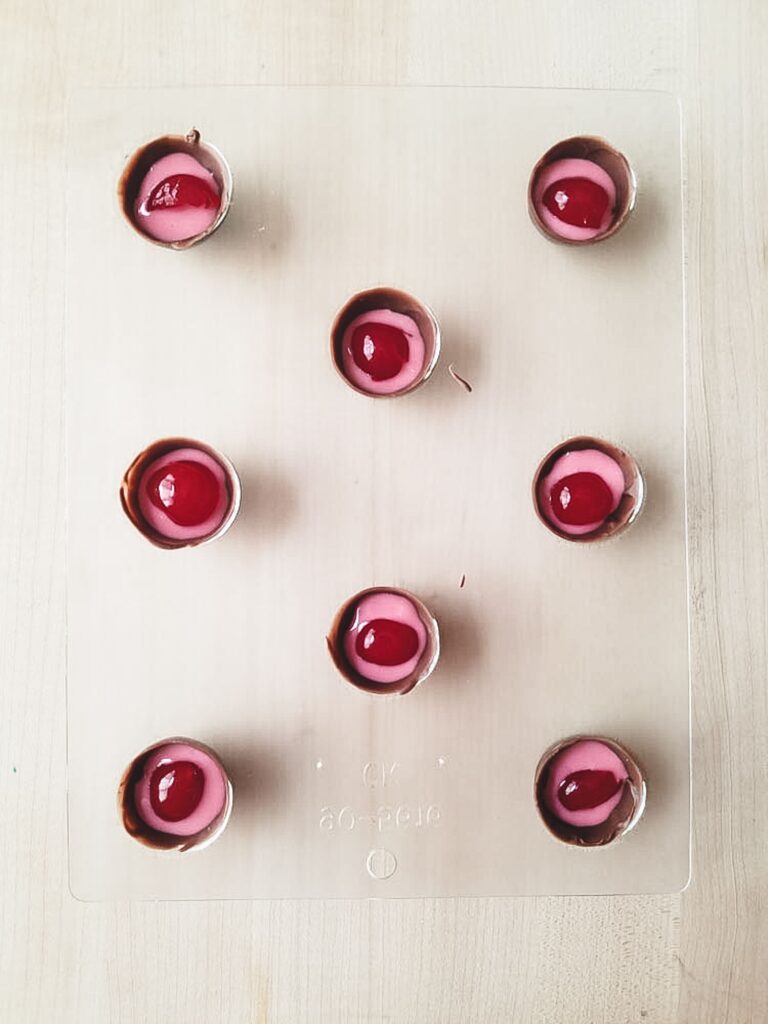
- Remove the mold from the freezer and add the cherry juice fondant mixture to each cavity. The amount can vary depending on how much chocolate has pooled in the bottom of the cavity. Fill the shell half full.
- Add half a cherry piece on top of the fondant mixture in each cavity. Gently press into the fondant so that the cherry does not float.
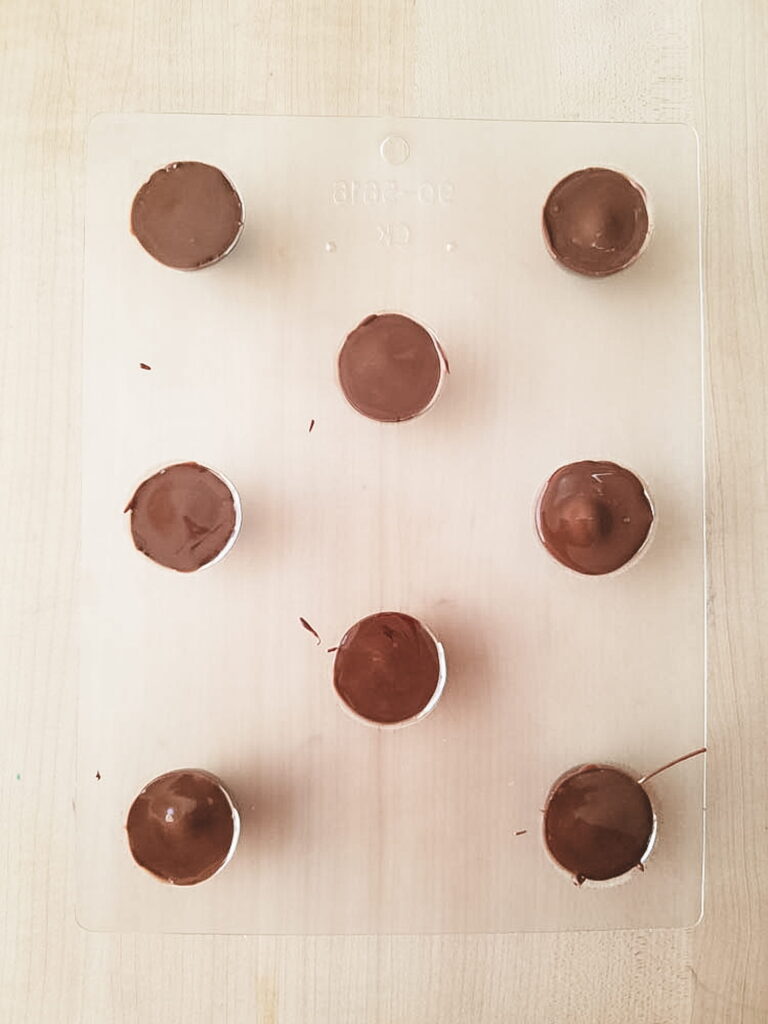
- Top one cavity with more melted chocolate. Gently shake the mold side to side to level out the chocolate. Add more chocolate, if needed, to fill the cavity. Pay close attention to the edges in order to seal the candy and prevent the filling from leaking out. Continue topping all the cavities with chocolate, one at a time, until completed.
- Place candy mold back in the freezer until set, ~ 7 to 10 minutes.
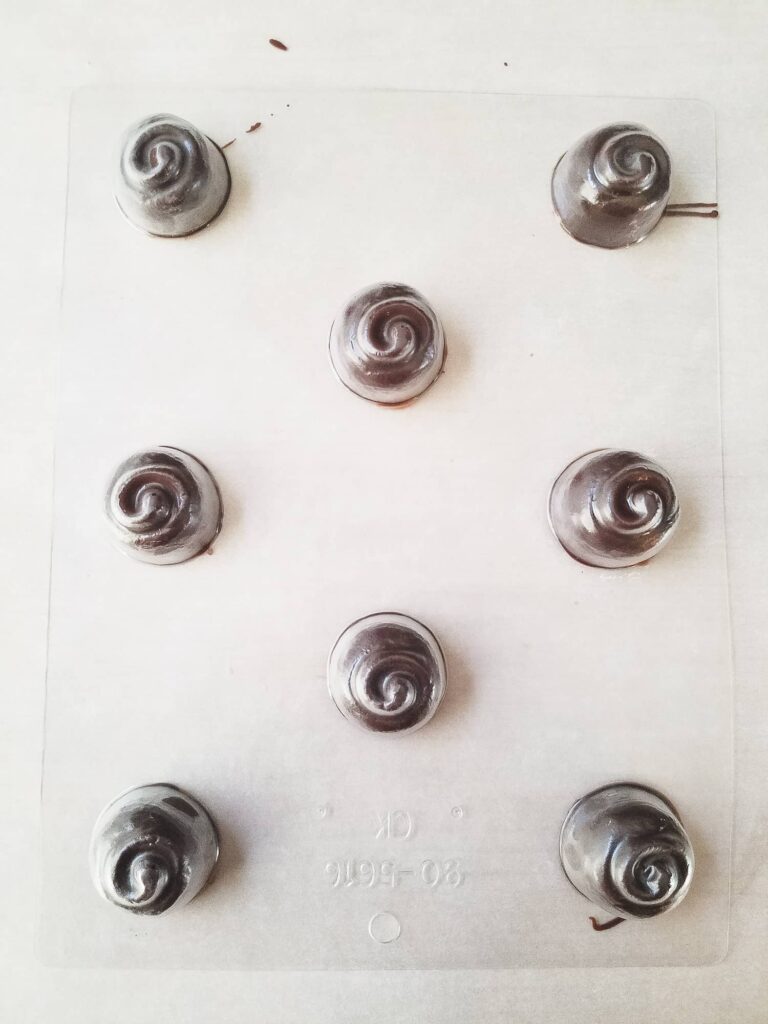
- Unmold cordials by turning the mold upside down and gently tap on the countertop, if needed. If cordials do not come out easily, return the mold to the freezer for a few more minutes.
- Store cordials in an airtight container until ready to serve.
Did you try this recipe?
Share your experience in the comments below!
I’d love to hear how it turned out
Let’s see your creations!
Share your photos
Tag me @flourtinbakes on social media