Chai Spiced Sugar Cookies
I have always loved a good spiced bake when the weather turns cold, and these chai sugar cookies are exactly what I find myself making as soon as there is a chill in the air. You might recognize the inspiration here. These are a nod to the famous chai cookies Taylor Swift shared on Tumblr years ago, which used tea leaves and a drop cookie base. I decided to take those cozy flavors and adapt them into a sturdy roll-out sugar cookie that holds its shape perfectly for decorating.
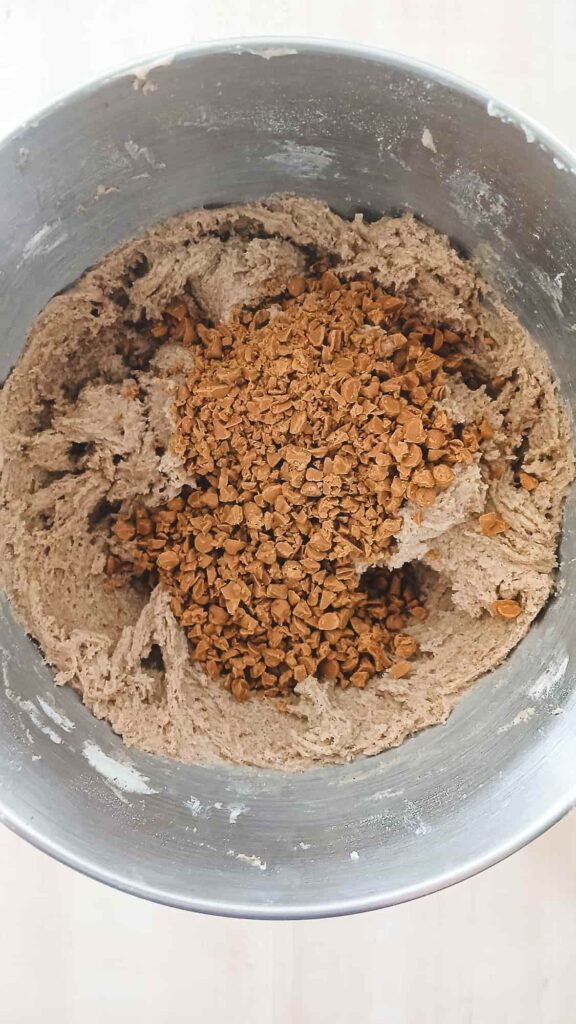
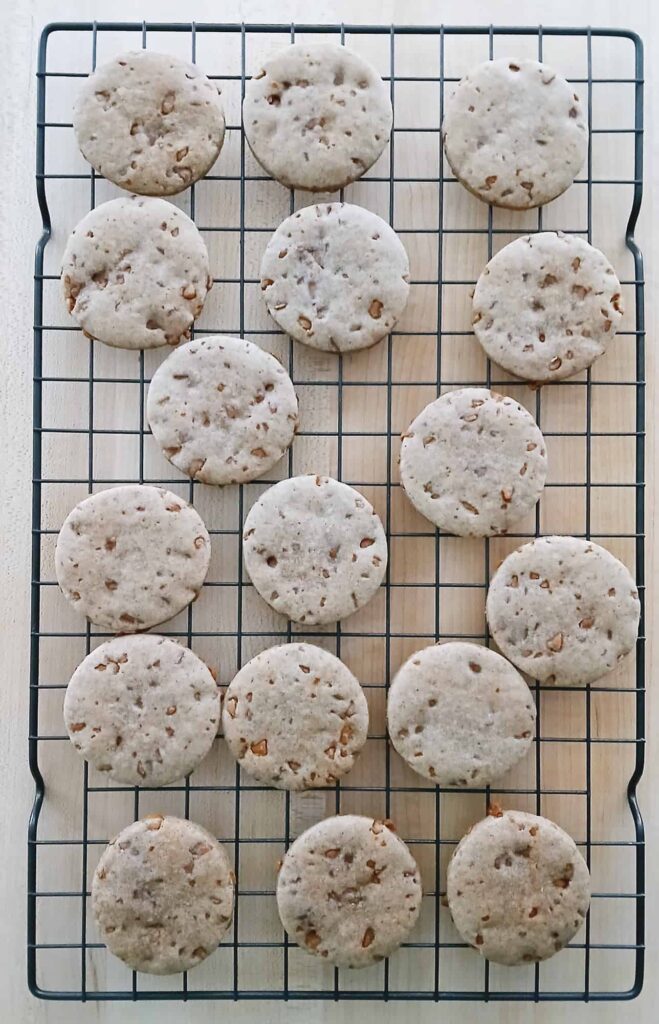
Instead of using loose tea leaves, I prefer to mix a custom blend of chai spices directly into the dough. It gives the cookies a much smoother texture while keeping all that aromatic warmth. I also added chopped cinnamon chips for little pockets of extra spice that melt just slightly in the oven.
This is a total love story between a classic buttery sugar cookie and bold, cozy spices. They are perfect for those nights when you want to turn up your favorite album, tie on an apron, and bake something that feels like cardigan season. Whether you are prepping for a cookie exchange or just want a batch to enjoy throughout the week, these cookies really are the stuff of wildest dreams.
Better Than A Tea Bag
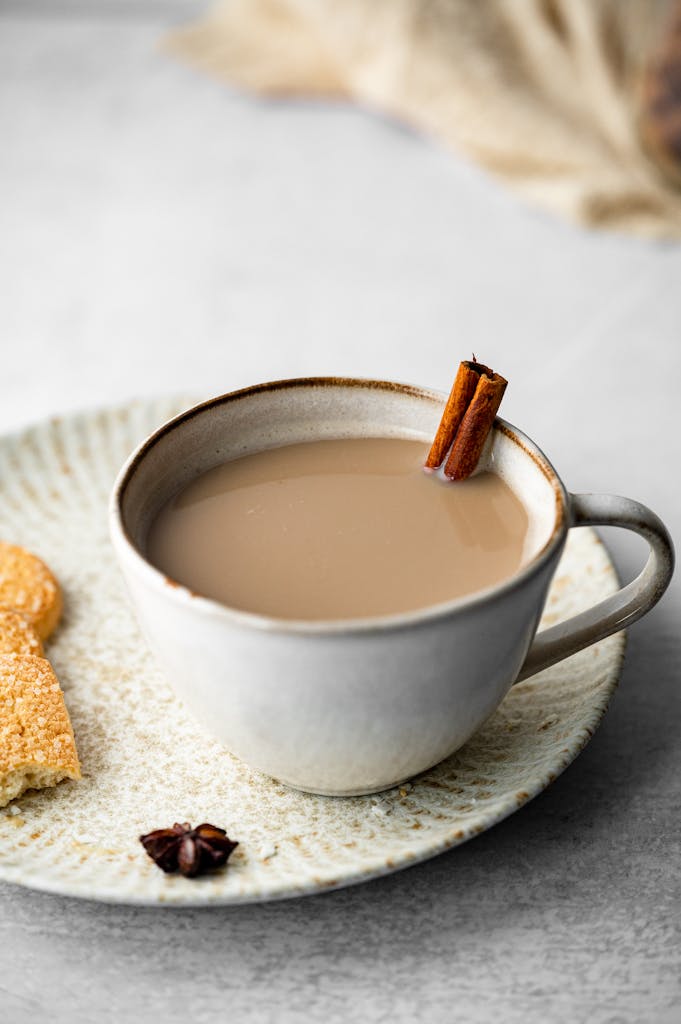
If you have ever ordered a hot dirty chai latte at a coffee shop, you already know why I love these flavors so much. Chai is a traditional spiced tea from India, and while the word itself just means tea, we usually associate it with that warm blend of cinnamon, cardamom, ginger, cloves, and a hint of black pepper. It is the ultimate cozy flavor profile for baking.
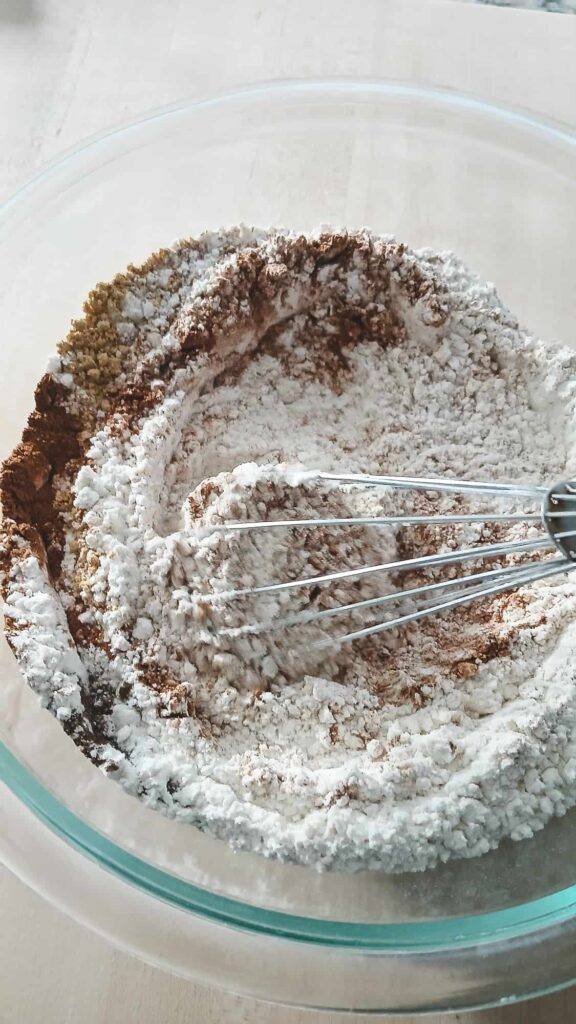
While the original viral recipe used tea from a tea bag, I found that those can sometimes make the cookie feel a little gritty. I prefer to whisk a custom blend of ground spices directly into the flour instead. This gives you all those deep, cozy spice notes while keeping the cookie texture soft.

Why I Add Cinnamon Chips
One of my favorite additions here is the chopped cinnamon chips. They can be a little tricky to find depending on the time of year, but I usually grab mine at Walmart or order them online. I like to chop them into smaller pieces so they mix in evenly and do not get in the way of your cookie cutters. They melt just enough in the oven to create little pockets of intense spice that really set these apart.
Chip Swap
If you can’t find cinnamon chips, you can use espresso or white chocolate chips, or just leave them out. Make sure to chop them a bit so your cookie cutters can still slice through the dough easily.
Getting the Dough Ready
I usually pull my butter and eggs out of the fridge about an hour before I want to start baking. Having them at room temperature makes a big difference in how the dough comes together. I prefer using my stand mixer with the paddle attachment for this recipe because the dough is fairly stiff, but a hand mixer works just fine if you are willing to put in a little extra effort.
Don’t Panic Over The Texture
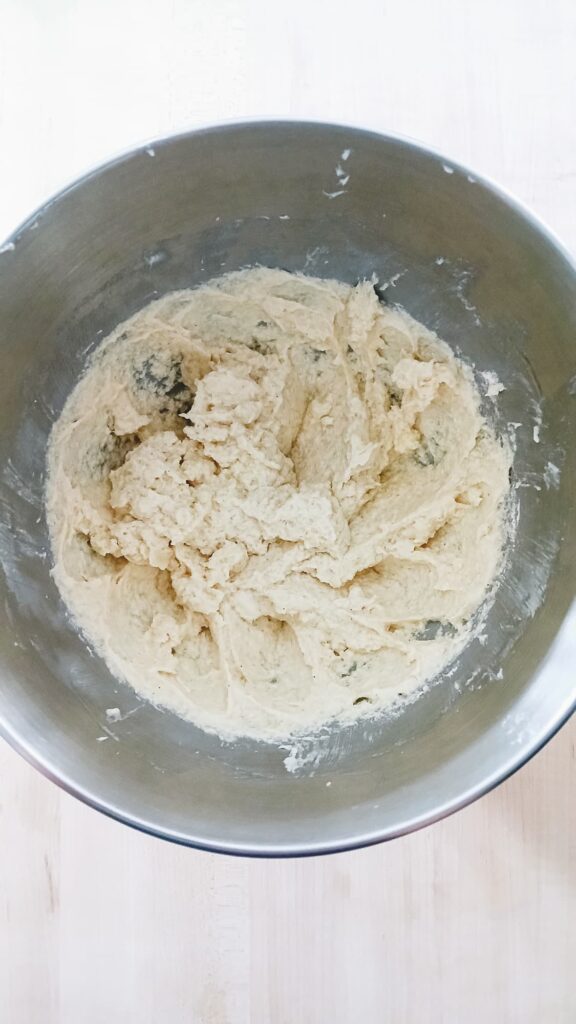
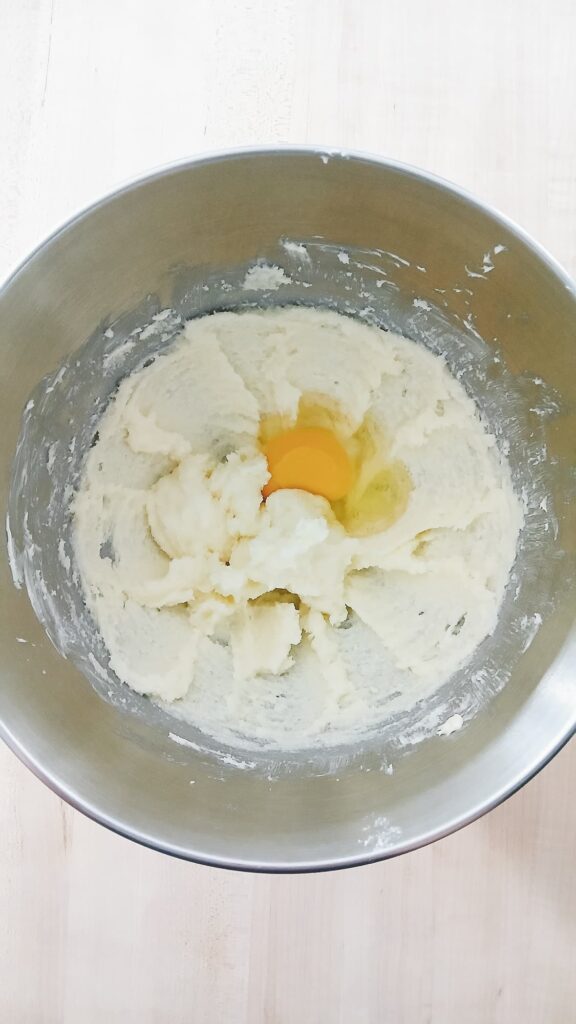
When you start creaming the butter and sugar, you want it to look light and fluffy. Do not worry if the mixture starts to look a little chunky or even curdled after you add the eggs. This happens sometimes if the eggs are added too quickly or are still a bit cold, but I promise the cookies will still turn out great. Just keep going and add your vanilla and the dry ingredients in batches.
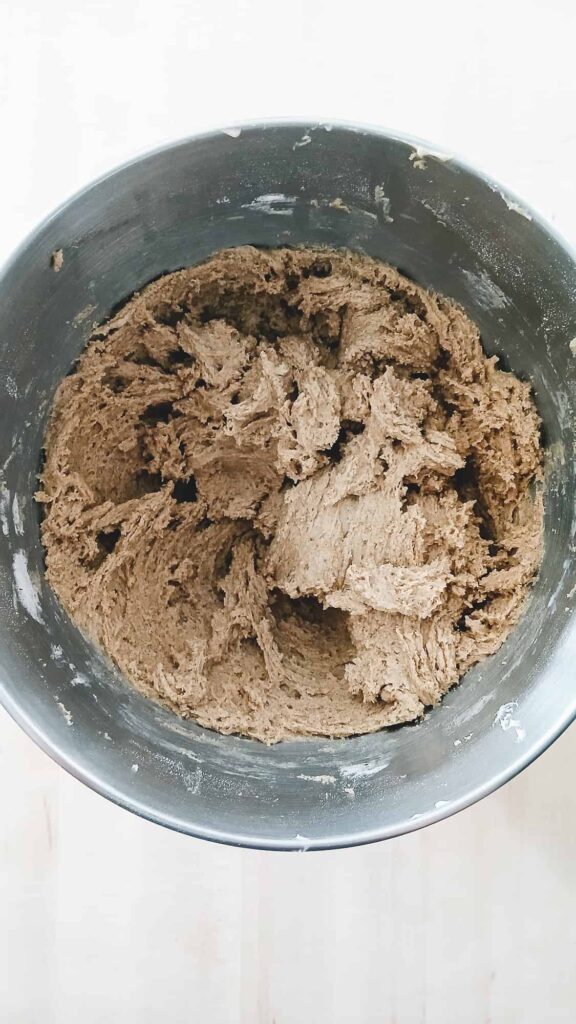
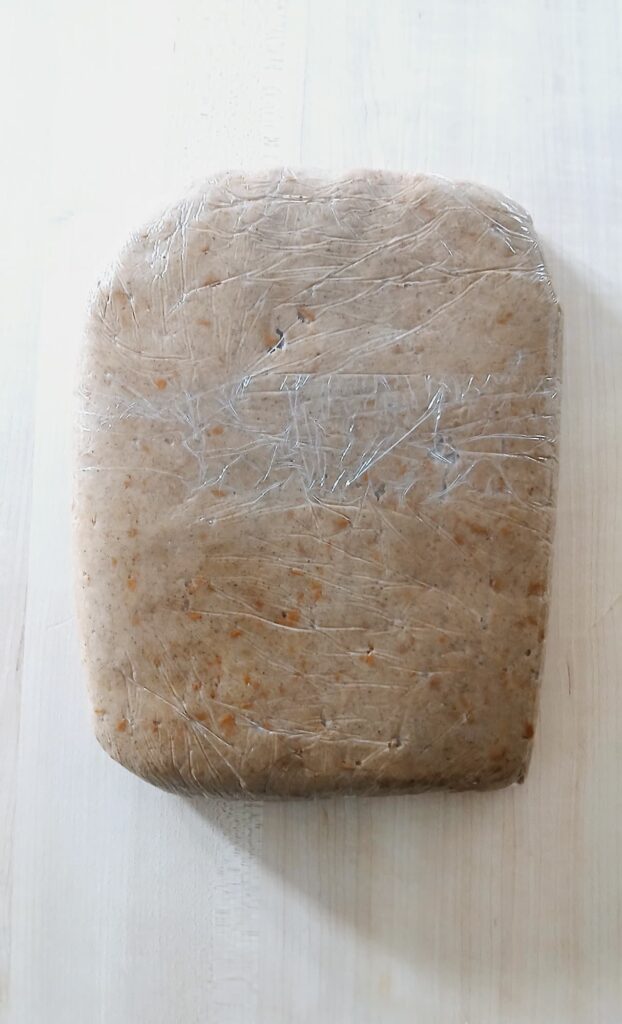
Once those chopped cinnamon chips are folded in, the dough needs some time to rest. I always chill my dough for at least an hour before I even think about reaching for the rolling pin. It makes the dough so much easier to handle and helps those warm spice flavors really settle in. You can even make this a day ahead and leave it in the fridge overnight if you are planning a big baking session.

Rolling, Cutting, and Baking
Once your dough has chilled and is easy to handle, it is time to get it onto the baking sheet. I like to work in small batches rather than trying to roll out the entire disc of dough at once. This keeps the dough from getting too warm and sticky as you work.
Rolling for the Right Thickness
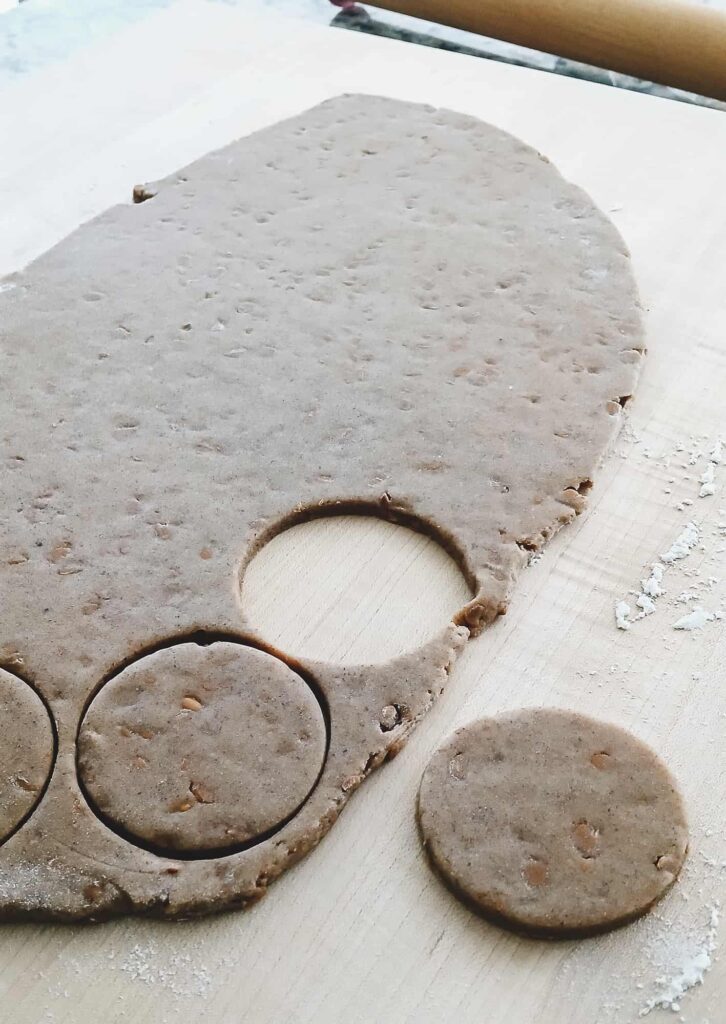
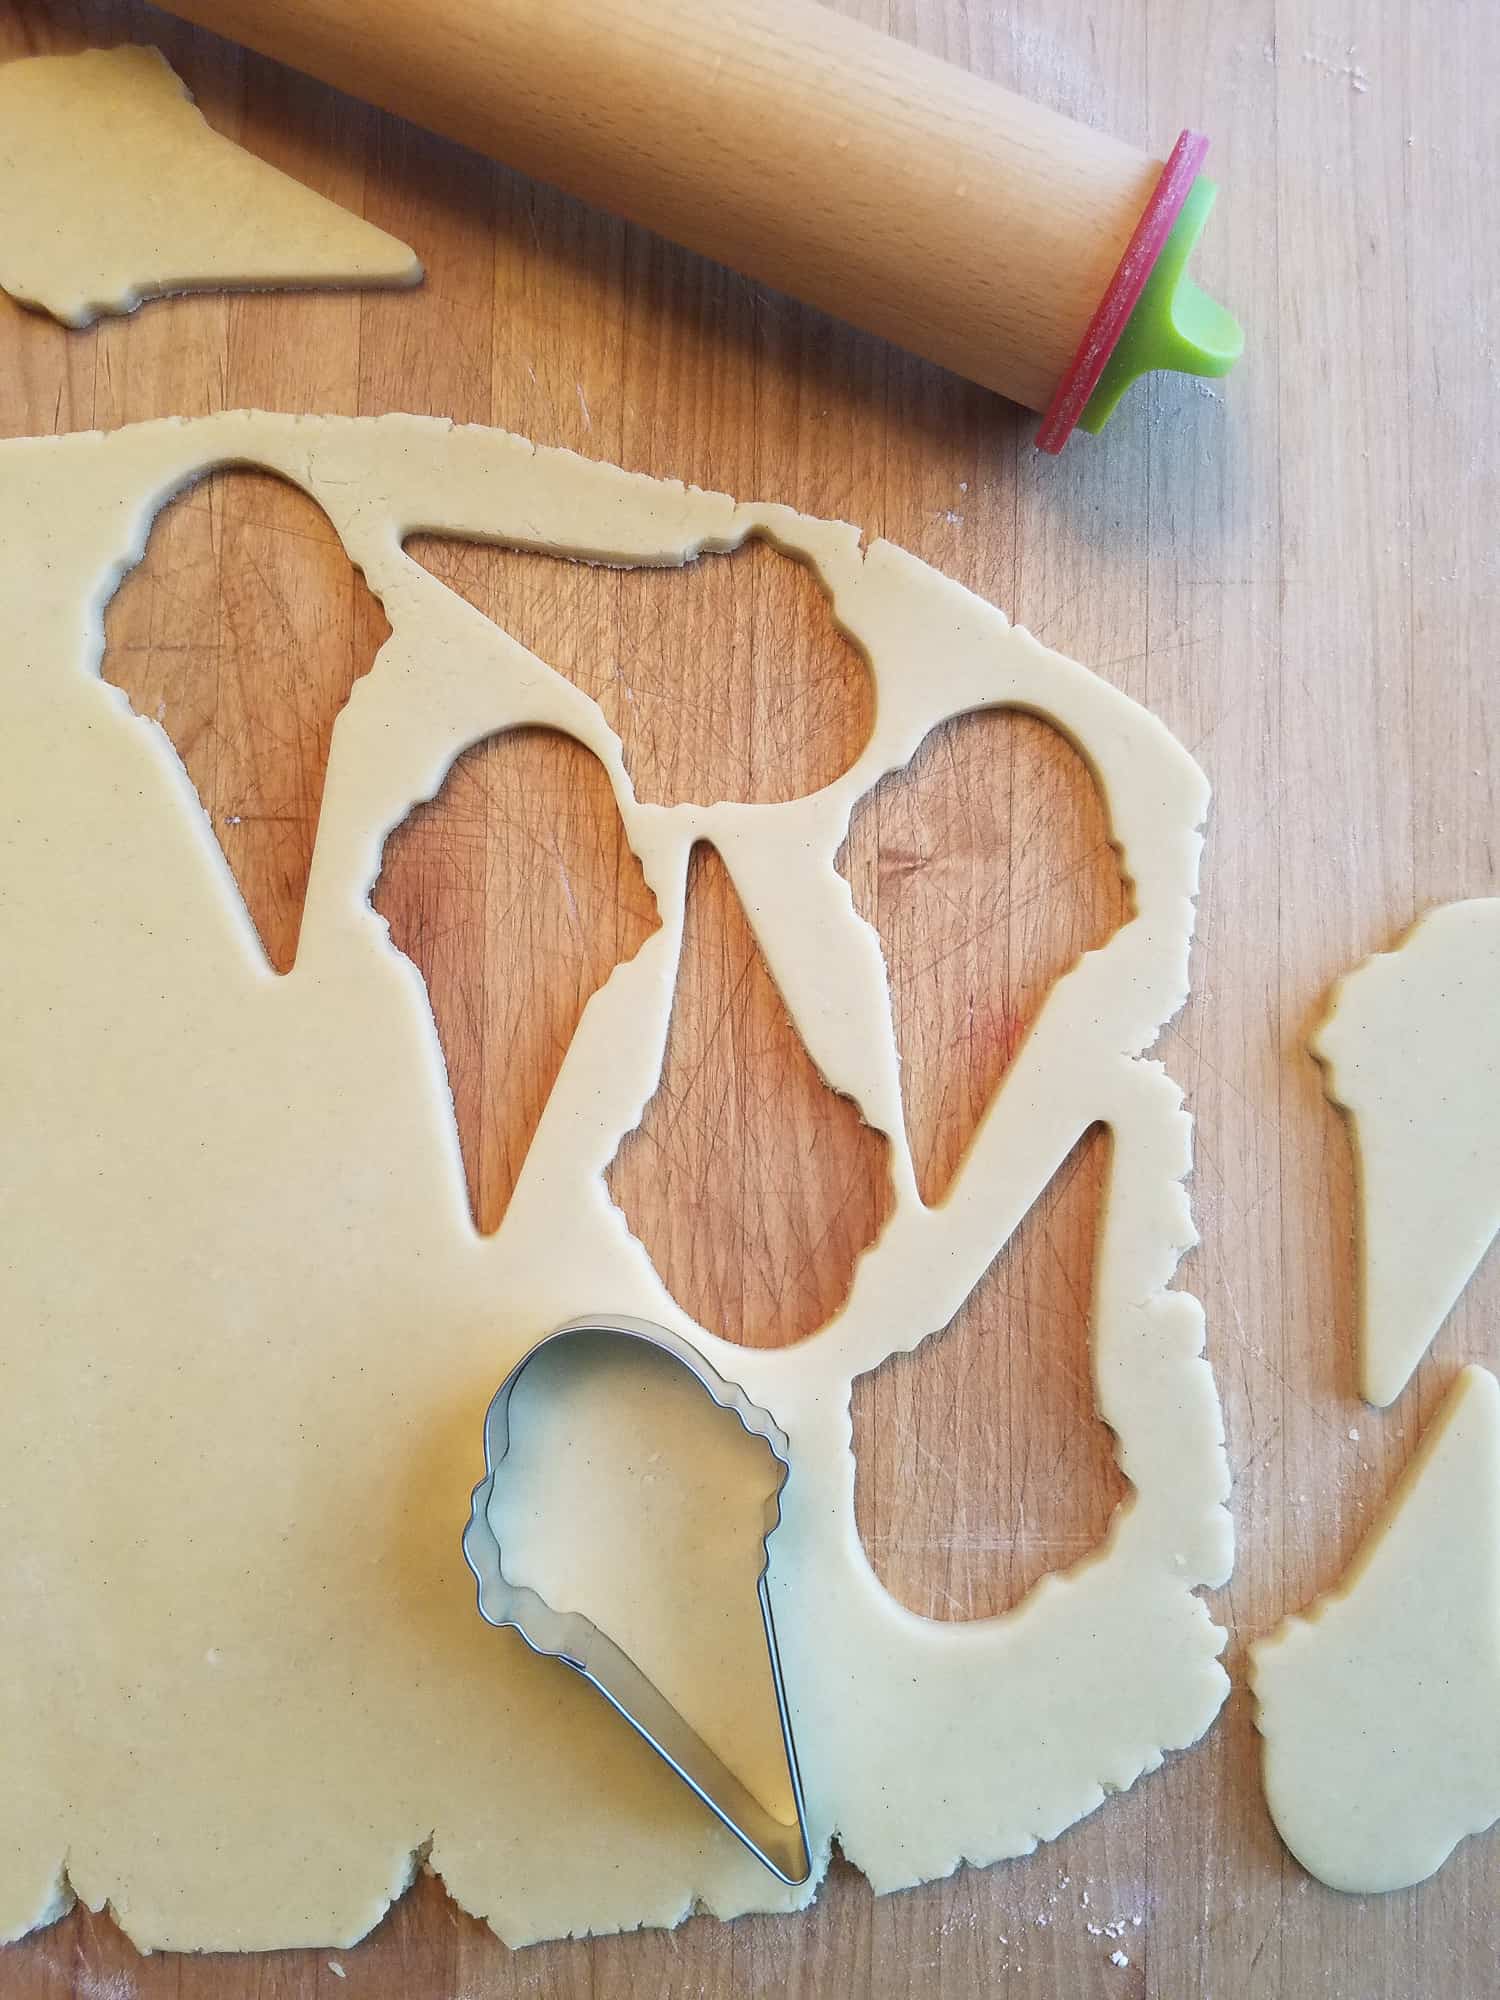
Start by placing your dough on a lightly floured surface. I always roll my dough to about 1/4-inch thickness. If you find the dough is sticking to your rolling pin, you can also roll it between two sheets of parchment paper for a cleaner finish. I recommend baking on sheets lined with parchment paper because it makes cleanup easier and helps the cookies bake more evenly.
Success with Sticky Dough
If your dough feels too soft to roll, chill it for 10 minutes to firm up the butter. You want it cool but still pliable. Use a light dusting of flour on your surface and the top of the dough as needed, but keep it to a minimum so your cookies stay tender.
Cutting and Chilling the Shapes
When you are ready to cut your shapes, try to group them as close together as possible to minimize scraps. Every time you re-roll the dough, it can get a little tougher, so the fewer times you have to roll it, the better.
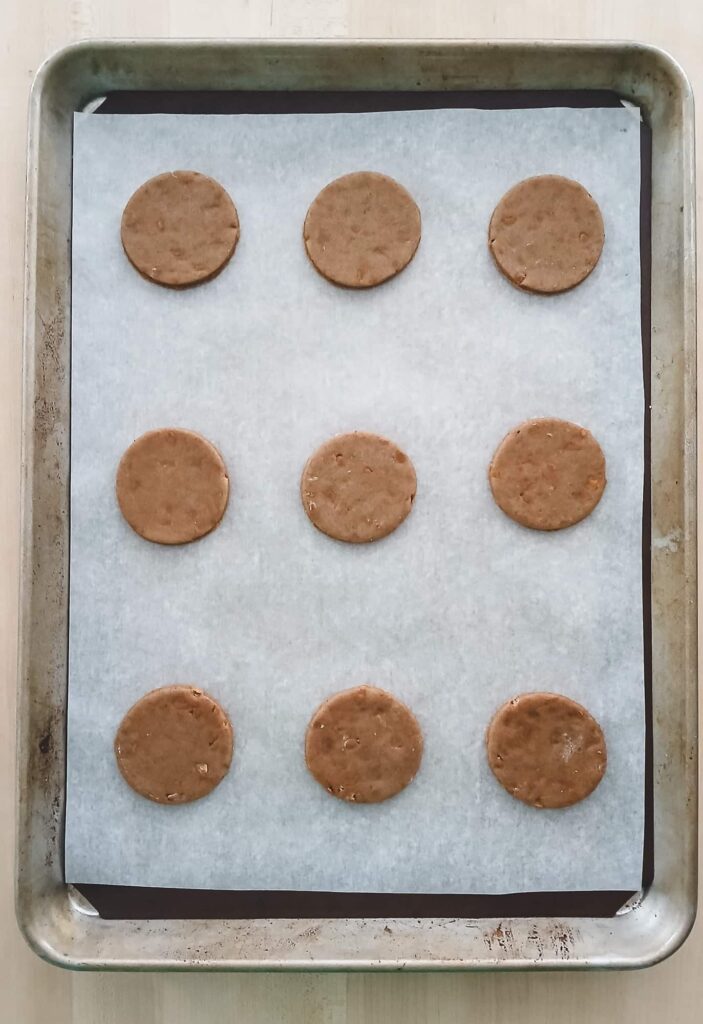
If you have the space in your fridge, I highly recommend placing your cut-out shapes on a tray and chilling them for another 15 minutes before they go into the oven. This is my favorite trick for making sure those crisp edges stay exactly where they should be instead of spreading out while they bake.
The Test Batch and Oven Temperature
Since the size of your cookie cutters might vary, I always suggest doing a small test batch with just a few cookies first. This helps you figure out the exact baking time for your specific shapes before you commit the whole tray to the oven.
I know I say this a lot, but using an oven thermometer is essential here. Most ovens do not sit at the exact temperature on the dial, and a few degrees can be the difference between a soft cookie and a hard one. You are looking for the bottoms to be just a very light golden brown. They might still look a little soft on top when you pull them out, but they will firm up perfectly as they sit on the baking sheet for a few minutes.
Finishing the Bake and Cooling
Once you have your timing down from the test batch, you can bake the rest of your dough cut-outs. Remember to let them cool completely on a wire rack before you even think about starting the glaze!
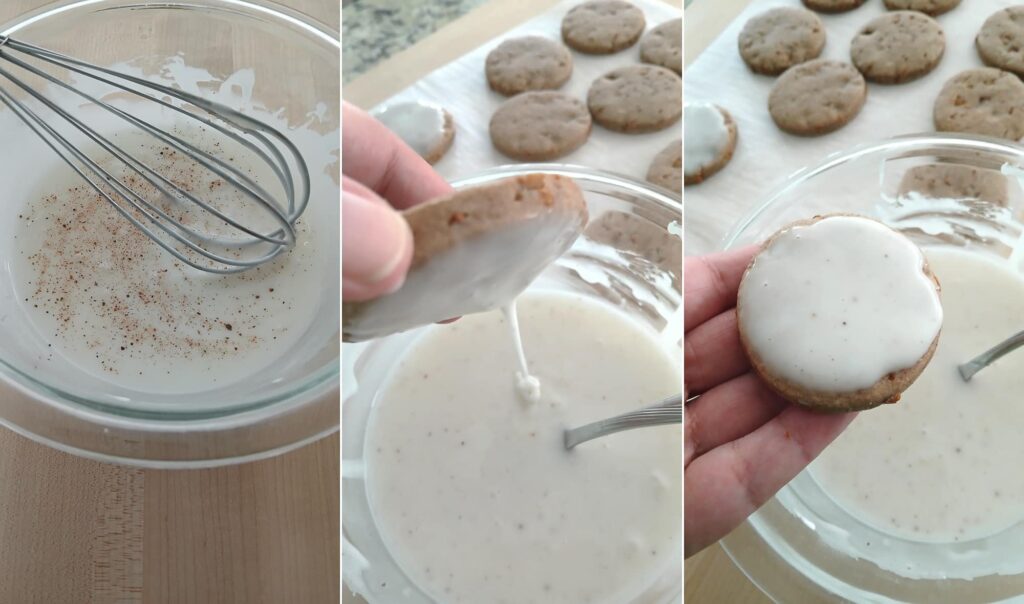
Dressing Up Your Cookies
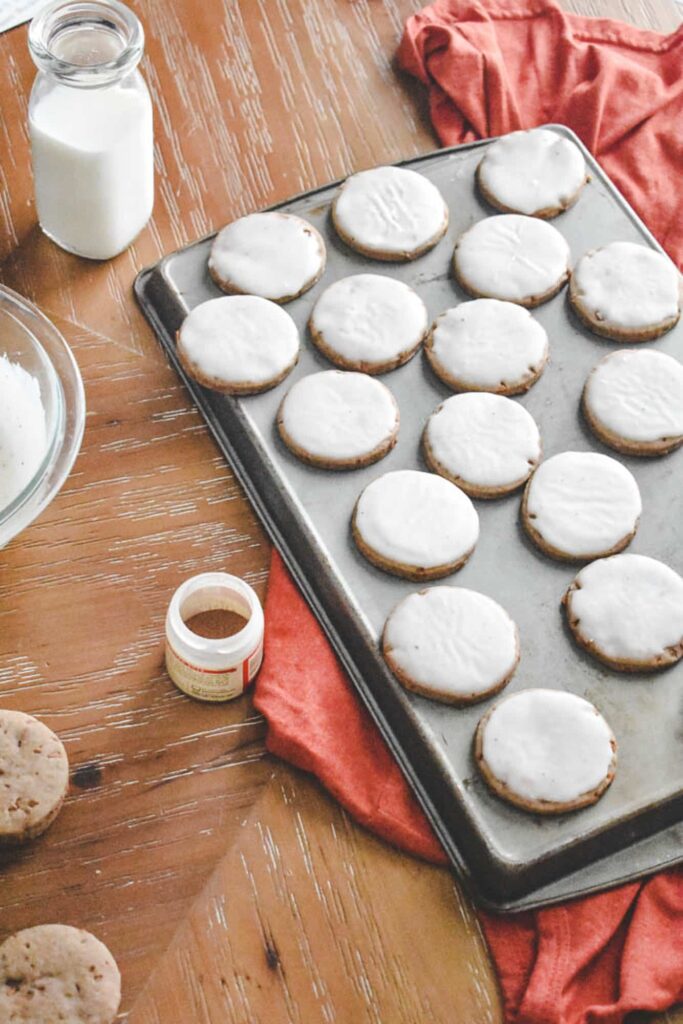
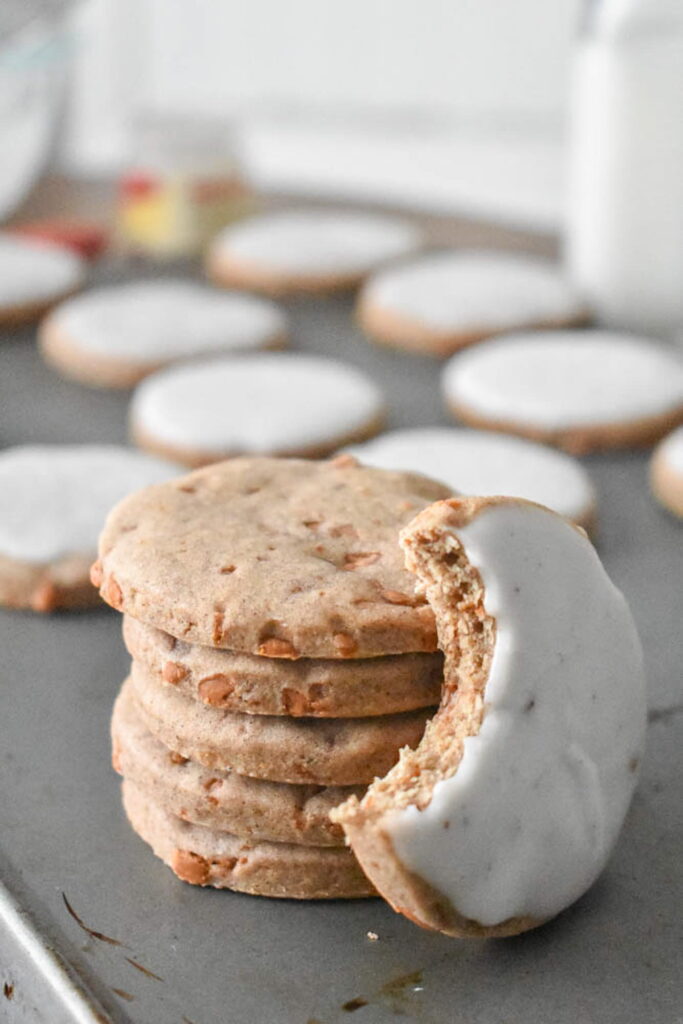
Once your chai cookies have cooled completely on a wire rack, it is time for the glaze. I like to keep this part simple with a classic powdered sugar glaze because it stays true to that original Taylor Swift style. The trick is getting the consistency just right. You want it thick enough to stay on the cookie without running off the sides, but thin enough that you can easily dip the tops.
Dipping and Setting
My favorite way to apply the glaze is to dip the top of each cookie directly into the bowl and give it a little shake as I pull it away. This helps the excess drip off so you get a nice, even coating. If you want to get fancy, you can also use royal icing for a firmer finish that is great for gifting. If I go that route, I usually skip the extra sugar coating so the cookies are not overly sweet.
Make It Your Own
One of the best things about this dough is how easy it is to tweak. I love the warmth of the chai spices, but you can easily adjust the flavor profile to match your own tastes or whatever you have in your pantry.
The Simple Sugar Topping
If you want to skip the glaze but keep things close to Taylor’s version, you can give the cookies a simple sugar topping instead. Before they go into the oven, lightly sprinkle the tops of your cut outs with granulated sugar. This gives them a nice little crunch and a pretty, shimmering finish that highlights the spices in the dough without adding a layer of icing.
Seasonal Variations
If you are a coffee lover like me, try adding a tablespoon of espresso powder to the glaze for a “dirty chai” twist. You can also experiment with the spice blend by swapping the chai spices for apple pie or pumpkin pie spice during the fall months. These swaps make the recipe feel fresh all year round.
Keeping Them Fresh
These cookies stay soft and delicious for about a week if you keep them in an airtight container at room temperature. If you have already glazed them, I recommend storing them in a single layer or using parchment paper between layers so they do not stick together.
Can I Freeze These?
You can also freeze the unglazed cookies or the raw dough if you want to get a head start on your holiday baking. Just wait to add the glaze until after they have thawed for the best results.
Chai Spiced Sugar Cookies
Ingredients
Cookie Dough
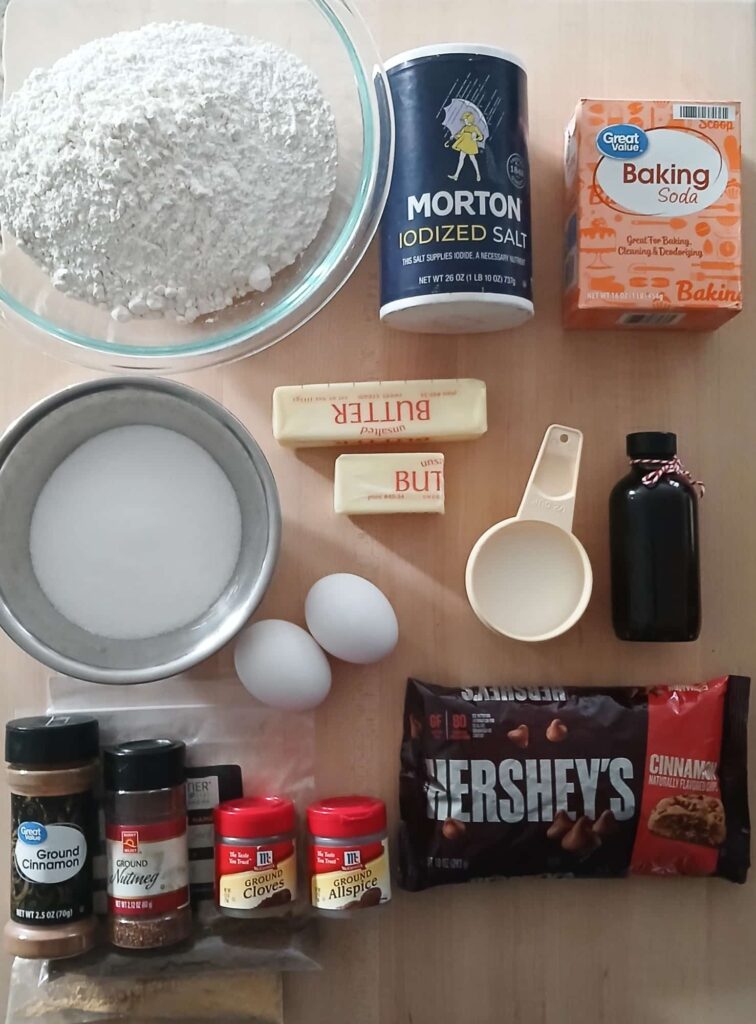
- 3.5 cups all purpose flour | 485g
- 1/4 teaspoon baking soda
- 1/4 teaspoon salt
- 3 teaspoons ground ginger
- 4 teaspoons ground cinnamon
- 2 teaspoons ground allspice
- 1 teaspoon ground nutmeg
- 3 teaspoons ground cardamom
- 1 teaspoon ground cloves
- 1 1/2 sticks unsalted butter, room temperature | 170g
- 1 cup granulated white sugar | 200g
- 2 eggs, room temperature
- 2 teaspoons vanilla extract
- 1/4 cup milk
- 3/4 cup cinnamon baking chips, chopped | 5 ounces | 142g
Glaze
- 2 cups powdered sugar | 225g
- 3 tablespoons milk
- Small pinch each of nutmeg, cinnamon, and salt
Instructions
Cookie Dough
- Prepare Baking Sheet: Line a baking sheet with parchment paper and set aside. Preheat the oven to 350°F
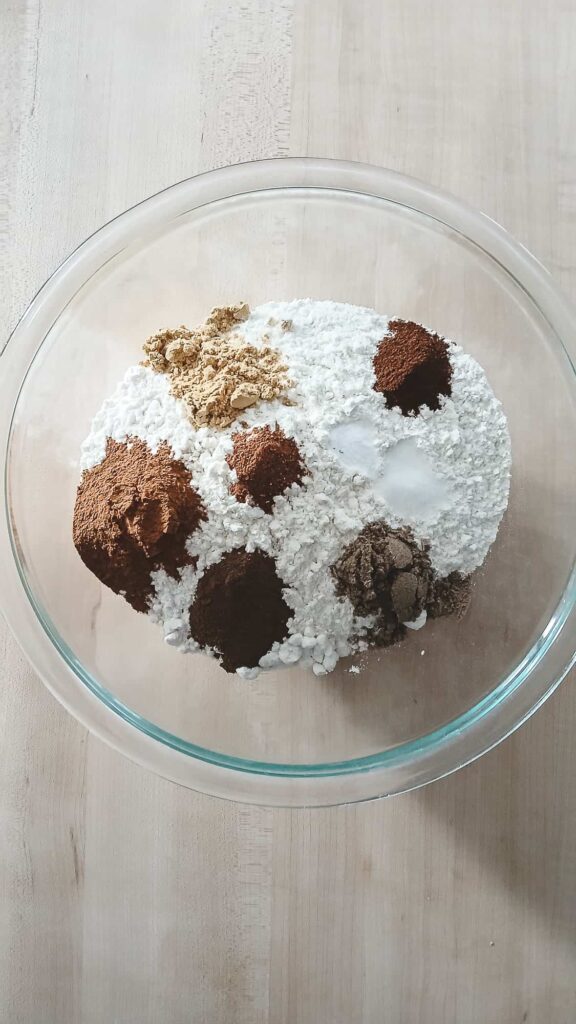
- Combine Dry Ingredients: In a medium bowl, whisk together flour, baking soda, salt, and spices. Set aside.3.5 cups all purpose flour | 485g1/4 teaspoon baking soda1/4 teaspoon salt3 teaspoons ground ginger4 teaspoons ground cinnamon2 teaspoons ground allspice1 teaspoon ground nutmeg3 teaspoons ground cardamom1 teaspoon ground cloves
- Cream Butter and Sugar: In a stand mixer, cream the butter and sugar until light and fluffy.1 1/2 sticks unsalted butter, room temperature | 170g1 cup granulated white sugar | 200g
- Add Eggs: Add eggs one at a time, mixing well after each addition.2 eggs, room temperature
- Add Extract: Add vanilla extract and mix briefly until incorporated.2 teaspoons vanilla extract
- Combine Wet and Dry Ingredients: Gradually add the flour mixture to the butter mixture in batches, alternating with the milk. Mix until just combined.1/4 cup milk
- Add Chips: Add chopped cinnamon chips and mix until combined.3/4 cup cinnamon baking chips, chopped | 5 ounces | 142g
- Chill the Dough: Wrap the dough in plastic wrap and chill for at least one hour.
- Roll and Cut: Roll out the dough to 1/4-inch thickness on a floured surface. Use cookie cutters to cut dough into desired shapes.
- Arrange on Baking Sheet: Place the cut-out cookies on the prepared baking sheet, spacing them about 2 inches apart.
- Bake: Bake for 8-10 minutes, or until the bottoms are light golden brown. Larger cookies may need a bit more time.
- Cool: Transfer cookies to a cooling rack. Prepare glaze (if using) while the cookies are cooling.
Glaze
- Mix Glaze Ingredients: In a medium bowl, whisk together the powdered sugar, milk, and spices.2 cups powdered sugar | 225g3 tablespoons milkSmall pinch each of nutmeg, cinnamon, and salt
- Adjust Consistency: If needed, add more powdered sugar to thicken the glaze or more milk to thin it. The glaze should be thick enough to stay on the cookie without running off.
- Apply Glaze: Spread, drizzle, or dip the tops of the cooled cookies in the glaze. I prefer to dip the cookie in glaze and shake off the excess while holding the cookie upside down.
- Set: Allow the glaze to dry and set.
- Store: Store finished cookies in an airtight container.
- Note: The number of cookies will vary based on cutter size. This recipe made approximately 54 cookies (4.5 dozen) using a 2.5-inch circular cutter.
Did you try this recipe?
Share your experience in the comments below!
I’d love to hear how it turned out
Let’s see your creations!
Share your photos
Tag me @flourtinbakes on social media
This looks amazing! Saving to bake this weekend!